background image

26

27

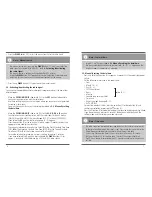
5.1. Réglage automatique de la date / de l'heure sur la base du signal

horaire

• L‘écran s‘allume après avoir inséré les piles ; un signal sonore retentit et le réveil

recherche automatiquement le signal horaire DCF. L‘icône radio clignote pendant la

recherche du signal horaire . Cette procédure dure de 3 à 5 minutes.

• La date et l‘heure sont réglées automatiquement dès que l‘unité détecte le signal

radio.

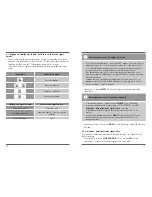
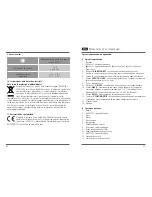
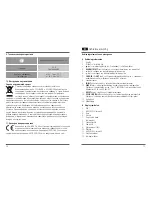
Icône radio

Intensité du signal

Aucune réception

Mauvaise réception

Réception acceptable

Réception excellente

Affichage du symbole radio

Recherche du signal horaire

Affichage clignotant

Recherche active

Affichage permanent

Recherche aboutie - signal en cours de

réception

Aucun affichage

Inactif

Remarque concernant le réglage de l‘heure

• En cas d‘échec de réception du signal horaire DCF pendant la minute suivant la

première configuration, la station termine la recherche. L‘icône radio s‘éteint.

• En cas de problème de réception, nous vous conseillons d’attendre une nuit ;

les signaux parasites sont généralement plus faibles pendant la nuit.

• Vous pouvez égale,ment lancer une nouvelle recherche manuelle du signal

radio en changeant d’emplacement, ou encore effectuer un réglage manuel de

l’heure et de la date.

• L‘horloge continue à rechercher quotidiennement le signal horaire DCF. Les

réglages manuels de l‘heure et de la date seront corrigés dès que la station

reçoit correctement le signal horaire DCF.

• Appuyez sur la touche

WAVE

(10) afin de lancer une recherche manuelle du

signal radio.

Remarque concernant la recherche manuelle

• La recherche manuelle à l’aide de la touche

WAVE

(10) est disponible

uniquement en présence d’un signal radio actif (US/UK/DE/JP) – voir

5.2.

Activation / désactivation du signal radio

– possible.

• La recherche manuelle se termine automatiquement au bous de 6 – 16

minutes.

• Une utilisation répétée de la touche

WAVE

(10) épuise les piles. Nous vous

recommandons d’utiliser cette fonction uniquement afin de localiser un

emplacement idéal.

• Appuyez à nouveau sur la touche

WAVE

(10) afin de quitter la recherche manuelle

du signal.

5.2. Activation / désactivation du signal radio

Vous pouvez soit désactiver totalement la réception du signal, soit l’adapter à une

région spécifique.

• Faites glisser le sélecteur

OFF/US/UK/DE/JP

(12) en position

OFF

afin de

sélectionner la synchronisation permanente avec le signal radio.

Summary of Contents for 00123189 RC 150

Page 1: ...g Mode d emploi Instrucciones de uso Gebruiksaanwijzing Instrukcja obs ugi All listed brands are trademarks of the corresponding companies Errors and omissions excepted and subject to technical change...

Page 2: ...ank you for choosing a Hama product Take your time and read the following instructions and information completely Please keep these instructions in a safe place for future reference If you sell the de...

Page 3: ...the cover flap 14 back to use it as a base for the alarm clock 5 Operation Note Input Hold down the button 5 or the button 6 to select the values faster 5 1 Automatic date time setting using the radi...

Page 4: ...ble if the radio signal is activated US UK DE JP see 5 2 Activating deactivating the radio signal The manual search is automatically aborted after 6 16 minutes Using the WAVE button 10 frequently will...

Page 5: ...ff the dimmed backlight on the display 1 Move the ON OFF slide switch 9 to the ON or OFF position to activate or deactivate the twilight sensor 8 Note Day of the week You can choose from English GB Fr...

Page 6: ...999 5 EC guideline You will find the declaration of conformity with R TTE directive 99 5 EC on the internet at www hama com Note Backlight We recommend deactivating the twilight sensor while the clock...

Page 7: ...ielen Dank dass Sie sich f r ein Hama Produkt entschieden haben Nehmen Sie sich Zeit und lesen Sie die folgenden Anweisungen und Hinweise zun chst ganz durch Bewahren Sie diese Bedienungsanleitung ans...

Page 8: ...von Kindern auf Schlie en Sie Akkus Batterien nicht kurz und halten Sie sie von blanken Metallgegenst nden fern 4 Inbetriebnahme Klappen Sie gegebenenfalls die Abdeckklappe 14 nach vorne ber die Taste...

Page 9: ...signal zu deaktivieren Nutzen Sie diese Einstellungen wenn Sie sich in einer Region befinden in der kein Funksignal empfangen werden kann und oder darf Nehmen Sie anschlie end die Einstellungen wie in...

Page 10: ...der Taste 3 Erfolgt 30 Sekunden keine Eingabe wird der Einstellungsmodus automatisch verlassen und die vorgenommenen Einstellungen gespeichert Dr cken Sie die Taste 3 um die eingestellte Weckzeit f r...

Page 11: ...Hinweis Hintergrundbeleuchtung Es wird empfohlen den D mmerungssensor w hrend der Nichtbenutzung auf Reisen im Gep ck usw zu deaktivieren Eine dauerhafte Nutzung des D mmerungssensors geht zu Lasten...

Page 12: ...e 99 5 EG nden Sie unter www hama com l ments de commande et d affichage A l ments de commande 1 cran 2 Touche r glage de l heure 3 Touche affichage de l heure de r veil pendant env 5 secondes r glage...

Page 13: ...fi s N apportez aucune modification l appareil Des modifications vous feraient perdre vos droits de garantie Retirez les piles du produit si vous ne comptez pas l utiliser pendant un certain temps par...

Page 14: ...ment lancer une nouvelle recherche manuelle du signal radio en changeant d emplacement ou encore effectuer un r glage manuel de l heure et de la date L horloge continue rechercher quotidiennement le s...

Page 15: ...la date de l heure Appuyez sur la touche 2 pendant env 2 secondes jusqu ce que les chiffres de l ann e se mettent clignoter Vous pouvez r gler successivement les valeurs suivantes Ann e Mois B 4 Jour...

Page 16: ...ie Zz se met clignoter l cran 1 La sonnerie s interrompt pendant 5 minutes puis retentit nouveau Vous pouvez profiter de la fonction de r p tition d alarme quatre fois successivement 5 5 Affichage de...

Page 17: ...nt la directive europ enne 2002 96 CE et 2006 66 CE et afin d atteindre un certain nombre d objectifs en mati re de protection de l environnement les r gles suivantes doivent tre appliqu es Les appare...

Page 18: ...espertador 13 S mbolo de visualizaci n para el despertador c Instrucciones de uso Le agradecemos que se haya decidido por un producto de Hama T mese tiempo y l ase primero las siguientes instrucciones...

Page 19: ...as 13 coloque dos pilas AAA prestando atenci n a que la polaridad sea correcta y vuelva a cerrar el compartimento para pilas 13 Si tras colocar una pila nueva no se visualiza nada en la pantalla LCD p...

Page 20: ...orredizo OFF US UK DE JP 12 a la posici n OFF para desactivar la sincronizaci n permanente con la se al de radiofrecuencia Utilice estos ajustes cuando se encuentre en una regi n en la que no sea posi...

Page 21: ...or pulse la tecla 5 o la tecla 6 y confirme la selecci n correspondiente pulsando la tecla 3 Si no se introduce ning n dato en 30 segundos se sale autom ticamente del modo de ajuste y se guardan los a...

Page 22: ...do las condiciones de luz son lo bastante claras el sensor de atenuaci n 8 apaga la retroiluminaci n atenuada de la pantalla 1 autom ticamente Desplace el interruptor corredizo ON OFF 9 hasta la posic...

Page 23: ...ntos de recogida comunales o a devolverlos al lugar donde los adquiri Los detalles quedaran definidos por la ley de cada pa s El s mbolo en el producto en las instrucciones de uso o en el embalaje hac...

Page 24: ...46 47 Hama 1 2 RC 150 2 3 4 14 13 2 13 RESET 11 14 5 5 6 5 1...

Page 25: ...48 49 3 5 DCF WAVE 10 WAVE 10 US UK DE JP 5 2 6 16 WAVE 10 WAVE 10 5 2 OFF US UK DE JP 12 OFF 5 3 OFF US UK DE JP 12 US UK DE JP WWVB MSF DCF 77 JJY40 JJY60 US B 9 5 5 6 P die PST M MST C CST E EST...

Page 26: ...50 51 5 JP 3 WAVE 10 JJY40 JJY60 DST AUTO 5 3 B 8 5 3 2 2 B 4 B 3 12 24 00 B 5 DST AUTO OFF 5 6 2 2 30 3 3 DCF 3 GB FR DE ES IT 5 4 2 3 B 10 B 10 5 6 3 30 3 ALARM ON OFF 4 ON B 1 B 10...

Page 27: ...OFF 4 OFF ALARM ON OFF 4 n ON SNOOZE LIGHT 7 1 Zz 5 5 5 2 WAVE 10 B 6 C F OFF US UK DE JP 12 US UK DE B 6 Lo 40 C 40 F HI 70 C 158 C 5 6 SNOOZE LIGHT 7 5 1 8 1 8 1 ON OFF 9 ON OFF 8 5 7 1 4 6 7 Hama...

Page 28: ...ets activeren deactiveren handmatige ontvangst radiografisch tijdsignaal omschakelen tussen C en F UK DE US omschakelen tussen frequenties 40 kHz en 60 kHz JP 11 RESET knop resetten naar fabrieksinste...

Page 29: ...nder niets aan het toestel Daardoor vervalt elke aanspraak op garantie Verwijder batterijen uit het product indien dit gedurende langere tijd niet worden gebruikt behoudens indien het product voor noo...

Page 30: ...n een handmatige zoektocht naar het radiografisch tijdsignaal op een andere plaats starten of de tijd en datum handmatig instellen De klok zoekt dagelijks automatisch verder naar het radiografisch tij...

Page 31: ...diografisch tijdsignaal kan of mag worden ontvangen Voer aansluitend de instellingen zoals in 5 3 Handmatige instelling datum tijd is beschreven handmatig uit Schuif de OFF US UK DE JP schuifschakelaa...

Page 32: ...5 of de toets 6 en bevestig de desbetreffende selectie door op de toets 3 te drukken Indien er gedurende 30 seconden niets wordt ingevoerd dan wordt de modus voor de instellingen automatisch verlaten...

Page 33: ...men van hergebruiken van oude toestellen batterijen levert u een grote bijdrage aan de bescherming van het mileu 11 Conformiteitsverklaring Hiermee verklaart Hama GmbH Co KG dat dit apparaat voldoet a...

Page 34: ...6 67 Hama 1 2 RC 150 2 AAA 3 1 2 3 5 4 ALARM ON OFF 5 6 7 SNOOZE LIGHT 5 5 8 9 ON OFF 10 WAVE C F UK DE US 40 kHz 60 kHz JP 11 RESET 12 OFF US UK DE JP 13 14 B 1 2 12 3 4 5 6 7 8 9 US 10 11 12 12 13 J...

Page 35: ...68 69 4 14 13 AAA 13 LCD RESET 11 14 5 5 6 5 1 3 5...

Page 36: ...DE JP 5 2 6 16 WAVE 10 WAVE 10 5 2 OFF US UK DE JP 12 OFF 5 3 OFF US UK DE JP 12 US UK DE JP WWVB MSF DCF 77 JJY40 JJY60 US B 9 5 5 6 P PST M MST C CST E EST 5 JP WAVE 10 3 JJY40 JJY60 DST AUTO 5 3 B...

Page 37: ...2 73 5 6 3 30 3 5 4 ALARM ON OFF 4 ON 1 B 12 ALARM ON OFF 4 OFF B 12 1 ALARM ON OFF 4 OFF ALARM ON OFF 4 ON SNOOZE LIGHT 7 1 Zz 5 B 5 DST AUTO OFF 5 6 2 2 30 3 3 DCF 3 GB FR DE ES IT 5 4 3 2 B 10 B 10...

Page 38: ...G 8 Hama 49 9091 502 115 www hama com 9 RC 150 3 0 V 2 x AAA 40 C 70 C 40 F 158 F 5 5 WAVE 10 2 B 6 C F 12 OFF US UK DE JP US UK DE B 6 Lo 40 C 40 F HI 70 C 158 C 5 6 SNOOZE LIGHT 7 1 5 8 1 8 1 ON OFF...

Page 39: ...a na 5 minut 8 Czujnik zmierzchowy 9 Prze cznik suwakowy ON OFF w czanie wy czanie czujnika zmierzchowego 10 Przycisk WAVE w czanie wy czanie r cznego odbioru sygna u radiowego zmiana mi dzy C i F UK...

Page 40: ...jest on u ywany przez d u szy czas chyba e produkt musi by w pogotowiu w razie sytuacji awaryjnych Materia y opakowaniowe trzyma koniecznie z dala od dzieci istnieje niebezpiecze stwo uduszenia Mater...

Page 41: ...w innym miejscu ustawienia lub r cznie skonfigurowa czas zegara i dat Zegar b dzie codziennie szuka automatycznie sygna u radiowego Po pomy lnym odbiorze sygna u r cznie ustawiona godzina i data s na...

Page 42: ...ei ustawi nast puj ce informacje Rok Miesi c B 4 Dzie B 3 Format 12 24 godzinny Godziny Minuty Sekundy tylko zera mo liwe Strefa czasowa J zyk dzie tygodnia B 5 DST AUTO OFF Aby wybra poszczeg lne war...

Page 43: ...emki Na ekranie 1 zaczyna miga Zz Sygna budzika jest przerywany na 5 minut a nast pnie ponownie wyzwalany Funkcj drzemki mo na wyzwoli cztery razy pod rz d 5 5 Wska nik temperatury Nacisn i trzyma wci...

Page 44: ...asu wprowadzenia europejskiej dyrektywy 2002 96 EU i 2006 66 EU do prawa narodowego obowi zuj nast puj ce ustalenia Urz dze elektrycznych elektronicznych oraz baterii jednorazowych nie nale y wyrzuca...

Reviews: