EMCEE200
© Copyright 2021 Hall Technologies, LLC
9
Front Panel (continued)
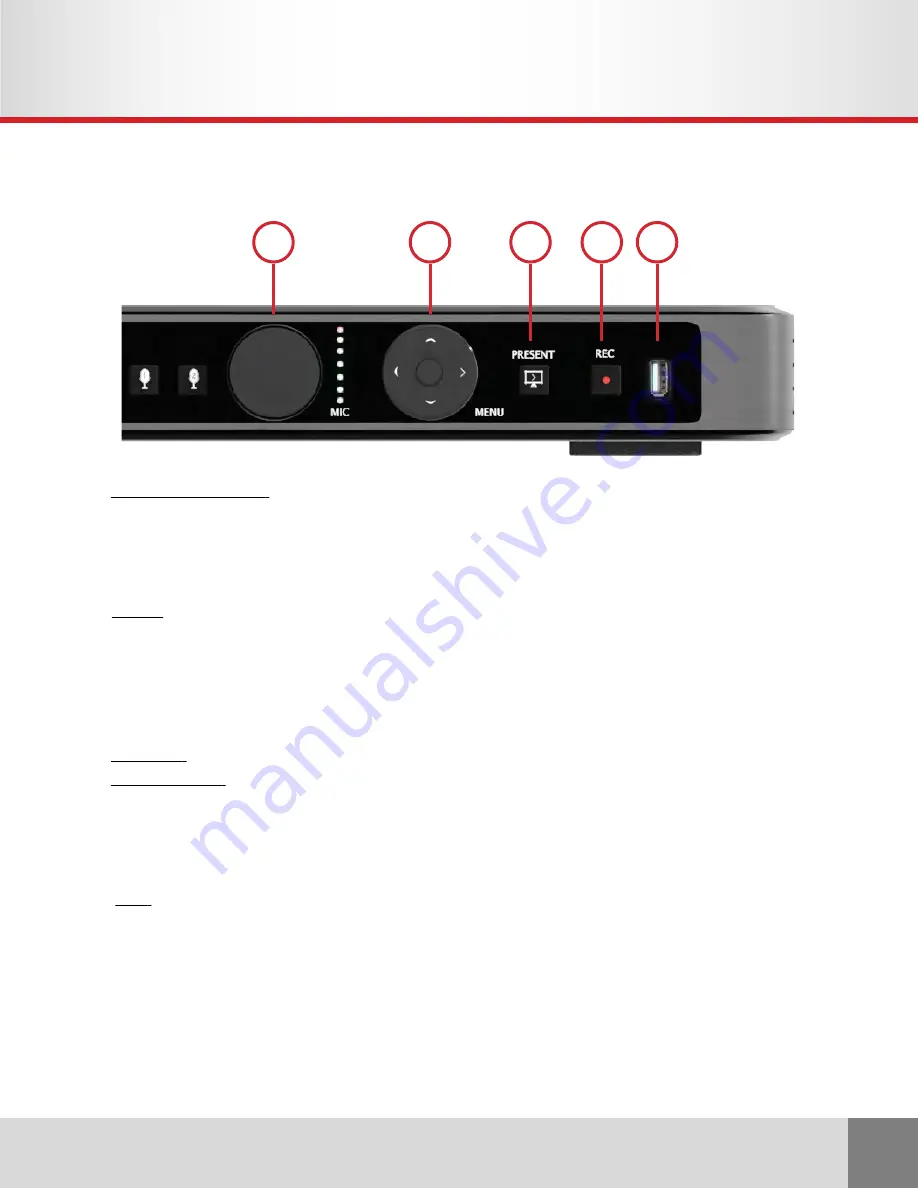
6) MICROPHONE (MIC): Adjust volume of MIC1 and MIC2.
a. Press MIC1 or MIC2 button to select microphone to adjust. Button LED indicates current
selection.
b. Rotate to adjust volume. Press the MIC volume knob to toggle mute/unmute of selected
microphone (MIC1 or MIC2)
7) MENU: Press MENU to open the OSD menu.
a. Use MENU to select the current menu item, or apply the new setting.
b. Use RIGHT to navigate into a menu item.
c. Use LEFT to navigate back from a menu item.
d. Use UP/DOWN to navigate up/down the menu items, or increase/decrease the current
menu item parameter.
8) PRESENT: Press to enable/disable the PRESENT output. LED is ON while presenting.
9) RECORD (REC): Press to start/stop recording to an external USB drive. LED is ON when recording
and OFF when not recording. LED will blink three times if an error is encountered.
a. After plugging into the USB drive, the REC LED will blink once when it is ready to record.
b. After recording is finished, the REC LED will blink continuously until it has finished writing
the data to the USB drive.
10) USB: USB 2.0 port for connecting to an external Storage Device. The USB drive must be
formatted as a FAT32 partition.
a. Recorded files are saved as .mp4.
b. File name is saved as record_(serial number).mp4. Resolution is fixed at 1080p@60Hz.
i. Serial number starts at 0, 1, 2…
ii. The name and serial number reset when power is cycled.
c. Approximately 6GB of storage is needed to record for one hour.
d. NO HDCP record support. See “HDCP NOTICE” in Section 6 of this manual.
6
7
8
9
10


