61
Maintenance and Service
5.7.5 Setting the sweeping pattern
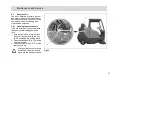
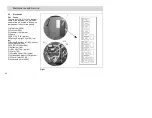
Check the rotary brush (Fig. 28/1) every
week for signs of wear. In the event of
wear or after the rotary brush has been
changed, proceed as follows to com-
plete the necessary adjustments:
1. Lower the rotary brush onto a
smooth floor and allow to rotate for a
short time while the vehicle has
stopped.
2. Raise the rotary brush and drive the
vehicle forwards a little.
3. Raise the sweepings container.
4. Switch the machine off and apply the
parking brake.
5. Check the degree of wear. When
setup correctly, the rotary brush
must produce a parallel sweeping
track, 75 +/- 10 mm wide, on the
floor.
6. Fit the crank (Fig. 28/8) on the
square and adjust the sweeping pat-
tern.
- Turn clockwise: smaller sweeping
pattern
- Counterclockwise: larger sweeping
pattern
The value is indicated on the scale
(Fig. 28/9).
5.7.6 Aligning the rotary brush
parallel
The rotary brush is set parallel at the
factory. If the parallel alignment is no
longer set, please contact an autho-
rized Hako service center.
5.7.7 Changing the rotary brush
In the case of wear resulting in a bristle
length of at least 100 mm, the rotary
brush must be changed. The rotary
brush can be accessed from the rear
when the sweepings container has
been raised and can be disassembled
as follows:
1. Park the vehicle on a level area of
floor.
2. Raise the sweepings container.
3. Switch the machine off and apply the
parking brake.
4. Turn back the crank (Fig. 28/8) to se-
ro.
5. Turn the rotary brush by hand until
the five screw connections (Fig. 28/
7) are visible.
6. Loosen the screw connections and
remove the rotary brush half (Fig. 28/
6).
7. Turn the second rotary brush half
further and pull out to the rear (the
rotary brush is held by clamps).
8. Install the new rotary brush in the re-
verse sequence. Only use original
spare parts!
9. When assembling the rotary brush,
pay attention that the clamps engage
in the catches and to the direction of
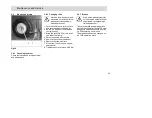
the bristles. The alignment of the
bristles must conform to that illustrat-
ed in the figure.
10.Adjust the sweeping pattern, refer to
Section 5.7.5.


