4-2
1. Coin-type Lithium Battery
6.
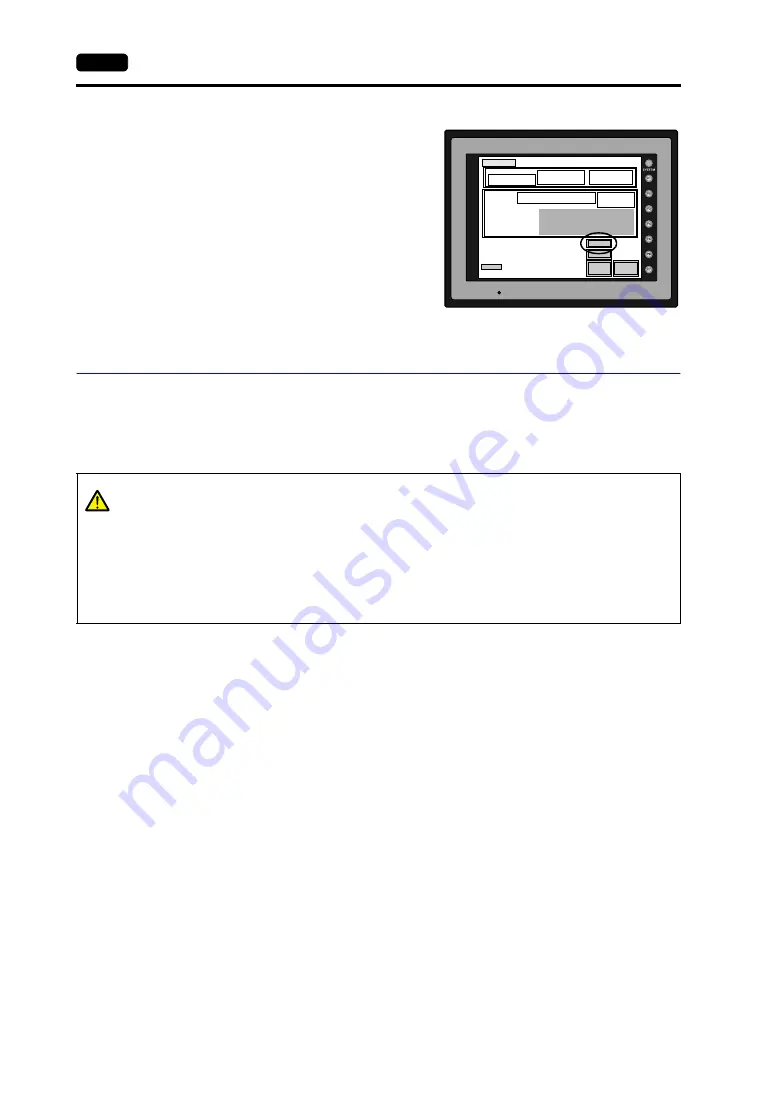
Turn on the power to the V7 unit and check that
the battery is correctly mounted on the Main
Menu screen.
When the battery is not connected, the
[SRAM/Clock] switch blinks and the message
“Battery not set” is displayed at the bottom left
corner. When the battery is correctly connected,
the [SRAM/Clock] switch goes out and the
message is cleared.
When the battery voltage has dropped, the
message “Brownout Battery” is displayed.
Battery Replacement
Safety Instructions on Handling the Battery
Lithium batteries contain combustible material such as lithium or organic solvent. Mishandling may
cause heat, explosion or ignition resulting in fire or injury. To prevent accidents, pay attention to the
following cautions when handling the lithium battery.
POWER
SYSTEM PROG. VER. 1.000
FONT
VER.1.300 / 1.000 / 1.000
ENGLISH
I/F DRV VER.1.300
MELSEC AnA/N/U
Editor:MJ1
Connection
:1:1
Signal Level
:RS232C
PLC Stat. No. : 0
Baud Rate :19200
Data Length : 8
Stop Bit : 1
Parity : Odd
Send Delay : 20msec
Main Menu
V 7 1 0 i T D
System Information
PLC Type : MITSUBISHIA series Link
Comment :
Screen Data
Information
Size : 5111808
SRAM/Clock
Ethernet
Card
Menu
I/O Test
Error : Stop
Time-Out : 1.00 sec
Retry : 3
Main Menu screen
CAUTION
•
Be sure to discharge static electricity from your body before battery replacement.
•
Use the battery “V7-BT” (replacement battery for the V7 series) for replacement.
•
Rough handling of the battery may cause a fire or chemical burn hazard.
•
Do not disassemble, incinerate or heat the battery.
•
Observe the local and governmental regulations when disposing of waste batteries.
•
Keep batteries out of reach of children (If swallowed, immediately consult a doctor.)
•
Never re-charge the battery.
•
When the battery leaks or smells, the leaking battery electrolyte may catch a fire.
Keep from heat or flame.
Summary of Contents for Monitouch V7
Page 1: ...V7 Series...
Page 3: ......
Page 5: ......
Page 9: ......
Page 13: ......
Page 14: ...11 Features 2 Models and Peripheral Equipment 3 System Composition Overview...
Page 15: ......
Page 25: ......
Page 47: ...2 22 8 Printer Connection PRINTER Please use this page freely...
Page 48: ...31 Mounting Procedure 2 Power Supply Cable Connection Installation...
Page 49: ......
Page 53: ...3 4 2 Power Supply Cable Connection Please use this page freely...
Page 54: ...41 Coin type Lithium Battery 2 DIP Switch Setting 3 Function Switches Instructions...
Page 55: ......
Page 63: ......
Page 81: ...5 18 10 Other Networks Please use this page freely...
Page 82: ...61 Operational Procedures 2 Main Menu Screen MONITOUCH Operations...
Page 83: ......
Page 112: ...71 Error Messages 2 Troubleshooting Error Correction...
Page 113: ......
Page 122: ...81 Inspection and Maintenance 2 Warranty Policy Inspection and Maintenance...
Page 123: ......
Page 127: ...8 4 2 Warranty Policy Please use this page freely...


