22
O
PERATION
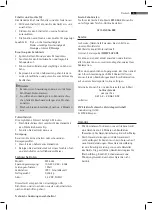
When first used, lubricate the cutter by applying a drop of oil to the points
shown (Fig. 4).
S
WITCHING ON
/
OFF
▪
Switch the trimmer on by pressing the On/Off button (Fig. 1-B). The button lights
up.
▪
To stop the trimmer, press the On/Off button again (Fig. 1-B). The button goes
out.
▪
When the trimmer is not in use, it is advisable to clip the blade cover (Fig. 1-L)
onto the blade.
U
SE WITH OR WITHOUT POWER LEAD
▪
With a new, fully charged battery, the trimmer can be used without the power
lead for about 4 hours.
▪
Before the end of the autonomy period, the On/Off button flashes (Fig. 1-B).
Charge the trimmer battery, refer to § 3.1.
▪
The trimmer can be used with the electrical lead. For this, connect the cable to
the trimmer (Fig. 2a) and connect the power pack (Fig. 1-I) to a mains power
socket.
U
SING THE COMB ATTACHMENTS
▪
The trimmer must be switched off. Select a comb attachment
(Fig. 1 refs. E-G).
▪
Place the comb attachment on the blade and clip it in at the rear. When the
comb attachment is correctly fixed, it is immobilized.
R
EPLACING THE BLADE
▪
Switch the trimmer off and unplug from the mains power supply.
▪
Take the screws out of the blade (Fig. 3) and remove the upper and lower
cutters.
▪
Replace the guide on the lower cutter and refit the blade.
▪
Tighten the two screws (Fig. 3).
SERVICING
R
OUTINE SERVICING
▪
After 30 minutes of use, it is advisable to lubricate the cutters. Use the
lubricating oil supplied with the trimmer (Fig. 1-J).
▪
Lubricate the cutters at least once a day (Fig. 4).
▪
After using the trimmer each time, clean the cutters with the brush supplied
(Fig. 1-K).
▪
If necessary, clean the body of the trimmer with a cloth slightly moistened with
water or mild liquid soap. Never use abrasive products or solvents.