background image

Please  install and adjust the machine according to the requirement of  the manual. 
It  is very  important  to your security  and  correct operating  the machine.

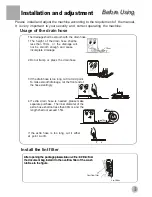
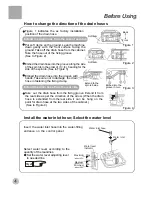
Usage of the drain hose

The drainage shall be smooth with  the drain hose.
1.The  height  of  the drain  hose  shall be
   less  than  10cm ,  or   the  drainage  will
   not  be  smooth  enough  and  cause
   incomplete drainage.

2.Do not tramp  or  press  the  drain hose.

4.If  extra  drain  hose  is  needed , please make
   separate purchase.  The inner diameter of  the
   extra  hose shall not less than 30mm, and  the
   length shall not exceed 1.5m.

If  the  extra  hose  is  too  long,  cut  it  either
at  point A or B.

3 If the drain hose is too long, cut it at mid point.
   To make smooth drainage, cut the front end of
   the hose slantingly.

<10cm

B

A

>   30mm

<1.5m

Before Using 

Before Using 

Installation and adjustment

Install the lint filter

After opening the package,pllease take out the lint filter from
the document bag,install it to the overflow filter of the  wash
tub.See to the figure.

After opening the package,please take out the lint filter from
the document bag,install it to the overflow filter of the  wash
tub.See to the figure.

Overflow filter

Lint filter

Summary of Contents for XPB56-23S

Page 1: ...e 9 Disposal after washing 12 Contents Before using Using process User s manual Trouble shooting Answers to question 14 Specification The back cover Packing list 16 Please read this manual carefully b...

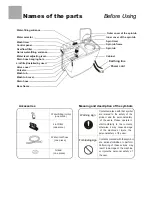
Page 2: ...idden to perform Performing of those actions may result in damage of the machine or injure the personal safety of the user Accessories Water filling jointer one piece Lint Filter one piece Water inlet...

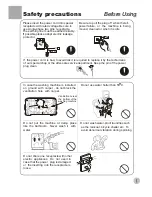
Page 3: ...ing machine Be sure to pull the plug off when there s power failure or the machine is being moved cleaned or when it is idle Do not use water hotter than 50 C Do not share one receptacle with other el...

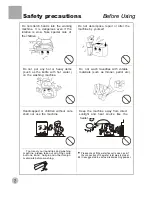
Page 4: ...machine Do not decompose repair or alter the machine by yourself Keep the machine away from direct sunlight and heat source like the heater Do not wash laundries with volatile materials such as thinn...

Page 5: ...the extra hose shall not less than 30mm and the length shall not exceed 1 5m If the extra hose is too long cut it either at point A or B 3 If the drain hose is too long cut it at mid point To make smo...

Page 6: ...stall the water inlet hose Select the water level Figure 1 Figure 2 Figure 3 Figure 4 Embed into the groove in turn Page8 Back Select water level according to the quantity of the laundries Set the wat...

Page 7: ...d reduces the unfavorable influence on the electrical component by the vapor Therefore it guarantees more safe and reliable washing It adopts complete enclosed base frame and low noise motor and thus...

Page 8: ...buttons close zippers When the pulsator is running the buttons of the laundries may cause noise For t h e s a k e o f discretion please put the laundries with buttons into other laundries The quantit...

Page 9: ...ne is 5 0 kg The thickness size type of the cloth will influence the actual washing capacity It is suitable to put in reasonable amount of laundries and the laundries can be turned round in washing fo...

Page 10: ...g powder is different Please refer to the instruction of the washing powder for the detail dosage Refer to the user s manual for the usage and quantity of the whitener For powder whitener please disso...

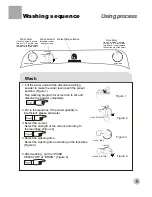
Page 11: ...LECTOR WASH SELECTOR 1 Fill the water and add the dissolved washing powder to make the water level reach the preset position Figure 1 Run washing program for some time to stir and dissolve the powder...

Page 12: ......

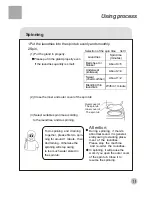
Page 13: ...ndries Spin time minutes About 4 5 Bed sheet or blanket About 2 4 Underwear knitwear Swear chemical fiber About 1 2 Within 1 minute Blending thin laundries To do spinning and draining together please...

Page 14: ......

Page 15: ......

Page 16: ......

Page 17: ...5 Bed sheet or blanket About 2 4 Underwear knitwear Swear chemical fiber About 1 2 Within 1 minute Blending thin laundries To do spinning and draining together please first do spin ning for around 1 m...

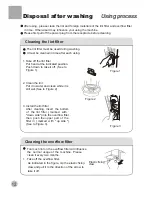
Page 18: ...rmal usage of the machine Please clean it every two months Elastic fixing claw Figure 2 Figure 3 Figure 1 1 Take off the lint filter Put hand at the indicated position Push down to take it off See to...

Page 19: ...ing plate at the bottom of the filter into the valve cover 3 Hang up the hook at the left upper side 4 Push the upper part in as indicated in Figure 2 Hook Figure 1 Figure 2 After washing dismount the...

Page 20: ...to the outer side of the spin tub please take them out immediately 1 Dismantle As indicated in the figure push the point marked with to pull the spin tub frame to oblique upwards to dismantle it 2 In...

Page 21: ...ed by foreign materials The draining does not work Is the drain hose put down Is the drain hose frozen Is the drain hose blocked by foreign material Are there laundries falling to the outer side of th...

Page 22: ...User s manual One piece Water inlet hose Water filling jointer Gland Lint filter Packing list Twin tub washing machine One set One piece One piece One piece One piece...

Page 23: ...put power W Dimension mm Wash pattern Weight kg Injection pressure Rated spinning capacity kg Twin tub washing machine XPB56 23S V 0Hz Maximum 43L Medium 36L Minimum 30L 5 6 5 Wash 420 Spin 160 L740 W...

Reviews: