


10
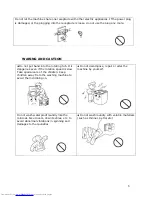
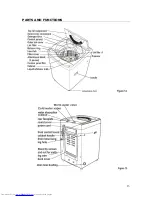
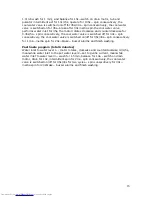
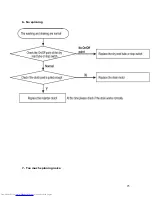
5. Check for leaks
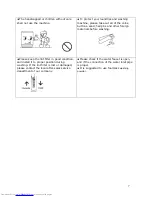
(1). Swing the water inlet hose gently to confirm if it's suitable.
(2). Turn on the water faucets and check for leaks. A small amount of water might
enter the washers. You will drain this later.
Do not take off the water absorption cushion. Please check if the cushion is dropped
or damaged before each usage. If it happens please contact our after-sale
department immediately.
(As Figure 4)
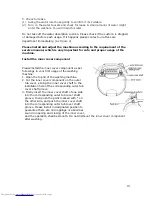
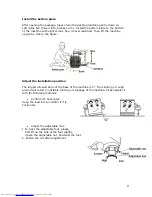
Please install and adjust the machine according to the requirement of the
service manual, which is very important for safe and proper usage of the
machine.
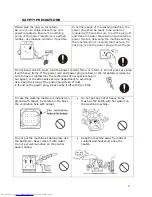
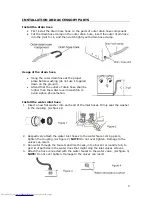
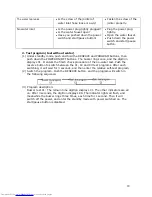
Install the inner cover component
Please install the inner cover component as per
followings in your first usage of the washing
machine:
1. Open the top lid of the washing machine.
2. Put the inner cover component on the outer
tub cover, aiming the inner cover shaft to the
installation hole of the corresponding outer tub
cover shaft groove.
3. Firstly insert the inner cover shaft of one side
into the corresponding outer tub cover shaft
groove, then push the point marked with * on
the other side, and push the inner cover shaft
into the corresponding outer tub cover shaft
groove. Please install in designated position to
guarantee there are no droppings or abnormal
sound in opening and closing of the inner cover,
and the operation shall be smooth. Do not dismount the inner cover component
after washing.
Summary of Contents for WD-8888-71
Page 4: ...4 SPECIFICATION ...
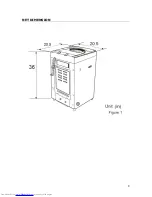
Page 8: ...8 NET DIMENSION ...
Page 12: ...12 ...
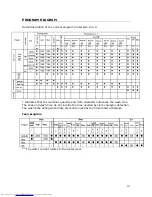
Page 13: ...13 PARTS AND FUNCTIONS ...
Page 20: ...20 ...
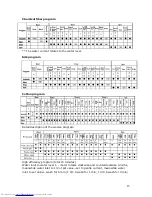
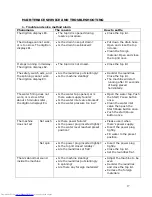
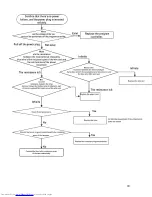
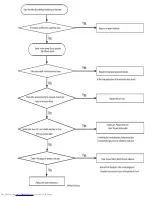
Page 21: ...21 2 No water filling 3 No rotation in washing or rotating to one direction only ...
Page 22: ...22 ...
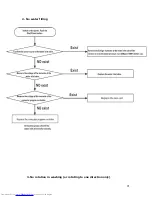
Page 23: ...23 4 No draining 5 Keep filling water ...
Page 24: ...24 ...
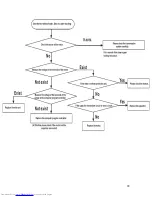
Page 25: ...25 6 No spinning 7 Too much spinning noise ...
Page 26: ...26 ...
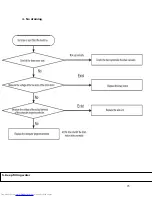
Page 27: ...27 8 Too much noise in washing ...
Page 28: ...28 9 The measured laundry load is inaccurate 10 Break time out ...
Page 29: ...29 ...
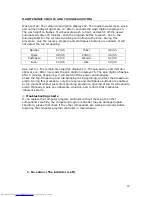
Page 30: ...30 WIRING DIAGRAM Actual Circuit Diagram Circuit Diagram ...