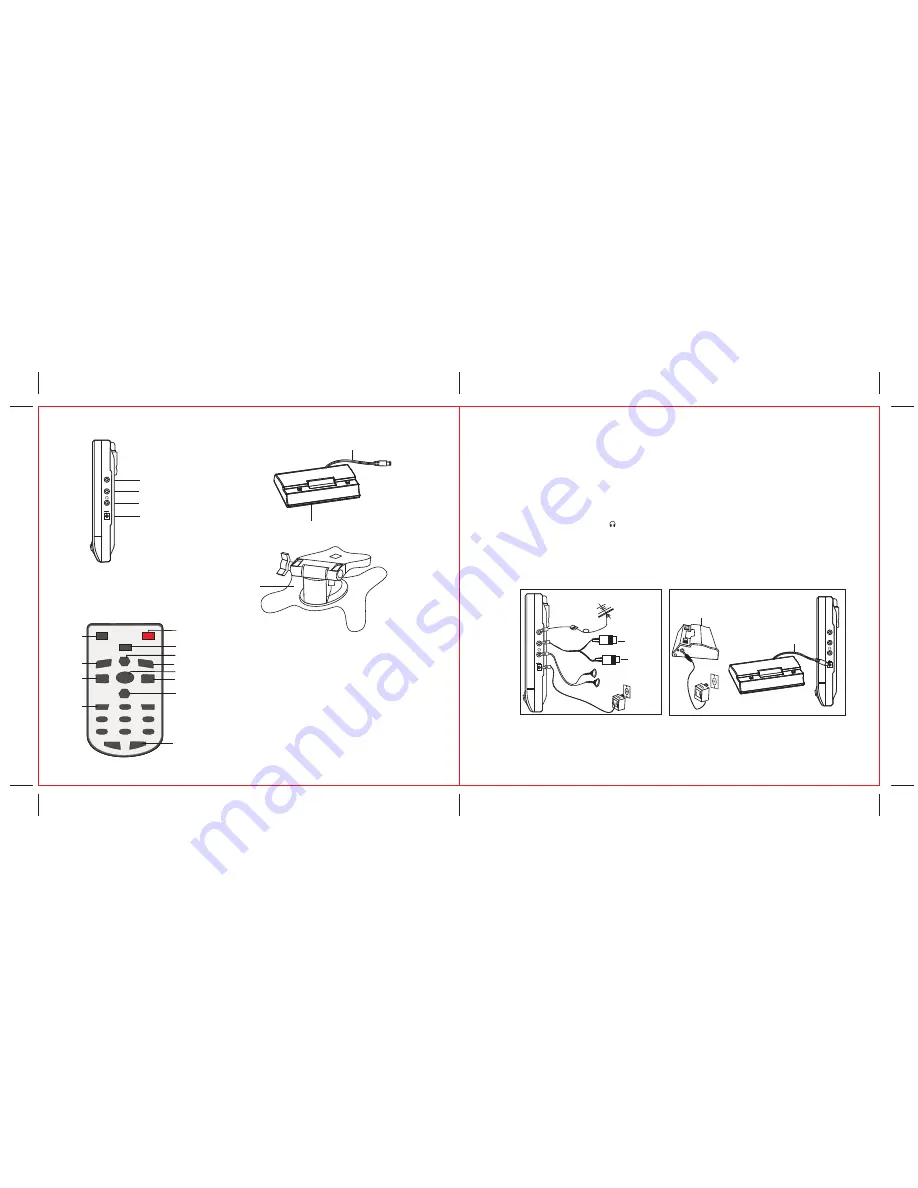
19. Car Stand
AV/TV
POWER
MUTE
CH+
TUNE
VOL+
VOL-
1
2
3
6
5
4
7
8
9
0
-/--
CH-
1. AV/TV Switch
2. Volume Down Control
3. Number Selector
4. Stand By button
5. Mute Button
6. Channel Up Control
7. Tune Mode
8. Volume Up Control
9. Channel Down Control
10. Single/Two/Three Digits Selector
11. Picture Button
12. Set Up Button
(2). Remote Control
5
4
7
8
9
10
6
1
2
3
PIC
SETUP
11
12
5
SIDE VIEW
13. Antenna Jack
14. AV IN Jack
15. Headphone Jack
16. Power Source Input Jack
ANT.
AV IN
DC IN-12V
+
-
18. Power Cord to DC 12V INPUT
17. Detachable Battery Compartment Stand
(10
X
"AA" <UM-3> SIZE batteries are not included)
ANT.
AV IN
6
ANT.
AV IN
DC IN-12V
+
-
Antenna
Red
YELLOW
AUDIO INPUT
VIDEO INPUT
AC Adaptor
Earphone
AC Adaptor
Detachable Battery Compartment Stand
(10 x "AA" <UM-3> SIZE batteries are not included)
Power Cord to
DC 12V Input
(Options)
(Options)
(1-2)
(1-1)
4. Connection
1.
Connection of the Antenna (See picture 1-1)
Plug the antenna into the ANT jack (13).
NOTE:
The unit can receive CATV/ANT signals from the ANT jack input.
2.
Connection of the External AV Equipment
(See picture 1-1)
Plug the AV cable into the AV IN jack(14) . (Press AV/TV button(1) to enable the con-
nection of external audio and video equipment).
3.
Use of Earphone
(See picture 1-1)
-
Connect the Earphone to " " at (15) for private listening.
- The speakers will not operate when headphones are connected.
CAUTION : Listening at high power for too long could damage your ears.
4
. Connection to the Power Source
(1) Connect one round end of attached AC adaptor or car adaptor
to the power source
input jack (16 ) and the other end to the wall outlet at the suitable voltage .(1-1)
(2) Connect the detachable battery compartment stand power cord to the power source
input jack (16). (See picture 1-2)
DC IN-12V
+
-


