background image


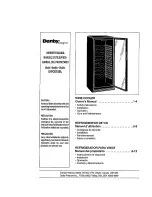
Your Freezer has 5 removable even shelves and 1 removable catercorner shelf. It 

allows you to store wine more accessibly or you can remove it if not needed. 

3.Defrosting and cleaning The Wine cellar            

·

Defrost w henever  the f rost  becomes  1/4” t hick. N ever u se  a  sharp or  

metallic instrument to remove the frost as it may damage the cooling coils.(A 

punctured coil will void the warranty) 

·

Unplug the power pin, then take out stored wine and place in a safety place. 

Defrosting usually takes a few hours. To defrost faster keep the freezer door 
open.


·


When frost buildup has melted, wipe water off with a  dry cloth. Replace 

the electrical plug in the electrical outlet. 

·

Reset the temperature control to the desired setting. 


Summary of Contents for JC-398G

Page 1: ...move roller Adjustable temperature display from 6 to 18 Active carbon deodorization implement Interior light Interior fan keep well proportioned temperature Store Wine quantity 174 bottle Haier Group MODEL JC 398G CAUTION READ THIS MANUAL CAREFULLY TO DIAGNOSE TROUBLE CORRECTLY BEFORE OFFERING SERVICE ...

Page 2: ...d ballast 10 5 4 The compressor 11 5 5 Fix the door 11 6 Control panel principle 12 7 System flow chart 13 8 System flow scenograph 14 9 Cir cuit diagram 15 10 1 Brief principle diagram 15 10 2 Connect diagram 16 1 0 3 Control panel diagram 17 1 0 4 Display board diagram 18 10 Normal problems 19 11 Trouble shooting 22 11 1 Compressor does t start 22 11 2 poor cooling 23 12 Failure code display 24 ...

Page 3: ...t have becom e frayed or otherwise damaged Do not use a co rd th at show s cr acks or ab rasion damage al ong its length the plug or the connector end 5 Unplug your Wine ce llar be fore c leaning or before m aking any rep airs N ote If for an y reason th is p roduct requires serv ice w e str ongly recom mend that a certi fied techn ician perform the service 6 If your old Wine cellar is not being u...

Page 4: ...ar 299 3 Defrosting H manual A automatic Fridge Freez A Frost free system Defrost water outlet Ye s Air circulating ventilator Yes Kind of coolant R134a R600a R600a Foaming components CP IP 3 Technical data Voltage frequency V Hz 220 240 V 50 Input power mains fuse minimum W A 180W 1 20A Length of cable incl plug cm 200 205 Temperature range from to Fridge Freez C 6 18 Features DIN 8950 resp 8953 ...

Page 5: ...erior Ex terior Control lamps green yellow red Over temperature ALARM LED acoustic acoustic Adjustable thermostat Yes Fast freeze switch _ Interior light W 11 Adjustable feet front rear n f ront Castors front rear rear Wall spacer grid distance holder Flush back cm 10 10 10 6 Product dimensions Unit dimensions H W D cm 167 66 5 67 Depth with open door cm 132 Net weight kg 82 0 7 Packing dimensions...

Page 6: ...llar on a floor strong enough to support it fully loaded 3 When m oving th e Wine cel lar ne ver ti lt i t m ore t han a 4 5 degree an gle This could damage the compressor and the sealed system 4 If the Wine cellar is tilted let it stand in an u pright position for at l east 24 hours prior to plugging This is to allow the refrigerant to settle Proper Air Circulation z To assure your Wine cellar wo...

Page 7: ... g garage etc your wine cellar was not designed to operate in temperature settings below 32 F ahrenheit z Select a s uitable l ocation f or t he wine cel lar o n a h ard ev en su rfaces away from direct sunlight or heat source e g radiators baseboard heaters cooking appliances etc Any floor unevenness should be corrected Initial Setup 1 Operating Your Wine cellar Once t he wine cel lar i s i n i t...

Page 8: ...u se a sharp or metallic instrument to remove the frost as it may damage the cooling coils A punctured coil will void the warranty Unplug the power pin then take out stored wine and place in a safety place Defrosting usually takes a few hours To defrost faster keep the freezer door open When frost buildup has melted wipe water off with a dry cloth Replace the electrical plug in the electrical outl...

Page 9: ...n the top b Hold the control panel meanwhile push Hinge the door should open for 135 when the wiring harness button with your loosening the right side philip screw thumb to take the control wire apart Control panel Fan and evaporator clapboard Glass door Adjustable feet Handle ...

Page 10: ...ever pull it wildly without pushing the button That will break it f The disply panel is fixed on the plastic panel with three philip screws you should regulate the philip screw properly to make the button on the disply panel sensitive On the right side of the picture is fan switch you can connect it directly with the wire without thinking of the direction but remember to push the button on the wir...

Page 11: ... wire in the Ballast cover is fixed in the slot with accessory In the picture is the plug connecting the control wire and power wire The black o ne i s b allast w ire spr ing out fr om t he C ord stopper cover d Take the P hilip sc rew ap art from the ba llas t hen you can t ake the ba llas apart When a ssembling it please fix the below screw first e The ba llast w ire has l ocked onese lf port Wh...

Page 12: ...and the compressor the live wire and zero wire is connected also some anti shock material to the compressor power panel rotate the plastic bolt to fix between them the wire The compressor power panel is one whole part 5 Fix the door a Pull the bottom Hinge cover out flatly b The bottom Hinge is fixed with four bolts you should use a M6 sleeve to unfix it then you can take the door out ...

Page 13: ...ressing the temperature buttons about 3 seconds the set temperature will flash on the display To reduce the temperature press the bottom button To increase the temperature press the top button 2 The small yellow lamp is the LAMP switch When the lamp is on the Interior light will run 3 The small red lamp is the ALARM lamp When the lamp is on the alarm will be on ...

Page 14: ...ef rigeration system o f di rect cooling s ingle system cooler belongs t o t he c ategory of a si ngle temperature and single control refrigerating system with one evaporat ors and i s controlled by a single temperature control ...

Page 15: ...14 System flow scenograph ...

Page 16: ... wait 24 hours before plugging the unit in 2 The alarm will sound when the appliance i s s witched on for th e first time and when t he a ppliance i s warm P ress th e Alarm button t o switch i t o ff The temperature display will also flash until set temperature is reached 3 The appliance has been tested and is supplied set for normal operation of 12 C ...

Page 17: ...16 2 Connect di agram ...

Page 18: ...UF 25V C2 104 E2 100U F 16V N L C HEAT LAMP K2 5A K3 5A K1 16A Vin 1 GND 2 Vout 3 IC1 7805 L L L 12V 12V 12V 12V 5V 5V 1 2W R7 120 CX1 103 275VAC 1 2 3 4 5 CN1 B5P9 VH 1 2 3 4 5 CN2 5267 5A N1 9013 N2 9013 N3 9013 D5 4148 D6 4148 D7 4148 R6 2 2K R4 2 2K R2 2 2K R5 10K R3 10K R1 10K C HEAT LAMP ...

Page 19: ...B4 22 D2 AD9 23 D5 T1C1 24 D4 T1C0 25 A5 KB5 26 RST 27 A7 KB7 28 AD12 T2CLK 29 IRQ 30 A0 KB0 31 VSS 32 IC1 MC68HC908JL8CFA C1 G F A B D H E C C2 LED1 TOT 5371 C2 22 R26 10M R42 220 R41220 R40220 R39220 R43 220 R44 220 R45 220 R46 220 N1 2SC2412K N3 2SC2412K R15 4 7K R16 4 7K G F A B D H E C N2 2SC2412K N4 2SC2412K LED2 LED3 R17 4 7K R18 4 7K D1 RLS4148 D2 RLS4148 D3 RLS4148 D4 RLS4148 R19 2K R20 1...

Page 20: ...ition of avometer i f the re is w ire br oken change compressor 8 Change compressor 9 Change compressor Compress or st arts too frequent operation time too long but temperatu re drop in wine cellar is too slow 1 The point of sensor was moved 2 The temperature controller is out of order 3 The environment temperature is too high humidity too high airflow is impeded 4 The frost layer at the evaporato...

Page 21: ... 2 The w ine ce llar body is not stable and in level 3 When compressor runs friction between tubes and w ine ce llar body causes resonance 4 Compressor f ixing s crew i s loose 5 The v ibration abso rption cushion for c ompressor fi xing is too tight or too loose or ageing 6 Compressor inside noise is too big or v ibration abso rption suspending spring is broken 1 Reinforce the floor 2 Make the w ...

Page 22: ...dust 3 Make the te mperature dry and control the environment humidity Tempera ture controlle r out of order 1 There is l eakage of tem perature sensing medium 2 Damage of cam of cont acting point spring etc Change temperature controller The probe o f temperat ure sensing tube doesn t contact evaporat or well It has not been mounted to position or changed during transportation Mount it again ...

Page 23: ...22 Trouble shooting 1 Compressor does t start ...

Page 24: ... room temperature is too hoot or not Whether the condenser is blocked by cloth pieces or paper or dirt or not Whether the glass door has been closed well Whether the glass door door seal bar is too dirty or sealed well Remove dirt and put on a little talcum power Avoid these matters which will affect heat radiation of condenser and reduce refrigeration ability Frequent opening and extended opening...

Page 25: ... broken circuit or open circuit it shows F3 Red indicator is light with buzzing Compressor enter into protection mode stop cooling Check sensor A and sensor B and their connecting status replace sensor if necessary F4 Continuous compressor running time is more than 3 hours and Sensor B felt the inner temperature change is within 1 Compressor enter into protection mode stop cooling Check if sensor ...

Page 26: ...28 ...

Reviews: