background image

Operation

11

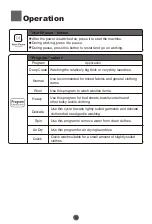
Explanation of buttons

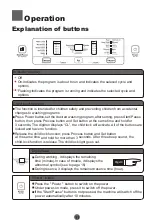
 Press Power button,set the desired washing program,after setting, press Start/Pause

 button, then press Process button and Set button at the same time and hold for 

 3 seconds, The digitron displays “CL”, the child lock will activate.


All of the buttons are 

 locked and have no function.    

Child Lock function 

Release the child lock function: press Process button and Set button


 at the same time and hold for more than 3 seconds. After three beep sound, the 

child lock function is release.The child lock light goes out. 


Indicator display

Off

On:Indicates the program is about to run and indicates the seleced cycle and 

options
Flashing:Indicates the program is running and indicates the selected cycle and 

options

Page16

During working , it displays the remaining 

time (minute).In case of trouble, it displays the 

abnormal symbol (see to page 16) 

During reserve, it displays the remained reserve time (hour).

Digital tube

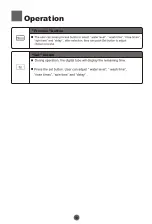
Press the " Power " button to switch on the power.

Under power-on mode, press it to switch off the power. 
If the "Start/Pause" button is not pressed, the machine will switch off the 

 power automatically after 10 minutes.  

"Power" button

The function is intended for children safety and preventing children from accidental 

changes to washing programs. 

Summary of Contents for HWM140-1826T

Page 1: ...HWM140 1826T ...

Page 2: ......

Page 3: ......

Page 4: ......

Page 5: ......

Page 6: ......

Page 7: ......

Page 8: ......

Page 9: ......

Page 10: ......

Page 11: ......

Page 12: ......

Page 13: ...Normal Wash ...

Page 14: ...Process Set Set Process ...

Page 15: ...Deep Clean Normal Wool Heavy Delicate Spin Air Dry Quick ...

Page 16: ...Process Set ...

Page 17: ......

Page 18: ......

Page 19: ......

Page 20: ......

Page 21: ......

Page 22: ...49 55 HWM140 1826T 550 360 630 1038 14 ...

Page 23: ...MODEL Please read this manual carefully before operating your washing machine and retain it for future reference HWM140 1826T TOP LOAD FULLY AUTOMATIC WASHING MACHINE OWNER S MANUAL ...

Page 24: ......
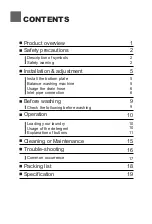
Page 25: ...t Specification Trouble shooting 1 2 2 2 5 5 5 6 6 9 10 10 11 18 9 10 15 17 16 19 Description of symbols Safety warning Balance washing machine Install the bottom plate Usage the drain hose Inlet pipe connection Check the following before washing Usage of the detergent Loading your laundry Explanation of buttons Common occurrence ...

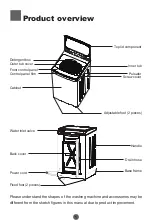
Page 26: ...ver Adjustable foot 2 pieces Control panel film Cabinet Fixed foot 2 pieces Handle Drain hose Power cord Back cover Front control panel Please understand the shapes of the washing machine and accessories may be different from the sketch figures in this manual due to product improvement Water inlet valve ...

Page 27: ...hine installation This appliance is intended to be used in household and similar applications such as staff kitchen areas in shops office and other working environments farm houses by clients in hotels motels and other residential type environments bed and breakfast type environments areas for communal use in blocks of flats or in launderettes Warning Ensure the plug is removed and the taps turned...

Page 28: ...ies or lack of experience and knowledge unless they have been given supervision or instruction by a person responsible for their safety Children should be supervised to ensure that they do not play with the appliance Do not take apart repair or alter the machine by yourself Do not attempt to move washing or place hands inside washing machine while in operation Please ensure children are supervised...

Page 29: ...er the door closing time and vice versa Smart Closing Door performs best when lid is closed from full open condition Safety precautions 4 Smart hinge Smart hinge The washing machine whose lid can be opened during water extraction that it takes 15s or more for complete stop of water extracting chamber tub The new hose sets supplied with the appliance are to be used and that old hose sets should not...

Page 30: ...ne Please adjust it by the following method 1 Confirm it is level 2 Lift up the side of the leg slightly and twist the adjustable leg Balance washing machine Install the bottom plate The purpose of the bottom plate is to suppress noise from the washing machine during operation Steps 2 Place the plate onto the bottom of the machine 3 Use a screwdriver to tighten the screw in accessory bag securing ...

Page 31: ...hall not exceed 1 5m 5 If the extra hose is too long cut it either at A or at B point Note he instructions for appliances connected to the water mains by detachable hose sets shall state that the new hose sets supplied with the appliance are to be used and that old hose sets should not be reused A B The new hose sets supplied with the appliance are to be used and that old hose sets should not be r...

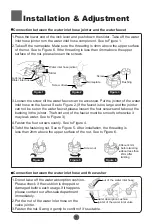
Page 32: ...end of the faucet must be smooth otherwise it may leak water See to Figure 3 4 Fasten the four screws evenly See to Figure 4 5 Twist the fastening nut See to Figure 5 After installation the threading is less than 2mm above the upper surface of the nut See to Figure 6 About 4mm before twisting About less than 2mm after twisting Lock lever Water inlet hose Slider Water inlet hose jointer Screw drive...

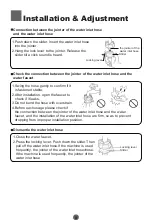
Page 33: ...k if it leaks 3 Do not bend the hose with overstrain 4 Before each usage please check if the connection between the jointer of the water inlet hose and the water faucet and the installation of the water inlet hose are firm so as to prevent dropping from improper installation position Dismantle the water inlet hose 1 Close the water faucet 2 Press the locking lever Push down the slider Then pull of...

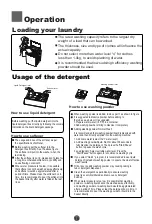
Page 34: ...st items c Separate items that do not absorb water easily and wash by hand d For heavily soiled items please first remove loose dirt then apply detergent directly as per instructions on pack to the stain before washing e For those items that may attract lint or are furry or fluffy please turn inside out before washing f Do not put laundry soiled with chemicals or solvents into the washing machine ...

Page 35: ...der before adding to the tub see as below It is suggested 1 Prepare warm water 35 C in a container 2 Add washing powder stirring to dissolve it completely Adding washing powder Normal Wash It is recommended that washing powder liquid is dissolved with water and then directly emptied into the washing machine 1 Add some water select the 1 water level 2 Add washing powder liquid Run for about 30 seco...

Page 36: ...es out Indicator display Off On Indicates the program is about to run and indicates the seleced cycle and options Flashing Indicates the program is running and indicates the selected cycle and options Page16 During working it displays the remaining time minute In case of trouble it displays the abnormal symbol see to page 16 During reserve it displays the remained reserve time hour Digital tube Pr...

Page 37: ...ghtiy soiled garments and delicate clothes that need gentle washing Quick wash suitable for a small amount of slightly soiled clothes Normal Wool Air Dry Washing the relatively big thick or very dirty laundries Use recommended for mixed fabrics and general clothing items Use this program to wash woollen items Use this program for bed sheets towels curtains and other bulky textile clothing Use this...

Page 38: ...Operation 13 Set button Process button ...

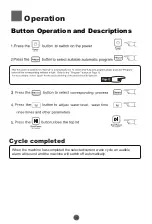
Page 39: ...Operation 14 Button Operation and Descriptions Cycle completed When the machine has completed the selected current wash cycle an audible alarm will sound and the machine will switch off automatically ...

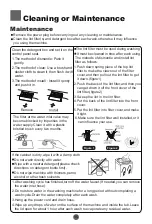
Page 40: ...s finished turn off the water faucet If needed you can remove the water inlet hose 2 Do not store water in the washing machine for a long period without completing a wash cycle Drain the water completely after each wash 3 Hang up the power cord and drain hose 4 Wipe up any drops of water on the surface of the machine and inside the tub Leave the lid open for about 1 hour after each wash to evapora...

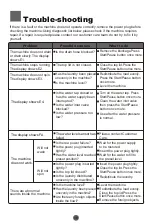
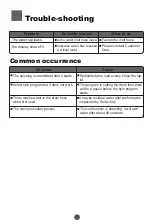
Page 41: ...achine does not operate correctly remove the power plug before checking the machine Using diagnostic list below please check if the machine requires repair If a repair is required please contact our customer care team do not try to fix it by yourself The machine does not drain or drain slowly The display shows E1 The machine stops running The display shows E2 The machine does not spin The display ...

Page 42: ...n program but it does not work There maybe water in the drain hose when first used It maybe residual water after performance inspection by the factory The program is setting the drain time there will be a pause before the spin program starts Situation Cause The wash procedure pauses The cloth sensor is detecting it will add water after about 48 seconds Indicates water has reached a critical level ...

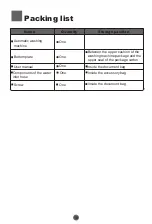
Page 43: ...e document bag Name Quantity Storage position Automatic washing machine Bottom plate User manual One One One Inside the document bag Screw Inside the accessory bag Between the upper cushion of the washing machine package and the upper seal of the package carton One ...

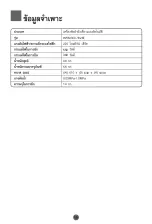
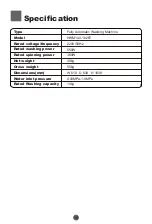
Page 44: ... washing power Rated spinning power Net weight Gross weight Dimensions mm Water inlet pressure Rated Washing capacity Fully Automatic Washing Machine 220V 50Hz 550W 360W 49kg 55kg 14kg W 610 D 630 H 1038 0 03MPa 1 0MPa HWM140 1826T Specification ...

Reviews: