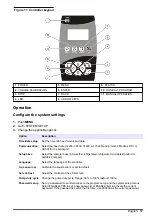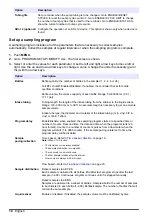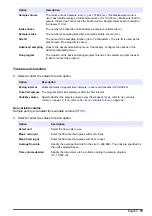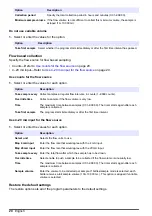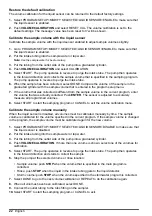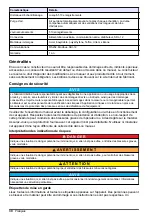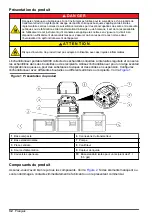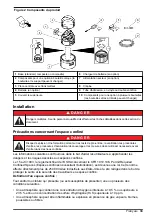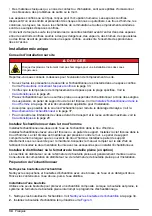
Verify the sample volume
To make sure that the sample volume is accurate, take a grab sample. Do not go back into
calibration to check the volume since the volume compensation is reset to zero at the start of a
calibration.
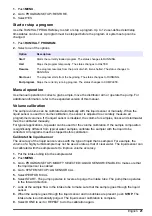
1.
Push
MANUAL OPERATION
.
2.
Select GRAB SAMPLE.
3.
Put the intake tubing into the sample water.
4.
Put the tubing from the outlet side of the pump into a graduated cylinder.
5.
If the liquid sensor is enabled, enter the volume to be verified.
6.
If the liquid sensor is disabled, enter the volume that is specified in the program.
7.
Push
ENTER
. The pump cycle starts (purge-sample-purge).
8.
Compare the volume that was collected in the graduated cylinder to the expected volume. If the
collected volume is not correct, do the volume calibration again.
Maintenance
D A N G E R
Multiple hazards. Only qualified personnel must conduct the tasks described in this section of the
document.
D A N G E R
Electrocution hazard. Remove power from the instrument before doing maintenance or service
activities.
W A R N I N G
Biohazard exposure. Obey safe handling protocols during contact with sample bottles and sampler
components.
W A R N I N G
Multiple hazards. The technician must make sure that the equipment operates safely and correctly
after maintenance procedures.
Clean the instrument
C A U T I O N
Fire hazard. Do not use flammable agents to clean the instrument.
N O T I C E
Do not clean the controller compartment heater with liquids of any kind.
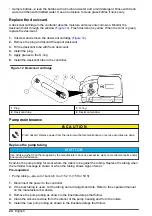
If water is not sufficient to clean the controller and the pump, disconnect the controller and move the
controller away from the sampler. Allow sufficient time for the controller and pump to dry before the
parts are re-installed and put back into service.
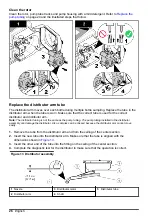
Clean the sampler as follows:
• Sampler enclosure—Clean the internal and external surfaces with a damp cloth and a mild
detergent. Do not use abrasive cleaners or solvents.
English
23
Summary of Contents for SD900
Page 2: ...English 3 Fran ais 28 Espa ol 54 Portugu s 80 106 129 153 2...
Page 25: ...English 25...
Page 103: ...Portugu s 103...
Page 109: ...FCC 15 A 1 2 3 4 5 SD900 1 1 1 6 2 7 3 8 4 9 5 10 21 L 5 5 gal 2 109...
Page 111: ...110 106 111 114 106 1 111 2 3 111...
Page 113: ...4 1 1 1 6 2 1 24 7 21 L 5 5 gal 3 1 8 8 4 1 2 4 9 5 1 111 2 1 112 3 5 8 4 8 113...
Page 115: ...6 1 3 2 7 8 115...
Page 117: ...15 A 117 1 2 10 3 117...
Page 118: ...10 50 C 122 F 1 3 5 15 2 11 MENU ENTER BACK 118...
Page 125: ...12 1 12 2 3 4 5 O 6 12 1 3 O 2 4 125...
Page 126: ...4 6 m 15 2 m 15 ft 50 ft 1 2 3 4 5 126...
Page 127: ...126 127...
Page 128: ...1 2 13 3 4 13 1 3 5 2 4 128...
Page 131: ...Web IECS 003 A 131...
Page 133: ...1 1 6 2 7 3 8 4 9 5 10 21 L 2 HACH Japan 2 1 6 2 7 AC 3 8 4 9 5 10 133...
Page 136: ...1 5 137 4 1 1 1 6 2 1 24 7 21 L 3 1 8 8 4 2 2 4 9 5 1 135 2 1 135 3 5 8 1 4 8 136...
Page 138: ...6 1 3 2 7 8 138...
Page 140: ...GFCI GFI 15 A PE 141 AC 140...
Page 141: ...1 2 10 3 10 50 C 1 3 5 15 2 AC 11 MENU ENTER BACK 141...
Page 149: ...12 1 12 2 3 4 5 O 6 12 1 3 O 2 4 149...
Page 150: ...4 6 m 15 2 m 1 2 Web 3 4 5 150...
Page 151: ...150 151...
Page 152: ...1 2 13 3 4 13 1 3 5 2 4 152...
Page 155: ...IECS 003 A 155...
Page 157: ...1 1 6 2 7 3 8 4 9 5 10 21 L 5 5 gal 2 2 1 6 2 7 AC 3 8 4 9 Teflon 5 10 157...
Page 158: ...XXX 1993 4 15 OSHA CFR 1910 146 250 000 19 5 23 5 H2S 10 ppm 158 153 159 161 153 158...
Page 160: ...4 1 1 1 6 2 24 1 7 21 L 5 5 gal 3 8 1 8 4 2 4 1 9 5 1 159 2 1 159 3 5 8 1 4 8 160...
Page 162: ...6 1 3 2 7 8 162...
Page 164: ...GFCI GFI 15 A PE 165 AC 164...
Page 165: ...1 2 10 3 10 50 C 122 F 1 3 5 15 2 AC 11 MENU ENTER BACK 165...
Page 172: ...0 1 MANUAL OPERATION 2 GRAB SAMPLE 3 4 5 6 7 ENTER 8 172...
Page 173: ...12 1 12 2 3 4 5 6 12 1 3 2 4 4 6 m 15 2 m 15 ft 50 ft 1 2 3 4 5 173...
Page 174: ...174...
Page 175: ...173 1 2 13 3 4 13 1 3 5 2 4 175...
Page 176: ......
Page 177: ......


