22
Installation
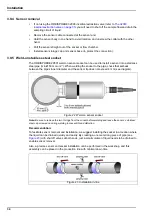
3.3.2 Wall mounting
3.3.3 Pipe mounting
Attach the U bracket provided to
the wall with two screws (not
provided).
Tilt the instrument slightly
backwards to align the bracket
pins and the insertion slots, and
slide the instrument onto the
bracket as shown.
Insert the 2 locking screws with
washers through the side slots.
Adjust instrument angle for better
screen vision, and lock both side
screws.
Figure 5 Wall mount bracket
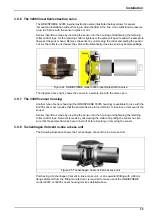
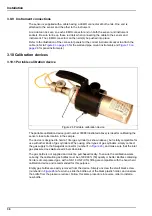
Assemble the pipe mount bracket to the
U-bracket, using the two screws provided
Attach this assembly to the pipe using two
clamps (not provided) as shown on the left
The rest of the procedure is similar to the wall
mount version, pictured above.
Slide the instrument onto the bracket.
Insert the 2 locking screws with washers
through the side slots.
Adjust the instrument angle for better screen
vision, and lock both side screws.
Figure 6 Pipe mount diagram
Summary of Contents for ORBISPHERE K1200
Page 5: ...4 Table of Contents...
Page 13: ...12 General Information...
Page 39: ...38 Installation...
Page 45: ...44 User Interface...
Page 46: ...45 Section 5 View Menu Figure 34 View menu...
Page 49: ...48 View Menu...
Page 59: ...58 Calibration Menu...
Page 60: ...59 Section 8 Inputs Outputs Menu Figure 40 Inputs Outputs menu...
Page 62: ...61 Inputs Outputs Menu 8 4 Analog outputs Figure 41 Analog outputs menu...
Page 69: ...68 Inputs Outputs Menu...
Page 86: ...85 Section 11 Products Menu Figure 44 Products menu...
Page 89: ...88 Global Configuration Menu...
Page 90: ...89 Section 13 Services Menu Figure 46 Services menu Part 1...
Page 91: ...90 Services Menu Figure 47 Services menu Part 2...


