background image

2

96-0198 Rev V

March 2012

Using the Optional Caster Kit

1.  Raise the leveling screws high enough to remove the leveling pads. This lowers 

the Ofice Mill onto the wheels.

2.  Carefully move the mill to its new position.
3.  Put the leveling pads back under the leveling screws and raise the mill to a 

position where all its weight is off the wheels. Make sure the machine is level when 

this is complete. 

Pendant Arm Position

Put the pendant arm into operating position when the machine is in place. 

1.  Remove the four screws from the pendant arm.

2.  Swing the pendant arm 90° toward the front of the machine to the operating 

position.

3.  Replace the pendant arm screws.

Doorway Coniguration

The Ofice Mill can it through a standard 36" doorway if you follow these steps. Note that 

the Ofice Mill has two doors: a large door that swings and a smaller door that slides. 

1.  From the inside of the door, remove the two bolts that attach each handle. 
2.  Use tape to make sure the Mill door stays closed while moving the machine.

3.  Remove the four screws from the pendant arm. 

4.  Rotate the the pendant arm 90° back into shipping position and replace the four 

screws. 

5.  When you are done moving the machine, put the pendant arm back into operating 

position and reinstall the door handles. 

Remove the Shipping Brackets

There are three shipping brackets to remove. 

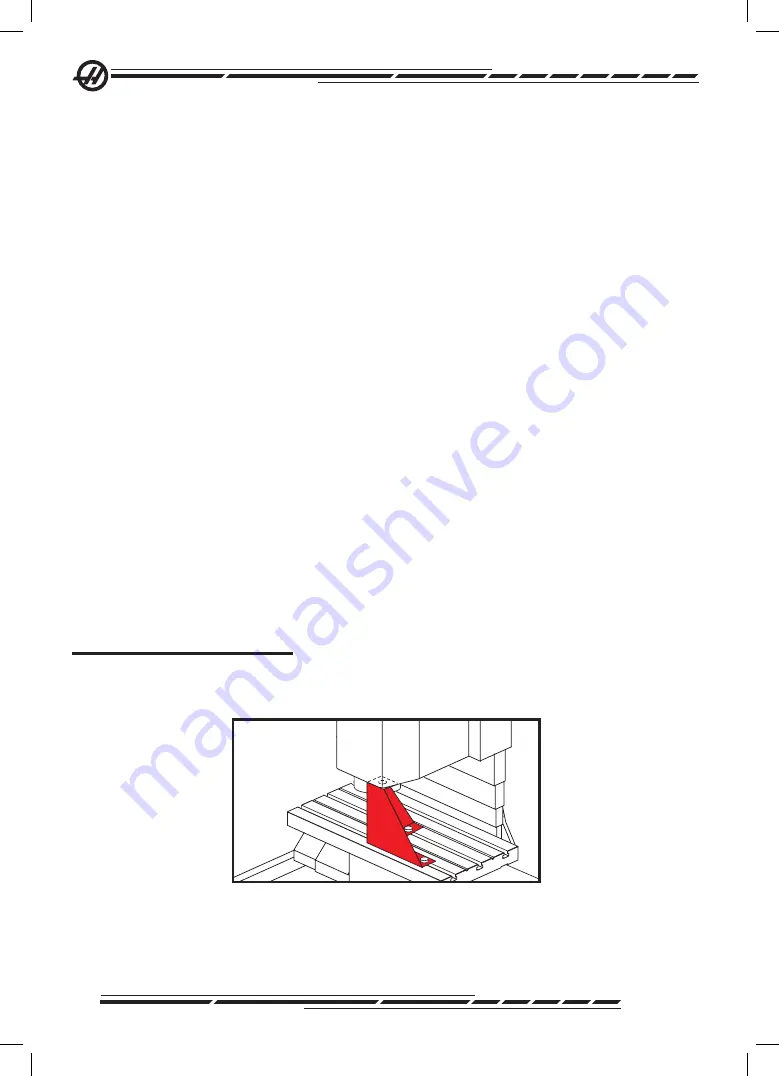
1.  Remove the bolts that attach the shipping bracket to the spindle head.

Spindle Head Shipping Bracket

2.  Remove the four bolts that attach the cable carrier shipping bracket to the top of 

the Ofice Mill and remove the bracket.

Summary of Contents for OFFICE MILL

Page 1: ...OFFICE MILL OPERATOR S ADDENDUM 96 0198 Rev V March 2012 2012 Haas Automation Inc ...

Page 2: ......

Page 3: ...ill Reference Manual for information on machine lifting Install Casters Optional Attach the casters to each side of the machine using the included socket head cap screws through the inside of the Ofice Mill base Move the Ofice Mill Warning The Ofice Mill has a high center of gravity Move the machine slowly and carefully to prevent it from falling over Without an Optional Caster Kit 1 You will need...

Page 4: ...The Ofice Mill can it through a standard 36 doorway if you follow these steps Note that the Ofice Mill has two doors a large door that swings and a smaller door that slides 1 From the inside of the door remove the two bolts that attach each handle 2 Use tape to make sure the Mill door stays closed while moving the machine 3 Remove the four screws from the pendant arm 4 Rotate the the pendant arm 9...

Page 5: ...st the indicator to sweep a 4 radius from the center of X and Y axes travels Slowly jog the Z axis in the negative direction to zero out the indicator 2 Find a reference zero at the rear of the table Sweep the three remaining points left front and right and record the readings 3 Shim the spindle if necessary to correct the spindle sweep to speciications 4 Recheck the sweep It must be within 0005 C...

Page 6: ...he air line only when it is connected to the machine 1 Refer to the procedure given in the Installation section of the Service manual to connect air to the Ofice Mill 2 Set the incoming air pressure to between 75 and 150 psi Set the air regulator on the machine to 60 psi 0 4 mPa Spindle 30K ISO20 Spindle Features 5HP 3 7 KW peak power 3HP 2 2KW continuous duty spindle power Spindle speed range of ...

Page 7: ...ciied ISO20 tooling without drive slots Use only tooling that has been balanced as an assembly G1 0 or better per ANSI S2 19 ISO 1940 Tooling should be re balanced every time the tool is changed or moved in the tool holder The Maximum collet size is 3 8 Tool lengths should be under 10 times the diameter from the gauge line with tool ing above 1 4 diameter Maximum tap size is 1 4 20 x 1 4 depth in ...

Page 8: ...el to the X axis of the mill Office Mill with HRT110 Rotary Table Office Mill with TR110 Rotary Table The rotary table can be mounted in other T slots or in other orientations HRT however check clearances and cable routing before running a part The rotary table and workpiece may collide with tooling or the interior of the machine Maintenance General Refer to the maintenance section of the Mill Ope...

Reviews: