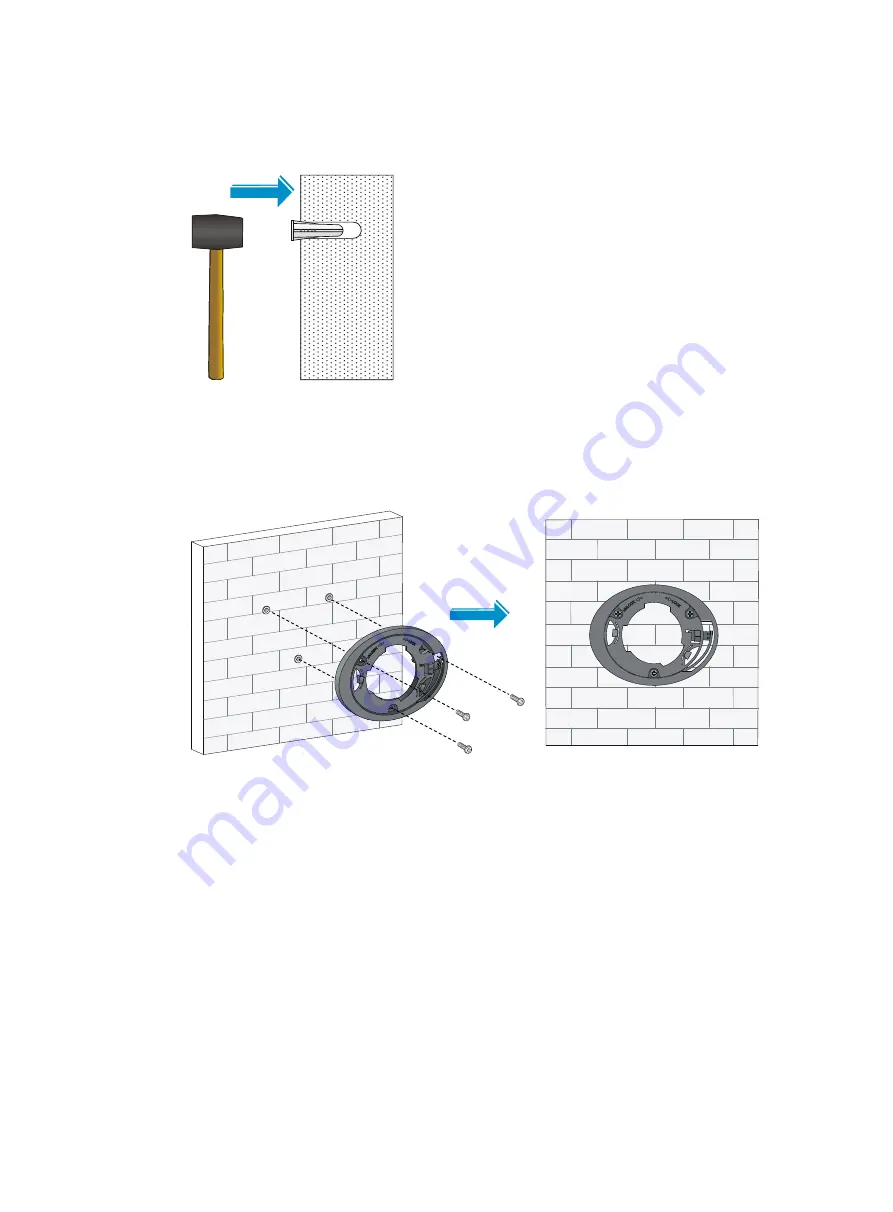
background image


4.


Insert a wall anchor into each hole, and tap the wall anchor with a rubber hammer until it is all 

flush with the wall surface, as shown in 

Figure 8

Figure 8


Hammering the anchor 


5.


Align the mounting holes in the mounting bracket with the anchors and insert screws through the 
mounting holes into the wall anchors. Adjust the position of the mounting bracket and tighten the 
screws.  

Figure 9


Attaching the mounting bracket to the wall 


6.


Connect the AP to the LAN by using Ethernet cables.  

7.


Align the AP at a 45 degree angle with the mounting bracket, and rotate the AP clockwise until it 

clicks into place, as shown in 

Figure 10

Summary of Contents for WA4320-ACN

Page 1: ...H3C WA4320 ACN Access Point Installation Guide New H3C Technologies Co Ltd http www h3c com hk Document version 6W101 20170407...

Page 2: ...her trademarks that may be mentioned in this manual are the property of their respective owners Notice The information in this document is subject to change without notice Every effort has been made i...

Page 3: ...presents commands and keywords that you enter literally as shown Italic Italic text represents arguments that you replace with actual values Square brackets enclose syntax choices keywords or argument...

Page 4: ...rmation NOTE An alert that contains additional or supplementary information TIP An alert that provides helpful information Network topology icons Represents a generic network device such as a router s...

Page 5: ...fer from what you have on your device Obtaining documentation To access the most up to date H3C product documentation go to the H3C website at http www h3c com hk To obtain information about installat...

Page 6: ...g the AP to the power supply 11 Check before power on 11 Connecting PoE power supply 11 Connecting local power supply 12 Check after power on 13 Connecting the AP to the network 13 Verifying network c...

Page 7: ...e configured on the wireless switches or access controllers The H3C WA4320 ACN can also act as a fat AP to provide wireless access for WLAN users Figure 1 Deployment of the WA4320 ACN on hotspots fit...

Page 8: ...aces Two Built in antennas 2 4 G antenna gain 4 dBi 5 G antenna gain 5 dBi Power consumption 3 95 to 12 95 W Dimensions H W D 54 220 220 mm 2 13 8 66 8 66 in Weight 0 55 kg 1 21 lb AP Core equipment r...

Page 9: ...sures to avoid injury and AP damage Place the AP in a dry and flat location and take anti slip measures Keep the AP clean and dust free Do not place the AP in a moist area and avoid liquid surrounding...

Page 10: ...Installation tools and equipment When installing the AP you may need the following tools Prepare these tools and equipment yourself Needle nose pliers Wire stripping pliers Diagonal pliers Marker Per...

Page 11: ...that the AP can operate correctly For more information about AP LEDs see Appendix LEDs and ports Verify that cabling on the installation site has been completed To ensure the PoE performance H3C recom...

Page 12: ...ife The place is not water seeping water soaking and condensing A lightning arrester user supplied is installed on the AP for cabling outdoors The ceiling for installing the AP must be less than 18 mm...

Page 13: ...as shown in Figure 5 Figure 5 Mounting holes in the mounting bracket Figure 6 Marking installation holes on the wall 3 Drill holes with a diameter of 5 mm 0 197 in and a depth of 30 mm 1 18 in in the...

Page 14: ...mounting bracket with the anchors and insert screws through the mounting holes into the wall anchors Adjust the position of the mounting bracket and tighten the screws Figure 9 Attaching the mounting...

Page 15: ...AP on a ceiling 1 Align the screw hole in the AP bracket with the screw hole in the AP rear Use the M4 10 screw to secure the AP bracket to the AP Figure 11 Attaching the AP bracket to the AP rear 2...

Page 16: ...rt the M4 30 pan head screws through the mounting holes in the mounting bracket and the holes in the ceiling Fasten washers and nuts at the other side of the ceiling to attach the mounting bracket to...

Page 17: ...onnecting the AP to the power supply You can power the AP with local power or by using PoE Check before power on Check the following items before powering on the AP The power supply is reliably ground...

Page 18: ...ower cord are user supplied Table 2 AC DC adapter specifications Item Specification Input 100 VAC to 240 VAC Output 48V at 0 52 A You can power the AP by using an AC DC adapter Use the AC DC adapter t...

Page 19: ...display wlan ap all command on the AC that connects to the fit AP If the AP status is R M the AP is connected to the network AC display wlan ap all Total Number of APs configured 1 Total Number of con...

Page 20: ...AP first Logging in through the console port Prepare the following items before logging in through the console port An 8 core console cable with a crimped RJ 45 connector at one end and a DB 9 connect...

Page 21: ...nnection Description dialog box that appears type the name of the new connection in the Name text box and click OK Figure 18 Connection description 3 Select the serial port to be used from the Connect...

Page 22: ...Click OK and the system displays the HyperTerminal window Figure 21 HyperTerminal window Logging in through the console port Power on the AP and you can see the following information System is startin...

Page 23: ...following default login information Username admin Password h3capadmin IP address of VLAN interface 1 of the AP 192 168 0 50 with subnet mask 255 255 255 0 If the default IP address is changed perform...

Page 24: ...d up but no client is connected to the AP If the AP acts as a fit AP the LED status means that the AP has registered successfully on the AC Flashing 1 Hz Clients exist on the 5G radio interface Flashi...

Page 25: ...02 3 IEEE802 3u IEEE802 3af The Ethernet port can act as an uplink interface to access the Internet or MAN and as a PoE port at the same time It is represented by interface GE1 0 1 DC 48V N A The port...

Page 26: ...network 13 PoE power supply 1 1 power supply 1 1 console connecting cable 14 D data bits parameter 15 determining installation position 6 E electrical connecting console cable 14 connecting local powe...

Page 27: ...necting power supply 1 1 installing AP 5 6 installing the AP on a ceiling 9 mounting the AP on a wall 6 verifying network connection for the fat AP 13 verifying network connection for the fit AP 13 pr...

Reviews: