8
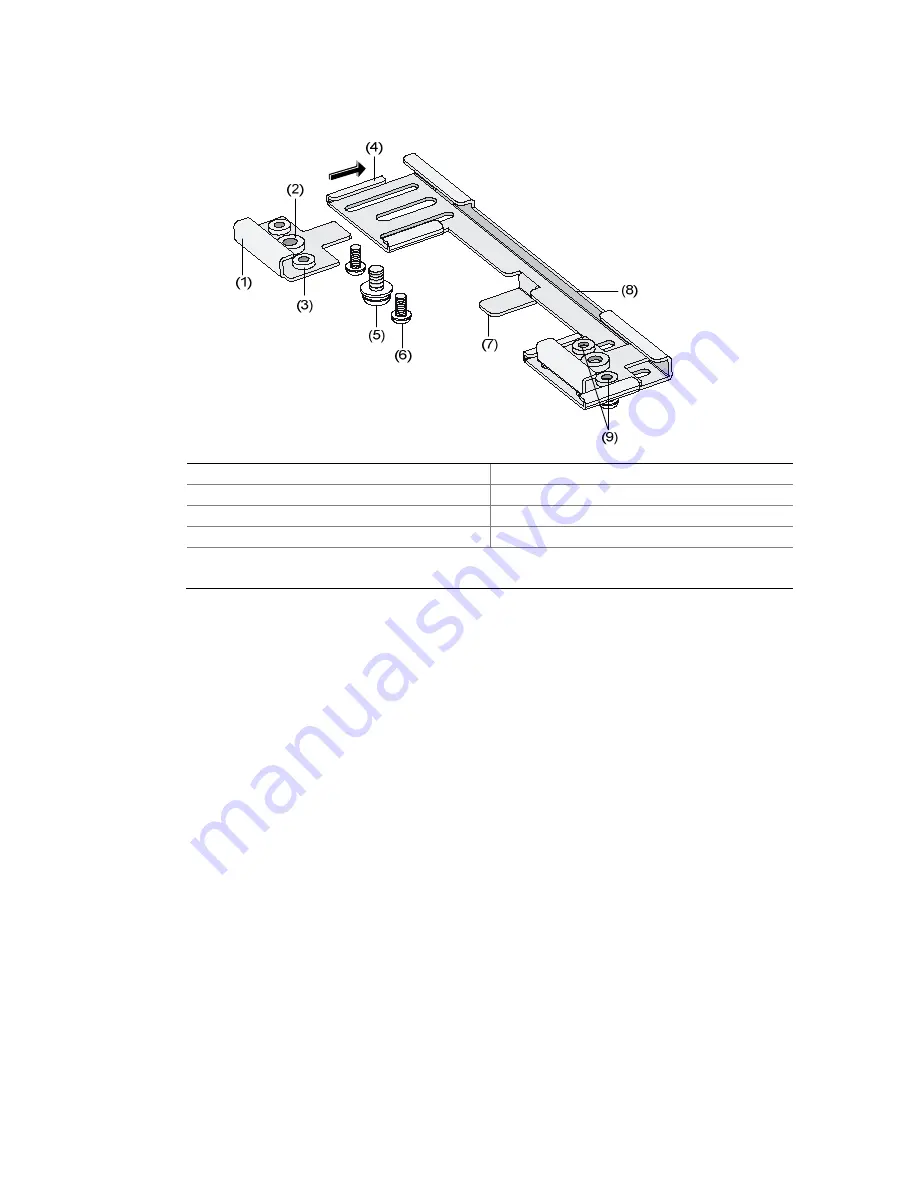
Figure7
T-rail holder
(1) T-rail clip
(2) M4×8 screw nut
(3) M3×6 screw nut
(4) Clip holder
(5) M4×8 screw
(6) M3×6 screw
(7) Mounting hook
(8) T-rail holder
(9) Before installing to the T-rail, loosen the screw nuts until the screw heads
are lower than the upper edge of the nuts.
Step3
Tighten the M3 × 6 screws on the two clip holders until the screw heads touch
the T-rail, and then fix the screws.
Step4
Check that the T-rail holder is fixed to the T-rail.
Step5
Hook the mounting clip of the wall-mounting bracket to the mounting hook of
the T-rail holder, as shown Figure8.
Step6
Insert the two M4 × 8 screws through the two holes (with a diameter of 5 mm,
or 0.20 in) on the wall-mounting bracket according to the dashed line shown in
Figure8 and fix the screws to the T-rail holder.
Step7
Check that the wall-mounting bracket is fixed to the T-rail.
Step8
Install the WA2612-AGN to the wall-mounting bracket. For details, refer to
Installing the AP on the wall-mounting bracket.


