


Page 10
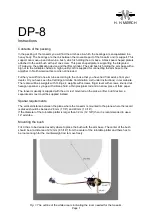
Coarse adjustment can be done with the stylus running between the grooves next to the label of the
record:
Without starting the turntable motor, place the stylus between these grooves. Then move the turntable
platter slowly forwards with your hand. The stylus should move inwards slowly. Then move the
turntable slowly a little backwards. The Stylus should move outwards.
Correct antiskating is when you move the turntable forwards and the stylus moves inwards with such
a slow speed, that it will stay between the grooves until it gets to the center groove.
Fine adjustment could be done by reducing the tracking force a little whilst listening to a critical
passage. If for instance distortion occurs in the right speaker, the handle should be turned clockwise.
(The best result is obtained with a test record). The adjustment is not critical. It is better giving too litte
than too much antiskating force.
The range that the antiskating handle A can move, will cover most cartridges.
If the handle A is turned in the direction of the arrow the antiskating will increase - and decrease if it is
turned the opposite way. If the handle cannot be turned enough to get more antiskating or to get less
antiskating the disc under the screw B should be adjusted. Hold it with two fingers of the left hand,
while the screw B is loosened with a not too small screwdriver, and the disc is turned ½ revolution or
more either in the direction of the arrow if more antiskating force is desired or in the opposite direction.
Then the screw should be tightened again. The antiskating then can be adjusted with the handle A in
a range with more or less antiskating than before.
Please note that the stability of the horizontal mode of motion is obtained as a co function between
the heavy sideweights and the excessive damping in the horizontal plane.
If the armtube is
moved horizontally in and out with a hand, there will be resistance to feel
against the movement. Only if the armtube is moved very slowly there will be
no resistance.
Special about PRECISION arm tubes
PRECISION arm tubes are supplied in "red" and "blue" versions only. They have a wide and very
precisely ground mounting plane to assure a good mechanical contact to cartridges that have a
similar large and accurate mounting plane. The PRECISION armtubes are 4 mm (5/32
”) longer than
the NARROW ones in the forward direction.
Special about 12” armtubes
12” arm tubes are supplied in "red" and "blue" versions only. They are supplied only with the narrow
headshell.
In the section
Mounting the bush
it is described how the position of the 20 mm (13/16
”) hole is found.
For 12” armtubes the distance from the center of this hole to the center of the turntable patter should
be
294.1 mm
(11 9/16
”).
If the bush is mounted at above distance from the center of the turntable platter, the stylus should be
positioned a little behind the front edge of the black plane of the arm tube. After mounting check that
the overhang -
13.3 mm
(17/32
”) - is correct and adjust if necessary.
With 12” armtubes more counterweights should be used than with 9” armtubes. With the heaviest 12”
armtube
“blue” usually all the weights should be on the counterweight rod. If even the cartridge is
heavy, the weights should be put on in opposite sequence, so that the large counterweight is at the
end of the counterweight rod.
The sound image most likely will be the best, if the counterweights are adjusted with the center of
gravity above the counterweight rod.


