background image

OPERATING INSTRUCTIONS

10

EXCAVATION PROCEDURES

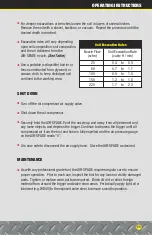
For most excavations the best performance is achieved by holding the AIR-SPADE
nozzle at approximately a 45 degree angle from horizontal and about 1 inch away
from the surface to be excavated.

Depending on the soil type, the AIR-SPADE should be directed above the surface
to be excavated at a rate of approximately 1 to 2 feet per second
(0.3 to 0.6 meters per second).

Except in very hard and compacted clays, dwelling on the same spot tends to reduce
the rate at which material is excavated and can increase the amount of material
blown away from the excavation site.

Watering the work area ahead of time can often be helpful. Watering reduces
airborne dust if the soil is extremely dry. It also reduces the soil strength making
digging easier.

For small diameter holes, position the AIR-SPADE barrel perpendicular to the ground
with the nozzle close to the surface. Depress the trigger, and slowly thrust the tool into
the soil. When resistance is met, slowly withdraw the AIR-SPADE and then reinsert.
This procedure allows loose soil at the bottom of the hole to exit upwards. Reinsert
the nozzle and repeat the above procedure until the desired depth of hole is reached.

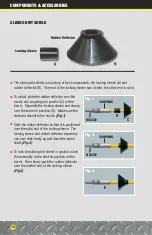
When boring a small diameter hole, or when plunging the AIR-SPADE into loose soil,
the tendency to expose the operator to blown back material is increased. The ad-
justable dirt shield should be positioned close to the ground to deflect airborne
material away from the operator.

For large diameter holes, position the AIR-SPADE at an angle between 30° and 45°
from the horizontal. Depress the trigger and move the AIR-SPADE back and forth
across the footprint of the excavation to loosen the soil to a depth of several inches.
Each layer of loose soil should then be removed with a shovel, backhoe, or vacuum.
Repeat the procedure until the desired depth is reached.

For shallow, wide excavations, position the AIR-SPADE at an angle between 30° and
45° from the horizontal. Depress the trigger, move the nozzle from side to side the
desired width, and blow the loosened soil ahead of the nozzle. Continue until the
excavation is completed to the required length.

Summary of Contents for AIR-SPADE 2000 Series

Page 1: ...A DIVISION OF SERIES 2000 OPERATOR S MANUAL ...

Page 2: ...nstructions 8 Operating Instructions 9 11 Components Accessories 12 14 Parts Disassembly and Reassembly 15 16 Products Parts Accessories List 17 Limited Warranty 18 AIR SPADE is a registered trademark of Guardair Corporation Always wear eye and ear protection when operating air tools and related equipment ...

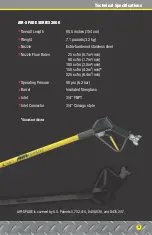
Page 3: ...dened stainless steel Nozzle Flow Rates 25 scfm 0 7m3 min 60 scfm 1 7m3 min 105 scfm 3 0m3 min 150 scfm 4 2m3 min 225 scfm 6 4m3 min Operating Presure 90 psi 6 2 bar Barrel Insulated fiberglass Inlet 3 4 FNPT Inlet Connector 3 4 Chicago style Standard Model AIR SPADE is covered by U S Patents 5 782 414 D408 830 and D435 207 ...

Page 4: ...zzle which produces a focused laser like jet of air moving at approximately 1 200 mph 1 900 km hr or nearly twice the speed of sound This supersonic air jet penetrates voids in the soil and expands rapidly therefore fracturing the soil Unlike the hard cutting edges of shovels picks blades or buckets the air jet is harmless to non porous items such as tree roots buried pipes or cables Excavating wi...

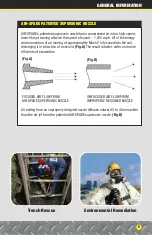
Page 5: ... of sound 1 200 mph All of the energy and momentum of air moving at approximately Mach 2 is focused into the soil dislodging it in a fraction of a second Fig A The result is faster safer and more efficient soil excavation Air exiting from an improperly designed nozzle diffuses outward 3 to 4 times wider than the air jet from the patented AIR SPADE supersonic nozzle Fig B 5 Trench Rescue Environmen...

Page 6: ...re aware that AIR SPADE is being used and that they wear appropriate personal protection as indicated Protect surfaces that could be chipped or damaged by dislodged soil or rock particles adjacent to the excavation work area by using suitable drop cloths screens or other means Check the AIR SPADE for loose or damaged parts prior to use Tighten repair and or replace as necessary Inspect hoses for l...

Page 7: ...lly understood Make any modifications to the AIR SPADE Tie tape or otherwise lock or fasten the trigger in the ON position Point or aim the AIR SPADE at any person during operation Allow hands feet or any body parts near the AIR SPADE nozzle tip during operation Use the AIR SPADE as a pry bar DO NOT 7 ...

Page 8: ...of the air compressor to which the tool is attached NOZZLE BARREL B A HANDLE Read and follow the directions below to properly assembly the AIR SPADE Apply a small amount of commercial grade anti seize compound on the barrel threads A B to prevent galling Screw the nozzle into the barrel by turning clockwise Hand tighten only Screw the barrel into the handle by turning clockwise Hand tighten only A...

Page 9: ...press the trigger Read the air compressor pressure gauge and the pressure gauge on the tool During operation the air pressure gauge on the tool should read between 80 and 100 psig 5 5 and 6 9 bar If not adjust the output pressure of the air compressor Match the air compressor size to the AIR SPADE nozzle on the tool To properly size the air compressor make sure the air compressor flow rate is equa...

Page 10: ...esistance is met slowly withdraw the AIR SPADE and then reinsert This procedure allows loose soil at the bottom of the hole to exit upwards Reinsert the nozzle and repeat the above procedure until the desired depth of hole is reached When boring a small diameter hole or when plunging the AIR SPADE into loose soil the tendency to expose the operator to blown back material is increased The ad justab...

Page 11: ...and depress the trigger Continue to depress the trigger until all compressed air from the tool and hose is fully expelled and the air pressure gauge on the AIR SPADE reads 0 It is now safe to disconnect the air supply hose Store the AIR SPADE as desired MAINTENANCE As with any professional grade tool the AIR SPADE requires regular care to ensure proper operation Prior to each use inspect the tool ...

Page 12: ...ter than normal connection a spanner wrench may used on the barrel if necessary Before re installing the barrel into the handle remove any dirt or foreign material from the threads and o ring and apply a small amount of anti seize compound on the threads to prevent galling Screw the barrel into the handle by turning clockwise Hand tighten only Extensions provide the ability to extend the reach of ...

Page 13: ... Screw the 45º adapter assembly onto the barrel via the coupler Hand tighten only Screw the nozzle onto the other end of the 45º adapter Hand tighten only To lock the adapter into position shoulder the locking ring against the coupler CAUTION When using the 45º adapter compressed air exiting the nozzle will force the tip of the tool away from the direction the nozzle is aimed To prevent this from ...

Page 14: ...e barrel in position D Make sure the slots are closest to the nozzle Fig 1 Slide the rubber deflector so that it is positioned over the solid end of the locking sleeve The locking sleeve and rubber deflector assembly can now slide freely up and down the barrel shaft Fig 2 To lock the sliding dirt shield in position slide the assembly to the desired position on the barrel Then firmly push the rubbe...

Page 15: ...udes Trigger Sleeve Trigger Guard 2 Botton Screws Handle Handle Extension Handle Cover Valve Cap Valve Seal Valve Stem Pressure Gauge Lanyard Safety Clip Grip Inlet Connector Trigger Valve Spring Valve Spring Valve Seal Valve Stem Pressure Gauge Lanyard Safety Clip Grip Trigger Sleeve 2 Button Screws Lubricant ...

Page 16: ...thread into the handle until flush Slide the existing handle cover back in place Remove the plastic snap on handle cover Carefully snug the AIR SPADE handle casting in a vise Unscrew the inlet connector by turning it counter clockwise Exercise caution not to unscrew the handle extension from the handle casting Before re installing the connector wrap the treads of the handle extension with Teflon t...

Page 17: ...ITH COUPLER HT122 AIR SPADE 2000 2 FT EXTENSION WITH COUPLER HT123 AIR SPADE 2000 150 SCFM NOZZLE HT125 AIR SPADE 2000 60 SCFM NOZZLE HT126 AIR SPADE 2000 25 SCFM NOZZLE HT127 AIR SPADE 2000 225 SCFM NOZZLE HT129 AIR SPADE 2000 150 SCFM NOZZLE WITH 40 BARREL HT130 AIR SPADE 2000 150 SCFM NOZZLE WITH 4 FT BARREL HT131 AIR SPADE 2000 150 SCFM NOZZLE WITH 3 FT BARREL HT132 AIR SPACE 2000 STORAGE CASE...

Page 18: ...rranty period begins at the date of shipment of the tool from GUARDAIR or from GUARDAIR S authorized distributor This warranty shall not be in effect if the tool is subject to misuse negligence or accident or if it is configured or used in any manner inconsistent with the directions set forth in this operator s manual Wear and tear from normal use is not covered under this warranty Any and all cla...

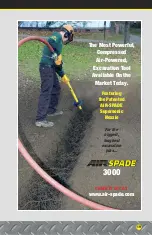
Page 19: ...Most Powerful Compressed Air Powered Excavation Tool Available On the Market Today CHECK IT OUT AT www air spade com Featuring the Patented AIR SPADE Supersonic Nozzle For the biggest toughest excavation jobs 19 ...

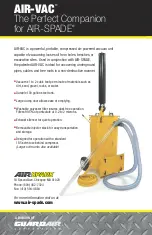
Page 20: ...copee MA 01020 Phone 800 482 7324 Fax 413 594 4884 For more information visit us at www air spade com Vacuums 1 to 2 cubic feet per minute of materials such as dirt sand gravel rocks or water Durable 100 gallon steel tank Large dump door allows ease of emptying Washable polyester filter insures dust free operation Filters 99 5 of particulate at 0 2 to 2 microns Exhaust silencer for quiet operation...

Reviews: