background image


Installation of the camera control software (GXCapture) 

Follow the steps below to install the GXCapture camera control software: 


1.


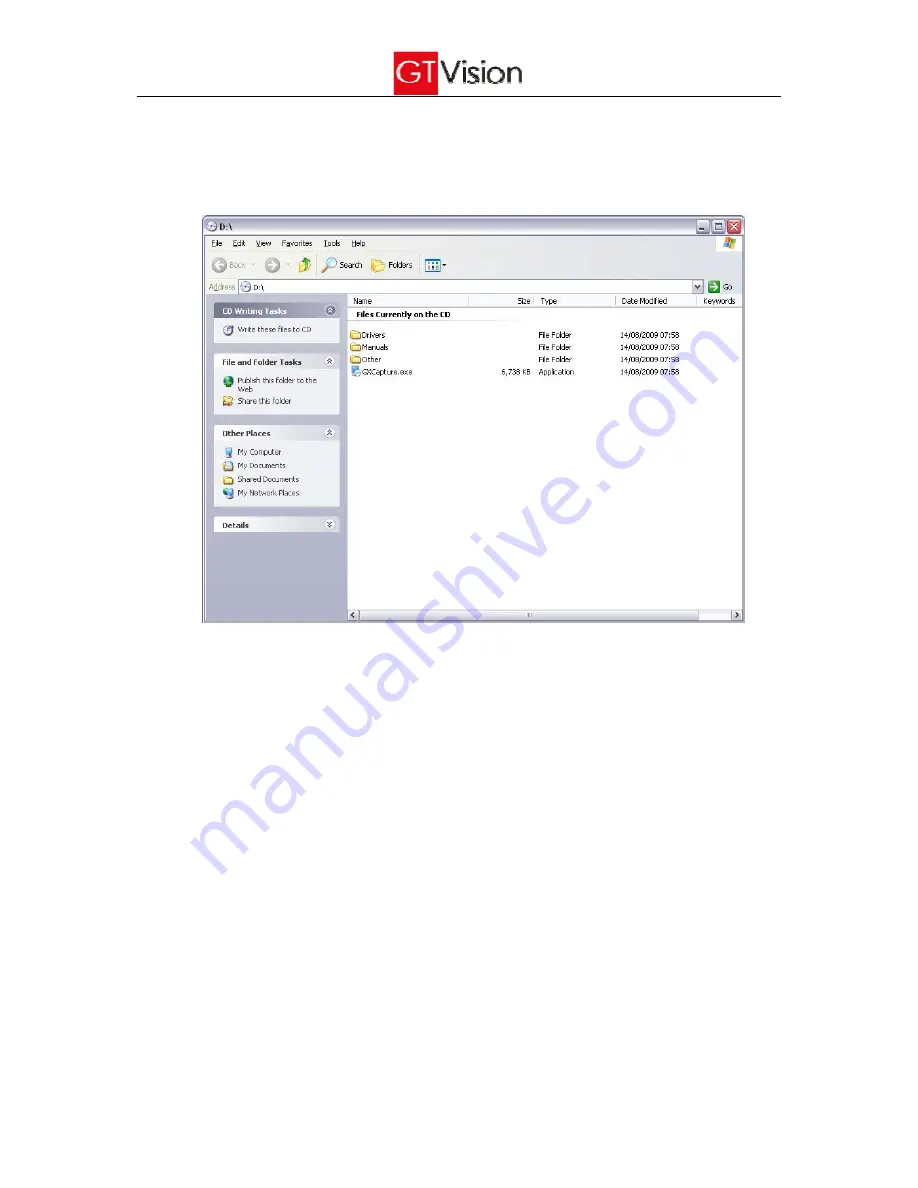
Use Windows Explorer to display the contents of the installation CD 


2.


  Double click the file ‘GXCapture.exe’ to run the GXCAPTURE software installation. 

3.


Click ‘Next’ in the welcome window   

4.


When the installation is completed, click ‘Finish’ 

5.


Find ‘GXCAPTURE’ shortcut in the Windows start menu and click ‘GXCAPTURE’ to run the GXCAPTURE 

software. 


Summary of Contents for GXCAM

Page 1: ...UK Tel 44 0 1440 714737 Fax 44 0 1440 709421 e mail eurosales gt vision com Web www gt vision com www gxoptical com www gxmicroscopes com N America HQ 10205 Easterday Court Hagerstown MD 21742 USA Te...

Page 2: ...r processor for use with Microsoft Windows XP GXCAM Camera A fully powered USB2 port 512MB RAM High quality modern Graphics Card Windows XP or 2000 or Vista HDD 1G unused Display memory 32MB Large goo...

Page 3: ...threaded fittings will definitely land on the chip surface and especially in microscopes these will be permanently visible in your images They can be extremely difficult to remove We recommend that yo...

Page 4: ...ld automatically detect the camera 6 In the driver installation window it is best to select the location of the driver yourself and point the driver installation to your CD drive and then to the Drive...

Page 5: ...sh 9 If the Operating System cannot detect the camera automatically open the Device manager from the Windows Control Panel in the Universal Serial Bus controllers term find USB2 0 Camera and right cli...

Page 6: ...Windows Explorer to display the contents of the installation CD 2 Double click the file GXCapture exe to run the GXCAPTURE software installation 3 Click Next in the welcome window 4 When the installa...

Page 7: ...menu 2 In the File Menu click on the Capture Tab the capture panel will be shown on the right hand side of the window The interface of GXCAPTURE is shown as follows 3 If your camera is still connecte...

Page 8: ...not installed USB port then this will appear 5 You can freeze the image by pressing the STOP Preview Button When the live preview is stopped you can select the resolution of the previewed image from t...

Page 9: ...ton This will open a range of live camera adjustment functions Exactly what is displayed is camera specifi here is a typical non cooled GXCAM set of controls 7 While in Live Preview mode you can set u...

Page 10: ...9 9 Click Stop Preview button to freeze the image or click the Capture button to capture the image into temporary memory...

Page 11: ...0 10 After pressing the Capture button the image is displayed in the Capture Picture Preview section 11 If you have captured a number of images you can scroll between them by pressing the arrow button...

Page 12: ...ween the ImageProcess and Capture Windows by pressing the tabs 14 The Image Process Tab provides a very wide range of functions for manipulating annotating and storing the image When an image first ap...

Page 13: ...measurements a you first need to capture and store an image of a calibration scale such as a stage graticule for each magnification you intend to use So for instance you will have an image stored of...

Page 14: ...13 d Repeat this procedure for each magnification e The calibrations can be selected from the menu Measure Calibration Table 17 Other functions can be accessed from the menus and toolbars...

Reviews: