background image

7

ENGLISH

Dear Customer,
Congratulations on the purchase of your new 

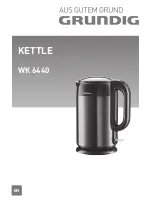
GRUNDIG kettle WK 6440.
Read the following user notes carefully to ensure 

full  enjoyment  of  your  quality  Grundig  product 

for many years to come.

A­responsible­approach!

GRUNDIG focuses on contractu-

ally agreed social working condi-

tions with fair wages for both 

internal employees and suppliers. 

We also attach great importance 

to the efficient use of raw materi-

als with continuous waste reduction of several 

tonnes of plastic every year. Furthermore, all our 

accessories are available for at least 5 years.
For a future worth living. 

For a good reason. Grundig.

Controls­and­parts­

See the figure on page 3. 

A

  Spout

B

  Lid

C

  Lid release button

D

  Handle

E

  On/Off switch 

F

  Base 

G

  Cable coil  

AT­A­GLANCE­_____________________________

Summary of Contents for WK 6440

Page 1: ...KETTLE WK 6440 EN...

Page 2: ......

Page 3: ...3 ______________________________________________ A G B F C E D...

Page 4: ...inflam mable places and materials 7 7 Do not use the appliance out doors or in the bathroom 7 7 Check if the mains voltage on the rating label corresponds to your local mains supply The only way to d...

Page 5: ...he appliance for the first time clean all parts which come into contact with water carefully Please see full details in the Cleaning and Care section 7 7 Dry the appliance before con necting it to the...

Page 6: ...ch a way that the plug is always accessible 7 7 There is a danger of burns Avoid contact with hot sur faces as well as with the emit ting steam 7 7 Position the lid so that the hot steam is directed a...

Page 7: ...i tions with fair wages for both internal employees and suppliers We also attach great importance to the efficient use of raw materi als with continuous waste reduction of several tonnes of plastic ev...

Page 8: ...at it is sitting in an upright and stable posi tion 5 Insert the plug into the wall socket 6 Press down On Off switch E On Off switch E illuminates and the boil ing process begins Note 7 7 The lid C s...

Page 9: ...in the kettle for a few hours 6 Pour out the solution and rinse the inside thor oughly 7 Fill the kettle with clean water and boil the water 8 Empty the kettle and rinse it with water again Notes 7 7...

Page 10: ...electronic equipment This is indicated by this symbol on the pro duct in the operating manual and on the packaging Please consult your local authorities to find out where the nearest collection point...

Page 11: ...Grundig Intermedia GmbH Beuthener Strasse 41 D 90471 N rnberg www grundig com 72011 908 62 00 14 48...

Reviews: