background image

10

SETTINGS

______________________________________________________________________________

Programming TV channels

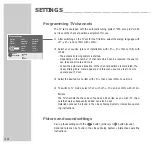
The TV set is equipped with the automatic tuning system “ATS euro plus” which
carries out the channel position assignment for you.

1

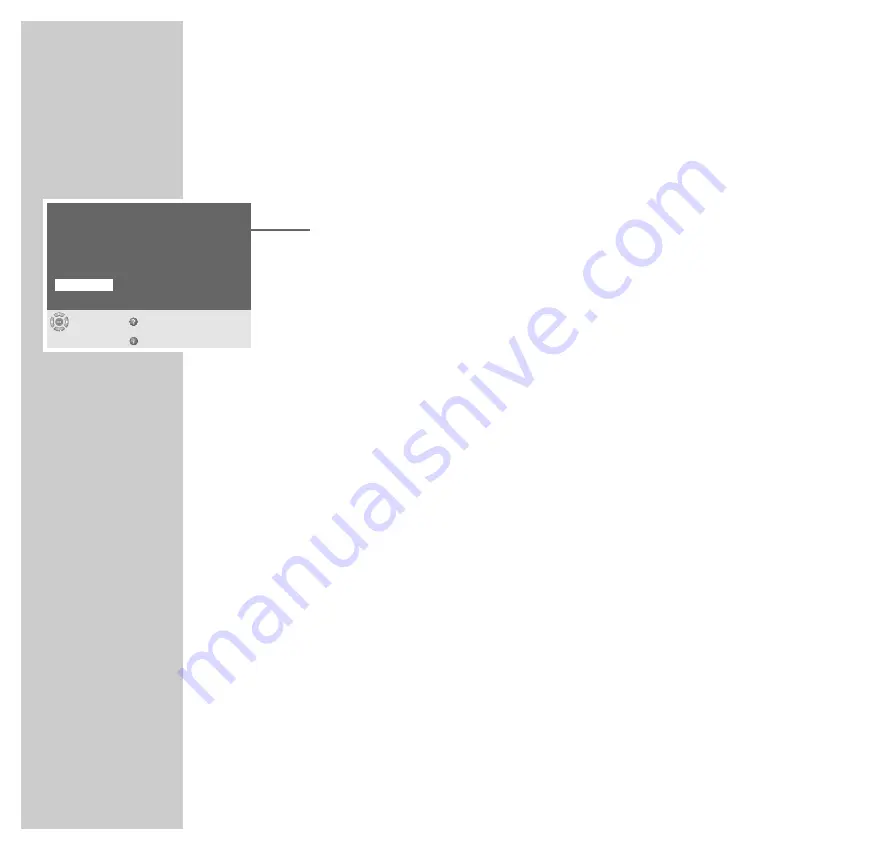
After switching on the TV set for the first time, select the dialog language with
»

P +

P -

« and confirm with »

OK

«.

2

Select your country (place of installation) with »

P +

P -

« then confirm with

»

OK

«.

– The automatic tuning system is started. 
– Depending on the number of channels which can be received, the search

can take one minute and more.

– When the automatic allocation of the channel positions is completed, the

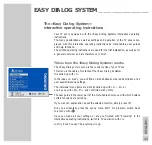
»Easy Dialog tips« menu appears. Via this menu you may learn how to
operate your TV set.

3

Select the desired menu item with »

P -

« then press »

OK

« to call it up.

4

To switch to TV mode, select »TV« with »

P +

P -

« and confirm with »

OK

«.

Note: 

The TV channels that have been found can be sorted as you wish. TV chan-
nels that were subsequently added can also be set. 
Detailed notes can be found in the » Easy Dialog System « interactive operat-
ing instructions.

Picture and sound settings

Call up these settings with the »

z

z

« button (picture) or »

F

F

« button (sound).

Detailed notes can be found in the » Easy Dialog System « interactive operating
instructions.

Menu Language

Select
and confirm

Help

Exit

Deutsch

Dansk

Español

Français

English

Italiano

Norsk

Slovensky

Nederlands

Português

Svenska

Suomi

âesky

Slovensko

Magyar

Polski

Türkçe

Български

Summary of Contents for THARUS 51

Page 1: ...COLOR TELEVISION THARUS 51 LCD 51 9310 DOLBY ǵ ENGLISH 22296 941 0400 ...

Page 2: ...ontrol TV mode The remote control teletext mode 8 Connection and preparation Putting batteries into the remote control 10 Settings Programming TV channels Picture and sound settings 11 Easy Dialog System The Easy Dialog System interactive operating instructions 12 Additional functions Zapp Function Alphanumeric channel selection 14 Adjusting the tilt angle 15 Mounting on the wall 17 Customer infor...

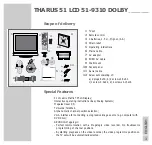
Page 3: ...t communication with a Megalogic video recorder No troublesome programming of channel positions By starting playpack on the video recorder the video programme position on the TV set will be automatically selected 01 TV set 02 Remote control 03 2 batteries 1 5 V Mignon AA 04 Strain relief 05 Operating instructions 06 Mains cable 07 AV adapter 08 EURO AV cable 09 Wall mount 10 Socket panel 11 Aerial...

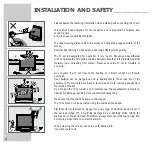
Page 4: ... to the heating or in direct sunlight as it could overheat Heat buildup can be dangerous and is detrimental to the service life of the equipment From time to time have a technician come to remove deposits from the inside of the set Do not open the TV set under any circumstances The manufacturer accepts no liability for damage resulting from unauthorised tampering Make sure that the mains cable is ...

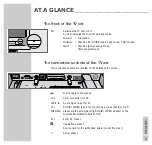
Page 5: ...d The connection sockets of the TV set The connection sockets are located on the bottom of the screen ʋ ʋ Mains cable to the socket VGA VGA connection for PC AUDIO IN Audio signal input for PC AV 2 AUDIO VIDEO jack 2 for connecting a video recorder DVD WIRELESS player via the accompanying AUDIO VIDEO adapter or the wireless transmitter module WT AV AV 1 Euro AV socket y y Headphone socket Service ...

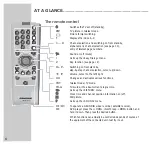
Page 6: ...Switching on from standby step by step channel selection cursor up down Ǹ Ƿ Volume cursor to the left right OK Changes and activates various functions TXT Teletext mode TV mode TV G TV Guide info about current programme z z Calls up the PICTURE menu Ȅ Ȅ Clock time and channel position information on off Ƿ Ƿ Still picture F F Calls up the SOUND menu VCR SAT To operate a GRUNDIG video recorder satel...

Page 7: ...es Set the subpages function in the VT Settings menu to Ja OK Direct call up of the Stop Present mode or Press reveal fun ction if the corresponding function is switched on in the VT Settings menu TXT Teletext mode ɫ Television TV mode TV G Direct selection of the Press reveal function z z red Page back Ȅ Ȅ green Page forward yellow Select next chapter F F blue Select next topic Notes In the VT Se...

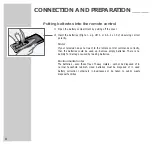
Page 8: ...television does not react to the remote control commands correctly then the batteries could be used up Remove empty batteries There is no liability for damage caused by leaking batteries Environmental note The batteries even those free of heavy metals cannot be disposed of in normal household rubbish Used batteries must be disposed of in used battery collection containers in businesses or be taken...

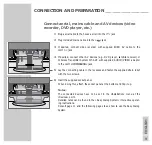
Page 9: ... AV2 with supplied AUDIO VIDEO adapter to the AV 2 WIRELESS jack 5 Lay the connecting cable in the recesses and fasten the supplied strain relief with the two screws 6 Insert the supplied socket panel When doing this attach the socket panel at the bottom and flip it up Notes The connected devices have to be set in the Installation menu at the Devices point Detailed notes can be found in the Easy D...

Page 10: ... completed the Easy Dialog tips menu appears Via this menu you may learn how to operate your TV set 3 Select the desired menu item with P then press OK to call it up 4 To switch to TV mode select TV with P P and confirm with OK Note The TV channels that have been found can be sorted as you wish TV chan nels that were subsequently added can also be set Detailed notes can be found in the Easy Dialog...

Page 11: ... menu is the control centre of your TV set This menu is the table of contents of the Easy Dialog Systems It is called up with i In the index A bis Z you will find an alphabetically ordered description of all user possibilities and settings The individual menu items are directly called up with 1 0 or one by one with P P and confirmed with OK The user guide in the lower part of the menu table shows ...

Page 12: ... wish to store in the zap memory e g channel position 7 PRO7 then press Z to store it On the picture screen appears for example Z 7 PRO7 2 Using 1 0 or P P you now may switch to another channel position 3 By pressing Z you may switch at any time to the stored channel position PRO7 in the example and switch back zap to the last viewed channel 4 Press i to end the zap function The on screen display ...

Page 13: ...se P P to select the desired channel in the list then press OK to call it up Note Three methods are possible for selecting a channel position 1 Letter entry off The channels are only selected by entering digits 2 Letter entry on The channels are only selected by entering alphanumeric characters 3 Mix When entering a digit the TV set switches automatically to the corresponding channel position and ...

Page 14: ... Ǹ or Ƿ 4 End setting with i Mechanically adjusting the tilt angle If the electronic adjustment of the tilt angle was not sufficient you can also adjust it mechanically Use the two different positions available in the foot of the TV set 1 Remove the foot of the TV set Loosen the 2 screws on the bottom of the foot 2 Insert both screws into the holes of the desired position and attach it again to th...

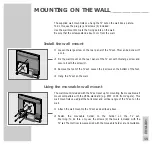
Page 15: ...foot of the TV set Loosen the 4 screws on the bottom of the foot 4 Hang the TV set on the wall Using the moveable wall mount The wall mount included with the TV set is set up for mounting the moveable wall mount compatible with the VESA standard e g EFW 1005 from Vogel s This wall mount lets you adjust the horizontal and vertical angle of the TV set on the wall 1 Attach the wall mount to the TV se...

Page 16: ...the sound module by pulling down Note If the TV set is going to be used without the sound module the U jack must be connected to the audio input plug of the stereo amplifier or to active spea kers Whether you use a stereo amplifier or active speakers be sure this choice is set in Audio output in the audio menu press F F Detailed information can be found in the interactive operating instructions Ea...

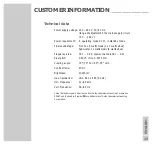
Page 17: ...sic 2 x 3 watts sinus Subwoofer 12 watts music 8 watts sinus Frequency area C01 C99 special channels S01 S41 Pixel pitch 0 6375 mm x 0 6375 mm Viewing angle 70 70 hor 65 55 vert Contrast ratio 400 1 Brightness 400cd m2 max liquidation VGA 640 x 480 60 Hz Hor Frequency 31 69 kHz Vert Frequency 56 85 Hz Virtual Dolby Surround Under license from Dolby Laboratories Licensing Corporation DOLBY and the ...

Page 18: ...3 audio output left 14 audio ground 15 blue ground 16 audio input left 17 RGB blue input 18 switching voltage 19 green ground 10 data line MEGALOGIC 11 RGB green input 12 13 red ground 14 ground 15 RGB red input S Video chroma 16 RGB switching voltage 17 video ground 18 RGB switching voltage ground 19 video output 20 video input S Video luminance 21 shielding ground ...

Page 19: ...of the appliance approval For repla cement purposes please order only the mains cable set with the part number 8290 991 427 from an approved after sales service The product meets the requirements of the following EU guidelines 73 23 EEC guideline on electrical equipment for use with certain voltage limits 89 336 EEC guideline on electromagnetic compatibility The appliance complies with the standar...

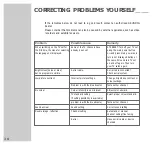
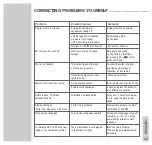
Page 20: ...layed button at the same time and turn TV set on and off again Then turn your TV seton again Bright screen noise or blue Aerial cable Aerial cable connected but no programme visible Check aerial system Low picture contrast Incorrect picture settings Change brightness contrast or colour settings Problem is with the broadcaster Test another channel No colour Colour intensity is on minimum Adjust col...

Page 21: ...mage or reflection or fine tuning transmission signal too weak Check aerial system picture noisy Remote control does not work No optical connection Point remote control at the TV set Remote control batteries Check or replace the batteries pay attention to polarity Picture is dark TV set has undefined operating status Turn your TV set off for approx switched itself off 2 min using the main power bu...

Page 22: ... ensure that the fuse is removed befo re disposal to eliminate potential shock hazard If it is necessary to change the fuse in the non rewireable plug the correct type and rating 5A ASTA or BSI approved BS1362 must be used and the fuse cover must be refitted If the fuse cover is lost or damaged the lead and plug must not be used until a replacement is obtained Replacement fuse covers should be obt...

Page 23: ......

Page 24: ...Grundig AG Beuthener Str 41 D 90471 Nürnberg http www grundig com ...

Reviews: