79
ENGLISH
WIRELESS SCREEN SHARE (LIVESHARE)
---------------------------
What is LIVESHARE?
7
Liveshare is a wireless technology featured
with Android operating system and used to
reflect the screen of your mobile device which
supports this feature to your television support-
ing Liveshare. By using this technology you
can share your device’s content, present a
slide show or play your favorite game on a
larger screen.
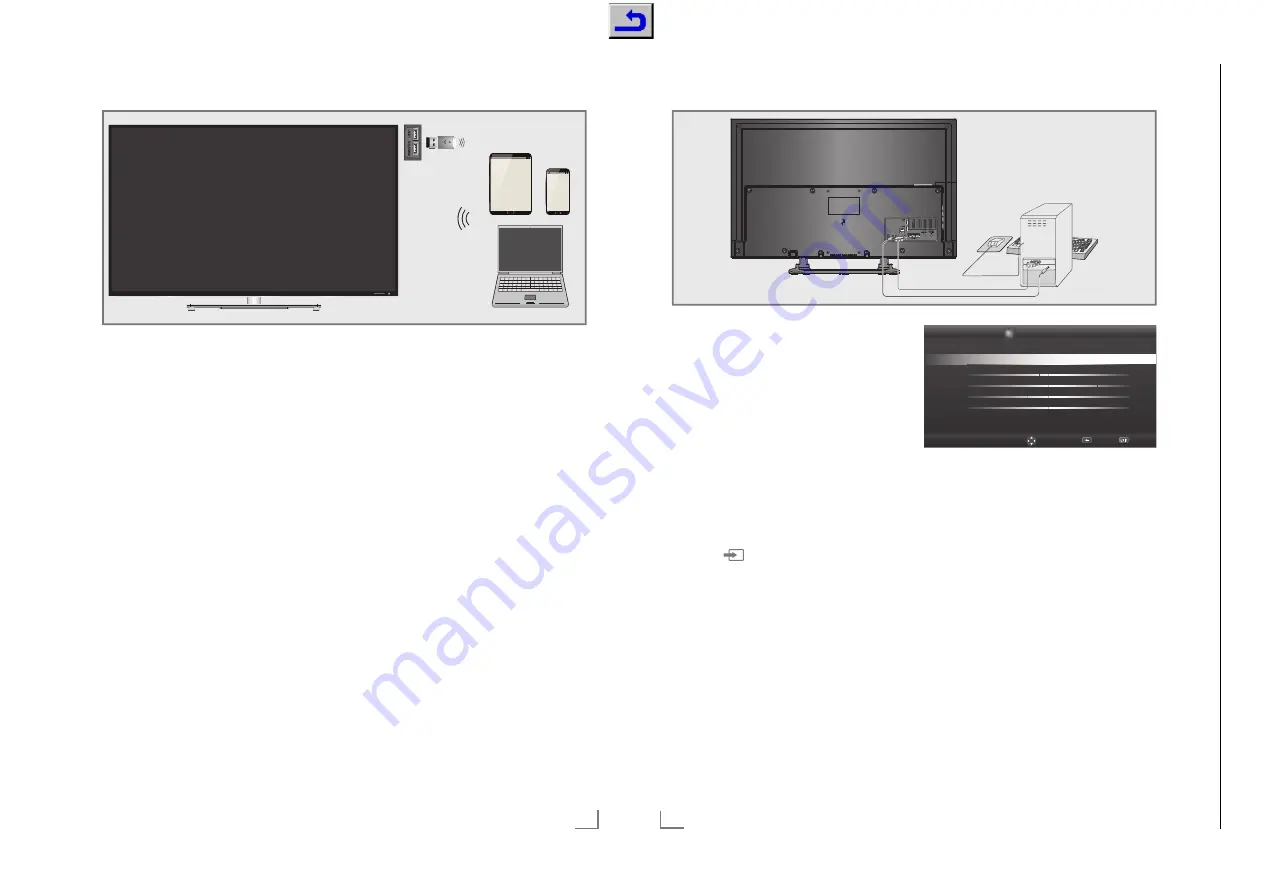
Screen share with Liveshare con-
nection
1
Connect Grundig WiFi USB dongle to the
»
USB1
« or »
USB2(HDD)
« socket of your
television in order to connect the television
to a wireless network.
2
Open the menu with »
MENU
«.
3
Select the menu item »Screen Share« with
»
>
« or »
<
« and press »
OK
« to confirm.
– »Liveshare« menu is displayed.
4
Start Liveshare application from your laptop
PC or mobile device and select your televi-
sion.
– Liveshare will begin in a short while and
the screen image of your laptop PC or
mobile device will be reflected on the
television.
5
Press
»
EXIT
« to end Liveshare.
Note:
7
To find out if your laptop PC or mobile device
supports Liveshare feature or not, please visit
the Website of the manufacturer.
ENGLISH
80
Connecting a PC
1
Connect the socket »PC-IN« on the television
to the corresponding socket on the PC using
a VGA cable.
2
Connect the »Audio« socket on the televi-
sion to the corresponding socket on the PC
using a suitable cable.
Note:
7
Adjust your PC to the monitor (for example,
picture resolution 1280 x 768, picture fre-
quency 60 Hz).
Selecting the channel position
for the PC
1
Press
»
« and use »
<
« or »
>
« to select
input signal »PC«, then confirm with »
OK
«.
Settings for the PC
1
Open the menu with »
MENU
«.
2
Activate the menu item »Settings« with
»
OK
«.
3
Select the menu item »Source Setup« with
»
>
« or »
<
« and press »
OK
« to confirm.
– »Source Setup« menu is displayed.
PC MONITOR MODE
----------------------------------------------------------------------------------
Source Setup
Sound Settings
Parental Guidance
Back
Exi
t
Ch
ang
e Area
Auto Adjust
Auto Adjust Mode
Off
Position
0H-0V
Size
0
Phase
0
4
Select the function and setting you want
using »
V
« or »
Λ
« and set with »
<
« or »
>
«.
Options:
– »Auto Adjust«, for automatic PC configura-
tion;
– »Auto Adjust Mode«, when set to »On«,
automatically makes adjustments in PC
mode;
– »Position«, adjusts the picture position
horizontally and vertically;
– »Size«, sets the cycle frequency;
– »Phase«, removes horizontal flicker, blur-
ring and horizontal lines.
5
Press
»
EXIT
« to end the setting.
Chassis J5
GR
UNDIG Ser
vice
1 - 78
Chassis KT
GR
UNDIG Ser
vice
1 - 78


