Steps for programming the Camera ID:
1. Turn on the CAMERA ID mode and enter the submenu.
2. Using the four direction keys, switch between the characters. Press the SET UP key
to make a desired figure.
3. Press CLR if you need to delete letters.
NOTE: CHR1 is the preset selection of characters for this camera (letters from A to Z,
numerals from 0 to 9, symbols). The camera ID is always created with letters and
numbers out of CHR1. The option CHR2 has no function in this camera model.
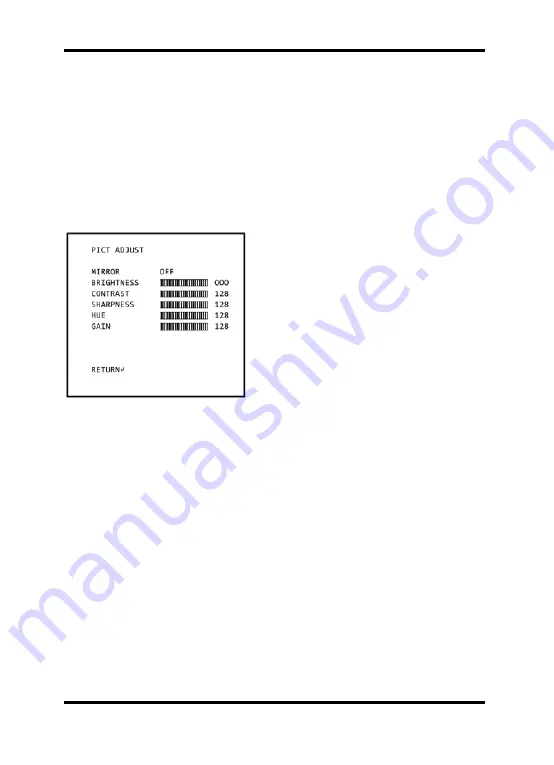
6.9. PICT ADJUST (Picture Adjustment)
When selecting
↵
, the following submenu will appear.
MIRROR [ON, OFF] :
This function is used to inverse the camera
picture.
BRIGHTNESS [000~255] :
This function is used to adjust the
brightness of the camera picture.
CONTRAST [000~255] :
This function is used to adjust the contrast
of the image (the difference between light
and dark areas on the screen).
SHARPNESS [000~255] :
This function is used to adjust the sharpness of the displayed image.
HUE [000~255] :
This function is used to adjust the colour tone of the displayed image.
GAIN [000~255] :
This function is used to adjust the saturation of the displayed image.
6.10. MOTION DET (Motion Detection)
MOTION DET [ON, OFF] :
This function is used to detect moving objects in the monitored area. There are 4
predefined boxes representing the areas that can be monitored for motion.
When choosing ON, the following submenu will appear where you can adjust the
settings for the MOTION DET function.
13
English
Summary of Contents for GCA-B1002B
Page 2: ......
Page 19: ...Dimensions 17 English...


