Grizzly T23089 Instruction Manual Download Page 12

t23089 (Mfg since 11/10)

-10

-

section 6: maintenance
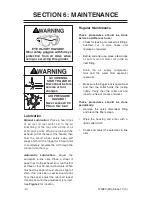
eye inJury hazard!

Wear safety goggles with full eye 

protection  from  all  sides  when 

using or servicing this grinder.

accidental 

start hazard!

disconnect before 

service or tool 

changes.

air pressure 

hazard!

never exceed 100 

psi on this tool!

regular maintenance 

these  procedures  should  be  done 
before and after each use:
• 

Check for leaking or cracked air fittings; 
bubbled,  cut,  or  worn  hoses;  and 
replace as required.

• 

Before and after use, place a few drops 
of  air  tool  oil  (not  motor  oil)  in  the  air 
inlet fitting.

• 

drain  the  air  supply  compressor 
tank  and  the  water  filter  separator 
reservoirs.

• 

Make sure the trigger lock is operational 
and  that  the  collet  holds  the  tooling 
tightly.  Verify  that  the  collet  nut  and 
insert are free of cracks and wear. 

these  procedures  should  be  done 
periodically:
• 

remove  the  quick  disconnect  fitting 
and clean the filter screen. 

• 

Wipe  the  housing  and  arbor  with  a 
lightly oiled cloth.

• 

Check and adjust the automatic in-line 
oiler.

lubrication

Manual  Lubrication:  place  a  few  drops 
of  air  tool  oil  (not  motor  oil)  in  the  air 
inlet  fitting  of  the  tool,  and  a  drop  of  oil 
at all pivot points. Wrap a rag around the 
exhaust port at the rear of the handle, then 
hold  the  cut-off  wheel  safely  away  and 
press and hold the trigger for 30 seconds 
to completely circulate the oil through the 
tool and into the rag.

Automatic  Lubrication:  Adjust  the 
automatic  in-line  oiler.  place  a  sheet  of 
paper next to the exhaust port, run the tool 
at three or four 30-second intervals. When 
finished, the paper should show a slight oil 
stain. if no oil is seen or excessive oil drips 
from the paper, adjust the oiler and repeat 
this process until the adjustment is correct. 
see 

figure 2 for location.

Summary of Contents for T23089

Page 1: ...Grizzly Industrial Inc Warning No portion of this manual may be reproduced in any shape or form without the written approval of Grizzly Industrial inc JB14051 printed in CHINA MODEL T23089 AIR CUT OFF...

Page 2: ...g grinding tool integrity and the usage of personal protective equipment The manufacturer will not be held liable for injury or property damage from negligence improper training machine modifications...

Page 3: ...job for which it was not designed DO NOT USE UNDER THE INFLUENCE OF DRUGS OR ALCOHOL For Your Own Safety Read Instruction Manual Before Operating This Equipment The purpose of safety symbols is to at...

Page 4: ...ion Use this machine with respect and caution to lessen the possibility of operator injury If normal safety precautions are overlooked or ignored serious personal injury may occur No list of safety gu...

Page 5: ...cutting using one hand and no support can allow the tool to grab the workpiece and cause you to lose your grip leading to serious personal injury HAND WHEEL CONTACT Cut off wheels have the capability...

Page 6: ...achine will be reflected in these documents as soon as they are complete Foreword No Load Arbor Speed 20 000 RPM Arbor Size 3 8 Cut off wheel Diameter 3 Cut off wheel Bore 3 8 Air Inlet Port Size 1 4...

Page 7: ...line oiler be installed to the air supply for constant lubrication See Figure 2 for a detailed layout of this setup Fittings Water Separator Air Regulator Automatic Oiler Main Air Supply Hose Male Fe...

Page 8: ...using the tool Using the Cut Off Saw Read and understand all safety instructions in this manual before starting Always test on a scrap piece of material similar to the workpiece Trial and error is oft...

Page 9: ...use the arbor wrench and hex wrench to fully tighten the flange securing the new wheel To change the cut off wheel 1 DISCONNECT TOOL FROM AIR 2 Position the arbor wrench on the flats behind the inner...

Page 10: ...heel T20881 In Line Lubricator 1 4 NPT T20887 Pressure Regulator 1 4 NPT G6261 Water Filter 1 4 NPT Install an in line lubricator to apply oil automatically Install an air regulator right at the tool...

Page 11: ...ntly assembled with cartridges so they re ready to use Each features a soft lightweight elastomeric face piece cradle suspension easy adjust head straps and low profile for greater field of vision wit...

Page 12: ...of cracks and wear These procedures should be done periodically Remove the quick disconnect fitting and clean the filter screen Wipe the housing and arbor with a lightly oiled cloth Check and adjust...

Page 13: ...presses the throttle valve 3 Clean the filter screen behind the air supply fitting 4 Set the regulator to 90 PSI or 100 PSI if the air hose is longer than 25 feet Repair any leaking fittings remove al...

Page 14: ...ttle valve and clean out sludge and contaminants 4 Clean the filter screen behind the air supply fitting 5 Disassemble air tool clean and relubricate Lubricate air tool and rotate spindle by hand a fe...

Page 15: ...OMPRESION SPRING 22 N A SPACER 6 N A VALVE STEM BUSHING 23 N A FRONT SLEEVE 7 N A VALVE STEM 24 N A BEARING 8 N A O RING 25 N A SPACER 9 N A AIR INLET 26 N A DISC RETAINER 10 N A EXHAUST SLEEVE 27 N A...

Page 16: ...Buy Direct and Save with Grizzly Trusted Proven and a Great Value Since 1983 ORDER 24 HOURS A DAY 1 800 523 4777 Visit Our Website Today For Current Specials...

Reviews: