background image

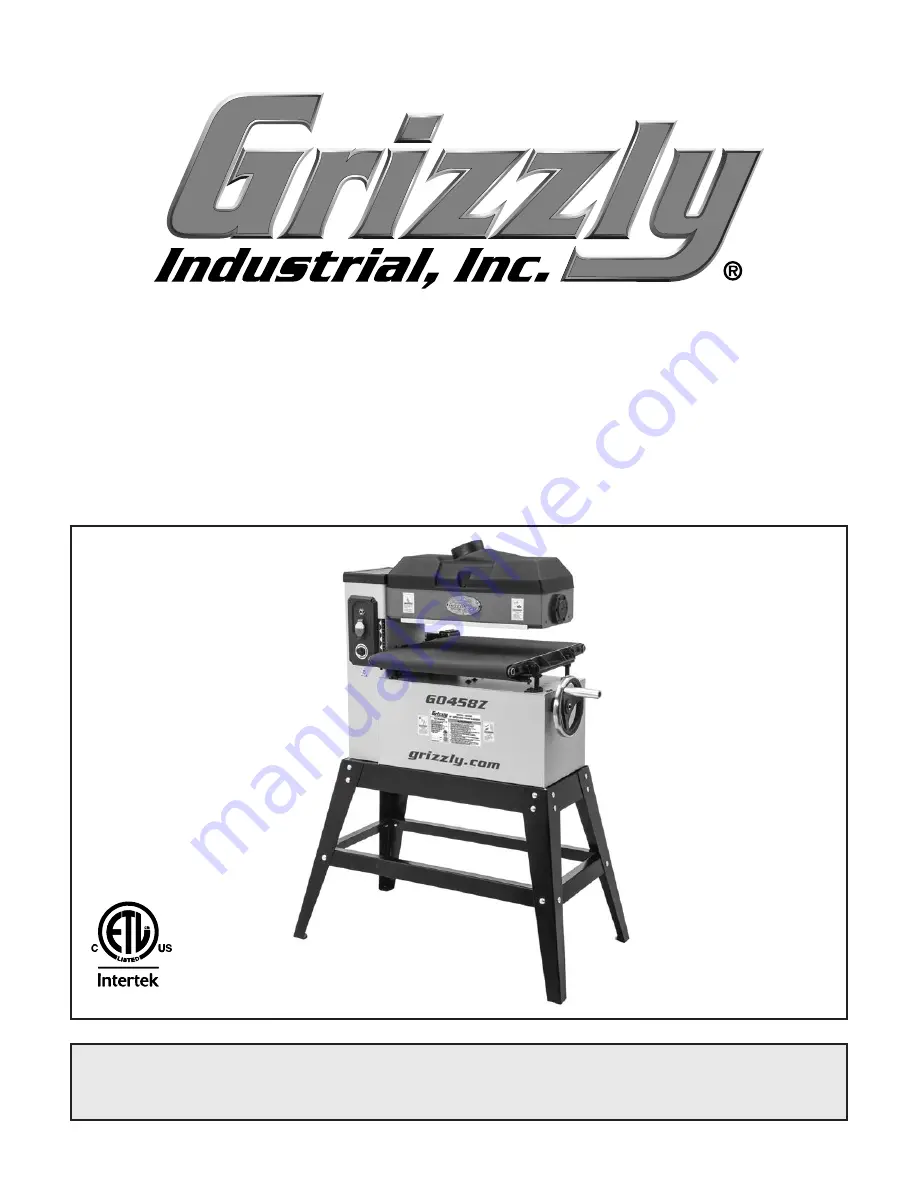
MODEL G0458Z

18" OPEN-END DRUM SANDER

OWNER'S MANUAL

(For models manufactured since 7/19)

COPYRIGHT © MARCH, 2018 BY GRIZZLY INDUSTRIAL, INC., REVISED OCTOBER, 2019 (MN)

WARNING: NO PORTION OF THIS MANUAL MAY BE REPRODUCED IN ANY SHAPE

 OR FORM WITHOUT THE WRITTEN APPROVAL OF GRIZZLY INDUSTRIAL, INC.

 #JHAB19391  PRINTED IN CHINA

V2.10.19

3092372

Summary of Contents for G0458Z

Page 1: ...anufactured since 7 19 COPYRIGHT MARCH 2018 BY GRIZZLY INDUSTRIAL INC REVISED OCTOBER 2019 MN WARNING NO PORTION OF THIS MANUAL MAY BE REPRODUCED IN ANY SHAPE OR FORM WITHOUT THE WRITTEN APPROVAL OF GRIZZLY INDUSTRIAL INC JHAB19391 PRINTED IN CHINA V2 10 19 3092372 ...

Page 2: ...ng grinding tool integrity and the usage of personal protective equipment The manufacturer will not be held liable for injury or property damage from negligence improper training machine modifications or misuse Some dust created by power sanding sawing grinding drilling and other construction activities contains chemicals known to the State of California to cause cancer birth defects or other repr...

Page 3: ...djusting Conveyor Feed Rate 21 Sanding 21 Sanding Tips 22 Choosing Sandpaper 22 Replacing Sandpaper 23 Changing Sanding Drum Speeds 25 SECTION 5 ACCESSORIES 26 SECTION 6 MAINTENANCE 27 Schedule 27 Cleaning 27 Lubrication 27 Cleaning Sanding Belts 28 SECTION 7 SERVICE 29 Troubleshooting 29 Tensioning V Belt 31 Changing V Belt 32 Aligning Pulleys 32 Tracking Conveyor Belt 33 Tensioning Conveyor Belt...

Page 4: ... machine We made every effort to be exact with the instruc tions specifications drawings and photographs in this manual Sometimes we make mistakes but our policy of continuous improvement also means that sometimes the machine you receive is slightly different than shown in the manual If you find this to be the case and the difference between the manual and machine leaves you confused or unsure abo...

Page 5: ...to 4 dust collection system F Table Elevation Handwheel Raises and lowers conveyor table G Rotate counterclockwise to lower table rotate clockwise to raise table One full rotation moves the table approximately 0 060 1 16 G Conveyor Table w Belt Feeds workpiece across conveyor table during sanding operations H Belt Access Panel Remove panel to change sanding belt pulley positions or make belt adjus...

Page 6: ... in Shipping Dimensions Type Cardboard Box w Wood Skids Content Machine Weight 235 lbs Length x Width x Height 25 x 33 x 33 in Must Ship Upright Yes Electrical Power Requirement 120V Single Phase 60 Hz Full Load Current Rating 13 92A Minimum Circuit Size 20A Connection Type Cord Plug Power Cord Included Yes Power Cord Length 6 ft Power Cord Gauge 14 AWG Plug Included Yes Included Plug Type 5 15 Sw...

Page 7: ...g Drum Size 4 in Construction Conveyor Belt Sandpaper Body Steel Base Steel Paint Type Finish Powder Coated Other Related Information Floor To Table Height 35 40 in Sanding Belt Tension Spring Loaded Conveyor Belt Length 45 in Conveyor Belt Width 18 in Belt Roller Size 1 3 8 in Number of Dust Ports 1 Dust Port Size 4 in Other Specifications Country of Origin China Warranty 1 Year Approximate Assem...

Page 8: ...id proof DANGEROUS ENVIRONMENTS Do not use machinery in areas that are wet cluttered or have poor lighting Operating machinery in these areas greatly increases the risk of accidents and injury MENTAL ALERTNESS REQUIRED Full mental alertness is required for safe operation of machin ery Never operate under the influence of drugs or alcohol when tired or when distracted For Your Own Safety Read Instr...

Page 9: ... moving parts or flying debris Make sure they are properly installed undamaged and working correctly BEFORE operating machine FORCING MACHINERY Do not force machine It will do the job safer and better at the rate for which it was designed NEVER STAND ON MACHINE Serious injury may occur if machine is tipped or if the cutting tool is unintentionally contacted STABLE MACHINE Unexpected movement dur i...

Page 10: ...ucts WORKPIECE INSPECTION Nails staples knots or other imperfections in workpiece can be dislodged and thrown from sander at high rate of speed into operator or bystanders or cause dam age to sandpaper or sander Never try to sand stock that has embedded foreign objects or ques tionable imperfections KICKBACK Occurs when a workpiece is ejected out the front of sander at a high rate of speed toward ...

Page 11: ...ersized circuit To reduce the risk of these hazards avoid over loading the machine during operation and make sure it is connected to a power supply circuit that meets the specified circuit requirements For your own safety and protection of property consult an electrician if you are unsure about wiring practices or electrical codes in your area Note Circuit requirements in this manual apply to a de...

Page 12: ... power cord or plug is nec essary do not connect the equipment grounding wire to a live current carrying terminal Check with a qualified electrician or service per sonnel if you do not understand these grounding requirements or if you are in doubt about whether the tool is properly grounded If you ever notice that a cord or plug is damaged or worn discon nect it from power and immediately replace ...

Page 13: ...se call us immediately at 570 546 9663 IMPORTANT Save all packaging materials until you are completely satisfied with the machine and have resolved any issues between Grizzly or the shipping agent You MUST have the original pack aging to file a freight claim It is also extremely helpful if you need to return your machine later Unpacking This machine presents serious injury hazards to untrained use...

Page 14: ...ombination Wrench 8 12mm 1 Hex Wrenches 4 5 6mm 1 Ea Flat Washer 5mm 1 Cap Screw M6 1 x 35 1 The following is a list of items shipped with your machine Before beginning setup lay these items out and inventory them If any non proprietary parts are missing e g a nut or a washer we will gladly replace them or for the sake of expediency replacements can be obtained at your local hardware store NOTICE ...

Page 15: ...rated is important for safe operation and lon gevity of machine components For best results operate this machine in a dry environment that is free from excessive moisture hazardous chemi cals airborne abrasives or extreme conditions Extreme conditions for this type of machinery are generally those where the ambient temperature range exceeds 41 104 F the relative humidity range exceeds 20 95 non co...

Page 16: ...t a top long bracket to a stand leg and secure by hand with 2 M8 1 25 x 15 carriage bolts and 2 M8 1 25 flange nuts as shown in Figure 4 3 Mount a bottom long bracket to stand leg and secure by hand with 1 M8 1 25 x 15 carriage bolt and 1 M8 1 25 flange nut as shown in Figure 4 DO NOT final tighten stand bolts until stand components have been assembled Figure 6 Top and bottom short brackets secure...

Page 17: ...ult to move 12 With help of an assistant tilt sander back so side with belt access panel faces pallet move left bottom edge of sander forward and rest left side of sander on pallet as shown in Figure 8 Note The base should be even with or stick out from the edge of the pallet to properly install stand assembly Figure 7 Completed stand assembly Figure 8 Sander tipped back on pallet against belt acc...

Page 18: ... 1 M6 1 x 35 cap screw 15 Lift up on stand and remove blocks 16 With help from an assistant carefully tilt sander upright as shown in Figure 11 so rear legs touch the floor Figure 10 Mounting sander to stand x 4 Figure 11 Tilting sander upright If the legs start to slide when tilting you MUST have a third person hold the stand from sliding to avoid personal injury or machine damage Figure 12 Insta...

Page 19: ... and capturing the dust with a dust collection system To connect dust collection system to machine 1 Fit 4 dust hose over dust port as shown in Figure 13 and secure in place with a hose clamp Power Connection After you have completed all previous setup instructions and circuit requirements the machine is ready to be connected to the power supply To avoid unexpected startups or property dam age use...

Page 20: ...machine to power supply 3 Turn machine ON verify motor operation and then turn machine OFF The motor should run smoothly and without unusual problems or noises 5 Try to start machine with paddle switch The machine should not start If the machine does not start the switch disabling feature is working as designed If the machine does start immediately stop the machine The switch disabling feature is ...

Page 21: ...sary outfeed clearance and support If workpiece is wider than conveyor table operator supports workpiece full width If workpiece is overly long and difficult to handle operator uses a roller support stand to assist with feeding 3 Adjusts table height to approximate workpiece thickness 4 Puts on required safety glasses and respirator and ensures dust collection is connected to dust port 5 Turns mot...

Page 22: ...the operator or damaging the sanding belt or the sander Before sanding inspect all workpieces for the following Material Type This machine is intended for sanding natural and man made wood products and laminate covered wood prod ucts This machine is NOT designed to sand glass stone tile plastics drywall cemen tious backer board metal etc Sanding metal objects can increase the risk of fire Sanding ...

Page 23: ...o failure weakens the electrical system Repeatedly doing so is abuse to the machine that will cause motor capaci tor or circuit breaker damage which is not covered under warranty DO NOT sand more than one board at a time Minor variations in thickness can cause one board to be propelled by the rapidly spinning sanding drum and ejected from the machine NEVER stand directly in front of the outfeed ar...

Page 24: ...an one board of the same thickness by feeding them into the sander with the front end of the sec ond board touching the back end of the first board Feed boards into the sander at different plac es on the conveyor to maximize sandpaper life and prevent uneven conveyor belt wear DO NOT sand boards less than 6 long or less than 1 8 thick to prevent damage to the workpiece and the drum sander Extend t...

Page 25: ...ide sand paper rolls Turn to SECTION 5 ACCESSORIES on Page 26 for grit selection and model numbers Items Needed Qty Flat Head Screwdriver 1 Hex Wrench 4mm 1 Hex Wrench 5mm 1 Carton Cutter or Utility Knife 1 To change sandpaper 1 DISCONNECT MACHINE FROM POWER 2 Open top cover and loosen cap screw on right spring loaded clamp as shown in Figure 19 3 Remove sandpaper from clamp Use a flat head screwd...

Page 26: ...e pattern in Figure 20 Make adjustments to sandpaper if necessary If sandpaper completely covers access hole you may have placed too little sand paper into left clamp Unwrap sandpaper and repeat Steps 7 12 13 In either case re install sandpaper repeat Steps 7 12 and continue adjusting paper until it fits into clamp 14 When finished reconnect dust collection system 11 Firmly hold down sandpaper wit...

Page 27: ...lt Motor Pulley High Speed 3400 RPM Motor Pulley Motor Sanding Drum Pulley Sanding Drum Low Speed 2600 RPM To adjust V belt location 1 DISCONNECT MACHINE FROM POWER 2 Remove the pulley cover Figure 25 Pulley speed settings Tools Needed Qty Hex Wrenches 4 8mm 1 Ea 3 Loosen the motor mount cap screws shown in Figure 26 and lift motor pulley to de ten sion belt 4 Tighten motor mount cap screws to kee...

Page 28: ...napproved accessories may cause machine to malfunction resulting in serious personal injury or machine damage To reduce this risk only install accessories recommended for this machine by Grizzly NOTICE Refer to our website or latest catalog for additional recommended accessories T28172 14 x 39 Heavy Duty Roller Table T28369 14 x 78 Heavy Duty Roller Table T28370 14 x 118 Heavy Duty Roller Table In...

Page 29: ...s maintenance or service Ongoing To maintain a low risk of injury and proper machine operation if you ever observe any of the items below shut down the machine immediately and fix the problem before continuing operations Loose mounting bolts Damaged sanding belt Worn switch Worn or damaged cords or plugs Damaged V belts Any other unsafe condition Oil the feed belt roller and drive bushings Clean v...

Page 30: ... STIK Cleaning Pad as shown in Figure 33 To clean sanding belt 1 DISCONNECT MACHINE FROM POWER 2 Set table to thickness of cleaning pad 3 Connect machine to power then run pad through sander two or three times DO NOT take too deep of a cut the belt should barely touch cleaning pad Bushings Oil Type Model T23964 NLGI 2 Oil Amount As Needed Check Add Frequency 6 Months Lubricate the table lift screw...

Page 31: ...ipping machine circuit breaker 9 Centrifugal switch at fault 10 Motor is at fault 1 Only sand wood ensure moisture is below 20 and there are no foreign materials in the workpiece 2 Decrease feed rate cutting speed 3 Clean replace sandpaper reduce feed rate sanding depth 4 Replace bad belt align pulleys and re tension V belt Pages 31 32 5 Test for good contacts correct wiring 6 Test repair replace ...

Page 32: ...workpiece as it comes out 2 Raise pressure rollers Page 38 3 Raise rear pressure roller Page 38 Workpiece kicks out of sander 1 Not enough pressure from pressure rollers 1 Lower pressure roller Page 38 Sandpaper comes off drum or is loose 1 Sandpaper not properly wrapped onto drum 2 Sandpaper not cut to correct dimensions 3 Torn or damaged sandpaper 4 Sandpaper not tightened or fastened correctly ...

Page 33: ...n belt access panel 3 Check tension of V belt then adjust tension by loosening motor mount cap screws shown in Figure 35 NOTICE New V belts will often stretch and loosen after approximately 16 hours of use Check frequently after installation and re tension if necessary Figure 35 Feed belt V belt tension V Belt Motor Mount Cap Screws 4 Tension V belt by pushing down on bottom motor pulley with one ...

Page 34: ...rum Speeds on Page 25 6 Properly tension V belt refer to Tensioning V Belt on Page 31 for more information Figure 36 Belt drive system Motor Mount Cap Screws Sanding Drum Pulley V Belt Motor Pulley 7 Re install V belt cover from Step 2 NOTICE New V belts will often stretch and loosen after approximately 16 hours of use Check frequently after installation and re tension if necessary Pulley alignmen...

Page 35: ...ing the conveyor belt is a balancing process that takes patience and a small degree of trial and error Usually you must over tighten the loose side the side the belt is tracking towards to make the conveyor belt move to the middle of the rollers then loosen that same side to make the feed belt stay in position If you adjust the tracking screw too much either way then you have to repeat the process...

Page 36: ...justment Screw Lock Nut Tensioning Conveyor Belt The conveyor belt will stretch when new and will eventually need to be tensioned This is most obvious if the conveyor belt starts slipping on the rollers When you tension the conveyor belt focus on adjusting the tensioning bolts in even increments Adjusting one side more than the other will cause tracking problems which will require you to make addi...

Page 37: ...t Conveyor Belt Tensioning Bolt Feed Roller Lock Screws To tension conveyor belt 1 Loosen feed roller lock screws shown in Figure 40 on both sides of conveyor belt DO NOT over tension the conveyor belt This may cause premature wearing of belt bushings and cause strain on the motor Replacing the conveyor belt is a relatively simple process but it will require re tensioning and track ing once the ne...

Page 38: ... Cap Screws 4 Remove outside table cap screws shown in Figure 42 and loosen corresponding cap screws on inside edge The blocks described here will be required to complete the remaining service procedures in this section Items Needed Qty 6 Long 2x4 1 Miter Saw or Circular Saw 1 Jointer 1 Table Saw 1 To make blocks 1 Edge joint concave edge of 2x4 flat on a jointer as shown in Figure 43 Making Block...

Page 39: ...ble until you hear or feel contact with the gauge blocks 4 Lower table one full crank of the handwheel taking handwheel free play into consider ation or in other words wait until the chain starts moving before starting to count the handwheel rotation 5 Starting at one end find the largest size feeler gauge that can pass between the drum and your gauge block The feeler gauge should slide with moder...

Page 40: ... drums 3 Raise table until blocks just touch the rear pressure roller 4 Find the largest size feeler gauge that can pass between sanding drum and your gauge block The feeler gauge should slide with moderate resistance without forcing drum to roll If gap is 0 004 0 1mm or less then no adjustment of rear pressure roller is neces sary If gap is more than 0 004 0 1mm then rear pressure roller must be ...

Page 41: ... the drum Pressure Roller Pivot Bars Pressure Roller This sander is equipped with a universal motor that uses two carbon brushes to transmit elec trical current inside the motor These brushes are considered to be regular wear items or consumables that will need to be replaced dur ing the life of the motor The frequency of required replacement is often related to how much the motor is used and how ...

Page 42: ...nt at the time of printing but may not match your machine If you find this to be the case use the wiring diagram inside the motor junction box CAPACITORS INVERTERS Some capacitors and power inverters store an electrical charge for up to 10 minutes after being disconnected from the power source To reduce the risk of being shocked wait at least this long before working on capacitors EXPERIENCING DIF...

Page 43: ...h Ground Neutral Hot Ground 120V 5 15 Plug Overload Switch L1 Series 25A 125V KEDU HY56 TN40 55 JSC Circuit Board Variable Speed Dial Feed Belt Motor LINE LOAD Motor Motor Junction Box Machine Cabinet Run Capacitor 40uF 250V Start Capacitor 350uF 125V ACL ACN Doout Doout Wiring Diagram ...

Page 44: ...ase Call 800 523 4777 or visit our online parts store at www grizzly com to check for availability Main Breakdown 94 129 38 125 36 59 35 35 124 134 131 132 126 134 132 131 138 141 124 139 135 99 51 60 100 37 99 51 60 54 123 15 92 108 16 72 23 120 121 93 6 9 1 4 152 2 3 7 8 10 11 12 13 14 117 80 99 60 140 130 133 27 137 123 25 28 24 31 32 2 112 29 25 99 99 136 165 142 33 22 30 34 118 2 89 90 26 2 2...

Page 45: ... 74 3 74 4 74 5 74 6 74 7 74 8 67 56 62 61 66 65 77 64 116 63 85 79 55 113 114 35 69 51 35 99 51 61 62 63 64 78 87 82 84 84 75 60 37 89 57 59 122 127 128 98 71V2 49 43 44 45 47 68 46 74 152 76 3 2 50 52 57 58 100 87 2 3 83 86 88 151 67 96 92 70 57 60 99 19 48 2 3 44 93 80 2 3 91 90 81 155 97 156 59 154 150 117 95 109 110 111 73 Main Breakdown Cont ...

Page 46: ...UTING PLATE 74 5 P0458Z074 5 JUNCTION BOX 28 P0458Z028 ROLLER 74 6 P0458Z074 6 CONTACT PLATE 29 P0458Z029 PIVOT SHOULDER PIN 74 7 P0458Z074 7 CENTRIFUGAL SWITCH 30 P0458Z030 CHIP DEFLECTOR PLATE 74 8 P0458Z074 8 BALL BEARING 6204 2RS FRONT REAR 31 P0458Z031 CAP SCREW M6 1 X 10 75 P0458Z075 WORM GEAR 32 P0458Z032 TAP SCREW M5 X 10 76 P0458Z076 EXT RETAINING RING 12MM 33 P0458Z033 TOP COVER 77 P0458...

Page 47: ...144 FLAT WASHER 5MM 113 P0458Z113 SPACER BLOCK 145 P0458Z145 LOCK WASHER 5MM 114 P0458Z114 BUSHING 146 P0458Z146 HEX NUT M5 8 116 P0458Z116 SPROCKET 147 P0458Z147 CAP SCREW M6 1 X 20 117 P0458Z117 HEX NUT M5 8 148 P0458Z148 FLAT WASHER 6MM 118 P0458Z118 FLAT WASHER 5 X 14 OD X 0 8 T 149 P0458Z149 SET SCREW M8 1 25 X 20 119 P0458Z119 SPADE TERMINAL F 150 P0458Z150 HEX BOLT M5 8 X 25 120 P0458Z120 C...

Page 48: ...re than one board at a time 7 Make sure sander is properly assembled adjusted and stable before operating Only operate with all guards in place 8 Be aware of pinch points located at the edge of conveyor 9 Only remove jammed pieces when machine is stopped and disconnected from power 10 Turn motor OFF and disconnect power before changing sandpaper making adjustments or servicing 11 Do not wear loose...

Page 49: ......

Page 50: ......

Page 51: ...r for incidental contingent special or consequential damages arising from the use of our products The manufacturers reserve the right to change specifications at any time because they constantly strive to achieve better quality equipment We make every effort to ensure that our products meet high quality and durability standards and we hope you never need to use this warranty In the event you need ...

Page 52: ......

Reviews: