background image

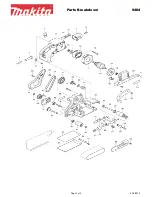
G0445/G0582/G9962Z/9962ZX Wide Belt Sander

-53-

REF

PART #

DESCRIPTION

REF

PART #

DESCRIPTION

1101

P9962Z1101

MACHINE FRAME

1121

P9962Z1121

BRAKE BRACKET

1102

P9962Z1102

MOTOR BASE

1122

PW02

FLAT WASHER 3/8

1103

P9962Z1103

MOTOR BASE HINGE

1123

PB21

HEX BOLT 3/8-16 x 3/4

1104

PN13

HEX NUT 1/2-13

1124

P9962Z1124

TABLE LIFTING COLLAR

1105

P9962Z1105

MOTOR BASE ADJUSTMENT ROD

1125

PSB05

CAP SCREW 1/4-20 X 3/4

1106

PLW07

LOCK WASHER 1/2

1126

P9962Z1126

LIMIT SWITCH

1107

PB78

HEX BOLT 1/2-13 x 1-1/4

1127

P9962Z1127

LIMIT SWITCH PLATE

1108

PW01

FLAT WASHER 1/2

1128

PB19

HEX BOLT 1/4-20 X 1/2

1109

P9962Z1109

10 HP MOTOR (G9962Z)

1129

PW06

FLAT WASHER 1/4

1109

P9962ZX1109

10 HP MOTOR 

1130

PSS18

SET SCREW 5/16-18 X 3/4

(G9962ZX/G0582/G0445)

1131

P9962Z1131

COVER OF MOTOR BASE

1109-1 P9962Z1109-1

MOTOR FAN (G9962Z)

1132

PW02

FLAT WASHER 3/8

1109-2 P9962Z1109-2

MOTOR FAN COVER (G9962Z)

1301

P9962Z1301

BRAKE BRACKET

1109-1 P9962ZX1109-1 MOTOR FAN 

1301-1 P9962Z1301-1

BRAKE BRACKET FRONT 

(G9962ZX/G0582/G0445)

1302-1 P9962Z1302-1

BRAKE LINING

1109-2 P9962ZX1109-2 FAN COVER 

1302-2 P9962Z1302-2

BRAKE LINING

(G9962ZX/G0582/G0445)

1303

P9962Z1303

BRAKE ARBOR

1110

P9962Z1110

PULLEY (G9962Z/G9962ZX)

1304

P9962Z1304

BRAKE SPRING

1110

P05821110

PULLEY (G0582/G0445)

1305

P9962Z1305

BRAKE INSIDE PIECE

1111

PSB11

CAP SCREW 5/16-18 x 1-1/4

1306

PFH12M

FLAT HD SCR M6-1 X 25

1112

PLW01

LOCK WASHER 5/16

1307

P9962Z1307

BRAKE PIN

1113

P9962Z1113

KEY 10 X 8 X 75

1308

PSB10M

CAP SCREW M5-.8 X 15

1114

PB03

HEX BOLT 5/16-18 X 1

1309

PR03M

EXT RETAINING RING 12MM

1115

PLW01

LOCK WASHER 5/16

1310

PLW04

LOCK WASHER 3/8

1116

P9962Z1116

DISC BRAKE

1311

PN08

HEX NUT 3/8-16

1118

P9962Z1118

PULLEY BUSHING

1312

PSB26M

CAP SCREW M6-1.0 X 12

1119

PVB77

V-BELT B-77 (G9962Z/G9962ZX)

1313

P9962Z1313

BRAKE GASKET 

1119

PVA71

V-BELT A-71 (G0582/G0445)

Sanding Motor System Parts List

Summary of Contents for 9962ZX

Page 1: ...SANDER COPYRIGHT OCTOBER 2005 BY GRIZZLY INDUSTRIAL INC REVISED JUNE 2006 WARNING NO PORTION OF THIS MANUAL MAY BE REPRODUCED IN ANY SHAPE OR FORM WITHOUT THE WRITTEN APPROVAL OF GRIZZLY INDUSTRIAL IN...

Page 2: ...ls are Lead from lead based paints Crystalline silica from bricks cement and other masonry products Arsenic and chromium from chemically treated lumber Your risk from these exposures varies depending...

Page 3: ...rage Loads 13 440V Connection 14 Clean Up 15 Site Considerations 15 SECTION 3 SETUP 16 Beginning Assembly 16 Air Line Installation 16 Unpacking 16 Inventory 17 Dust Collection 17 Sanding Belt 18 Press...

Page 4: ...System Parts List 55 Conveyor System Diagram 56 Conveyor System Parts List 57 Feed Drum and Pressure Roller Diagram 58 G9962Z 58 G9962ZX 58 G0582 58 G0445 58 Feed Drum and Pressure Roller Parts List...

Page 5: ...s machine is part of the growing Grizzly family of fine wood working machinery When used according to the guidelines set forth in this manual you can expect years of trouble free enjoyable operation a...

Page 6: ...Key I Table Adjustment Start Key J Table Adjustment Stop Key K Sanding Belt Stop Button L Feed Belt Stop Button M Emergency Stop Button F L G M I H J D E K C Figure 1 Control Panel B B A C D F E Figur...

Page 7: ...aten Adjustment Lock Lever D Lock Post Release Lever E Tracking Adjustment Knob Figure 4 Inside the left access door F Upper Roller G Airflow Adjustment Knob H Speed Control Adjustment Knob I Air Fork...

Page 8: ...6 G0445 G0582 G9962Z 9962ZX Wide Belt Sander Machine Data Sheet G0445...

Page 9: ...G0445 G0582 G9962Z 9962ZX Wide Belt Sander 7 Machine Data Sheet G0582...

Page 10: ...8 G0445 G0582 G9962Z 9962ZX Wide Belt Sander Machine Data Sheet G9962Z...

Page 11: ...G0445 G0582 G9962Z 9962ZX Wide Belt Sander 9 Machine Data Sheet G9962ZX...

Page 12: ...cinogen and can cause cancer and severe respiratory illnesses For Your Own Safety Read Instruction Manual Before Operating this Machine The purpose of safety symbols is to attract your attention to po...

Page 13: ...ricating and changing accessories 16 MAKE SURE GUARDS ARE IN PLACE AND WORK CORRECTLY BEFORE USING MACHINERY Safety Instructions for Machinery 17 REMOVE ADJUSTING KEYS AND WRENCHES Make a habit of che...

Page 14: ...Replace sanding belt when it becomes worn or damaged 12 FOREIGN MATERIAL Always inspect workpiece for nails staples knots and other imperfections that could be dis lodged and thrown from the machine d...

Page 15: ...1 HP Feed Motor 1 7 Amps 1 4 HP Table Motor 0 6 Amp G0445 220V Three Phase 30 Amp 10 HP Sanding Motor 25 Amps 1 HP Feed Motor 3 4 Amps 1 4 HP Table Motor 1 2 Amps G0445 440V Three Phase 15 Amp 10 HP S...

Page 16: ...e relays so refer to 440V Conversion Relays on Page 65 for the relay part numbers If you do not have three phase power available for your wide belt sander you must install a phase converter such as a...

Page 17: ...loads Be sure to observe local electrical codes for proper installa tion of new lighting or circuits Unsupervisedchildrenand visitors entering a shop could suffer serious per sonal injury Ensure chil...

Page 18: ...ay result in serious personal injury Figure 9 Air inlet located on regulator Air Line Installation SECTION 3 SETUP Unpacking The Model G0445 G0582 G9962Z G9962ZX was carefully packed when it left our...

Page 19: ...ions on the top of the sanding unit with the supplied M6 1 x 10 Phillips head screws 2 Using 4 hose clamps secure the hoses from your dust collection system to the dust ports Inventory Crate contents...

Page 20: ...ongs of the oscillation controller as shown in Figure 14 Damage to the sanding belt could occur if the sander is turned ON before the sanding belt is correctly positioned 6 Replace the spacer block an...

Page 21: ...Rollers on Page 33 The pressure rollers have been set at the factory but for your safety you should verify that they are set below the level of the sanding roller Start Up Before starting the machine...

Page 22: ...le moves in the same direction as the but ton description If not then the power needs to be disconnected and any two power wires need to be switched at the circuit breaker in the electrical box If usi...

Page 23: ...ely higher grit numbers with no one grit increase of more than 50 however the type of wood and desired finish will determine the best grit to use Grit Type 60 80 100 120 150 Coarse Medium Fine To avoi...

Page 24: ...16 adjusts the feed rate of the sander Note Never adjust the feed rate dial unless the conveyor belt is running otherwise you can dam age the control Changing Feed Rate Turn the dial clockwise to dec...

Page 25: ...iple passes or install a coarser grit paper Amp load will be directly affected by many factors such as feed rate depth of cut wood type sand paper grit and workpiece width If the amp load is in the re...

Page 26: ...d with an adjustable felt platen and graphite pad for those extra sensitive sanding operations The platen position allows for 3 basic types of sanding These different posi tions can be adjusted by rot...

Page 27: ...ter Add 3 phase multi motor capability to your single phase electrical supply Operate single or mul tiple motors transformers and resistance loads at 100 power and 95 efficiency while saving big dolla...

Page 28: ...yor gear reducer should be replaced after the first 100 working hours of operation We recommend 90 Wt gear oil Every 2500 Hours After the first conveyor gear reducer oil change replace the oil after e...

Page 29: ...e lifespan of your sanding belts if you clean them often As men tioned on Page 25 cleaning pads are the fastest way to remove saw dust build up Air System If a component in the air system is malfunc t...

Page 30: ...e average thick ness measurement is within 0 003 Note These final passes should be done without adjusting the table height This ensures the most consistent average thick ness 7 Observe the digital dis...

Page 31: ...eplace the brake pads 1 DISCONNECT THE SANDER FROM THE POWER SOURCE AND REMOVE AIR PRESSURE COMPLETELY 2 Remove the nuts from the two mounting bolts and the two snap rings on the mounting pins behind...

Page 32: ...he belt are dependent upon adequate airflow through the air fork gap To set the correct amount of airflow through the air fork gap 1 Remove the sanding belt and turn the belt tension knob to the tensi...

Page 33: ...scillation should take a similar amount of time to oscillate If the oscillation time to the right is 2 sec onds but the oscillation time to the left is longer loosen the oscillation adjustment knob Fi...

Page 34: ...t knob 2 Turn the knob clockwise to decrease the oscillation speed and counterclockwise to increase it 3 Tighten the lock nut loosened in Step 1 to secure the knob Lock Nut The corners of the table ca...

Page 35: ...CE 2 Plane a 72 long 2x4 to a uniform thickness and cut it in half Place one board along the length of the feed belt on the right hand side and place the other board on the left hand side 3 With the s...

Page 36: ...til it just touches the board Note DO NOT continue to lower the roller beyond that point 10 Tighten the roller lock nuts Note Variables such as feed rate depth of the cut and the type of sanding belt...

Page 37: ...itch P Right Belt Limit Switch Q Belt Tension Limit Switch R Emergency Brake Contactor A Shop Compressor B Air Pressure Regulator C Emergency Brake Solenoid D Emergency Brake E Air Distribution Manifo...

Page 38: ...u test your settings with the handwheel manually so you don t crash the table if incorrectly set the first time around 17 With a helper install the gearbox vibration dampener washers and mounting brac...

Page 39: ...G0445 G0582 G9962Z 9962ZX Wide Belt Sander 37 Figure 37 Conveyor belt removal sequence...

Page 40: ...Needed Qty Wrench or Socket 20mm 1 Phillips Screwdriver 2 1 To adjust the feed belt tension 1 DISCONNECT THE SANDER FROM THE POWER SOURCE 2 Find the adjustment ports in the safety guard Figure 38 at t...

Page 41: ...G0445 G0582 G9962Z 9962ZX Wide Belt Sander 39 Maintenance Performed Approximate Hours Of Use Maintenance Log Date...

Page 42: ...eyor belt is worn 1 Pressure rollers set too high 2 Dirty conveyor belt 3 Conveyor belt is worn 1 Pressure rollers are dirty or dam aged CORRECTIVE ACTION 1 Correct situation that caused limit switch...

Page 43: ...t 1 Air pressure incorrect 2 Air leak in system 3 Brake rotor contaminated with oil 4 Brake pads worn out 1 Brakes severely worn out CORRECTIVE ACTION 1 Clean or replace sanding belt 1 Replace sanding...

Page 44: ...42 G0445 G0582 G9962Z 9962ZX Wide Belt Sander Control Panel Electrical Diagram G0445 G0582 G9962Z 9962ZX...

Page 45: ...er 43 Control Panel Component Locations G0445 G0582 G9962Z 9962ZX Sanding Belt STOP Button Conveyor Belt STOP Button Emergency Stop Button Sanding Belt START Button Conveyor Belt START Button Power La...

Page 46: ...44 G0445 G0582 G9962Z 9962ZX Wide Belt Sander Connection Wiring Diagram 220V 440V 3 Phase G0445 G0582 G9962ZX...

Page 47: ...G0445 G0582 G9962ZX Conveyor Motor Contactor Emergency Brake Contactor UP DOWN Table Motor Contactors Conveyor Motor Overload Relay 220V Single Phase Power Supply Junction Block Sanding Motor Contacto...

Page 48: ...2 L3 1 3 5 NO NC 14 22 A2 T1 T2 T3 2 4 6 NC NO 3 2 2 1 9 11 2 1 3 2 10 9 8 9 10 R S R S R E S R 1 2 1 3 R U1 V1 U2 V2 U3 1 7 1 9 1 2 1 3 1 1 9 1 0 8 6 5 5 3 3 2 1 4 1 5 2 2 GROUND EMERGENCY BRAKE SOLE...

Page 49: ...62Z Transformer Sanding Motor Contactor Conveyor Motor Contactor Amp Meter Current Sensor Emergency Brake Contactor UP DOWN Table Motor Contactors Sanding Motor Overload Relay Conveyor Motor Overload...

Page 50: ...2 SANDING BELT CONVEYOR BEL T R Emergency Stop SANDING BELT CONVEYOR BELT R S TABL E L I FTING LOWERING E A AM 14 15 U1 V 1 W1 OL3 M3 M3 11 A R U V S a b Emergency Brake a b a b PCR1 10 M3 T T W U2 V...

Page 51: ...NG L OWERI NG MOTOR R U S V U V 3 2 SANDI NG BELT CONVEYOR BELT Emergency Stop SANDI NG BELT CONVEYOR BELT R S T ABLE L I F T I NG LOWERING E A AM 14 15 U1 OL3 M3 M3 11 A R U V S a b Emergency Brake a...

Page 52: ...50 G0445 G0582 G9962Z 9962ZX Wide Belt Sander 1 2 4 7 3 13 9 8 6 5 12 11 10 Tool Box and Accessories Diagram...

Page 53: ...LIMIT SWITCH ROD 7 P0582009 SANDING BELT 180 75 LONG 3 P9962Z0003 TOOL BOX G0445 G0582 4 P0582004 FELT PAD G0445 G0582 8 P9962Z0008 PHILLIPS SCREWDRIVER 5 P0582005 GRAPHITE PAD G0445 G0582 9 P9962Z00...

Page 54: ...52 G0445 G0582 G9962Z 9962ZX Wide Belt Sander Sanding Motor System Diagram...

Page 55: ...T WASHER 3 8 1109 2 P9962Z1109 2 MOTOR FAN COVER G9962Z 1301 P9962Z1301 BRAKE BRACKET 1109 1 P9962ZX1109 1 MOTOR FAN 1301 1 P9962Z1301 1 BRAKE BRACKET FRONT G9962ZX G0582 G0445 1302 1 P9962Z1302 1 BRA...

Page 56: ...54 G0445 G0582 G9962Z 9962ZX Wide Belt Sander Table Lift System Diagram...

Page 57: ...TION GEAR BOX G9962ZX G0582 G0445 2302 P9962Z2302 WORM GEAR 2332 PN05 HEX NUT 1 4 20 2303 P6005 BEARING 6005Z 2333 PB89 HEX BOLT 1 2 12 X 4 1 2 2304 P9962Z2304 BEARING CAP 2334 P9962Z2334 PROXIMITY SW...

Page 58: ...56 G0445 G0582 G9962Z 9962ZX Wide Belt Sander Conveyor System Diagram...

Page 59: ...3112 BEARING UCF205 3135 P9962Z3135 POSITIONING WHEEL 3113 PLW04 LOCK WASHER 3 8 3136 PSB70 CAP SCREW 5 16 18 X 2 3114 PB24 HEX BOLT 3 8 16 X 1 1 4 3137 PLW01 LOCK WASHER 5 16 3115 P9962Z3115 BEARING...

Page 60: ...58 G0445 G0582 G9962Z 9962ZX Wide Belt Sander Feed Drum and Pressure Roller Diagram G9962Z G9962ZX G0445 G0582...

Page 61: ...P9962Z4302 BRACKET 4105 PSS07 SET SCREW 1 4 20 X 1 2 G0582 G9962Z G9962ZX G0445 4106 PB11 HEX BOLT 5 16 18 X 1 1 2 G0582 4303 PRP55M ROLL PIN 3 x 27 4107 PN02 HEX NUT 5 16 18 4304 P9962Z4304 SLIDERAI...

Page 62: ...60 G0445 G0582 G9962Z 9962ZX Wide Belt Sander Sanding Drum and Platen System Diagram G0582 G0445 G9962Z G9962ZX...

Page 63: ...582 G0445 5205 P9962Z5205 HANDLE 5401 P05825401 HOUSING G0582 G0445 5206 P9962Z5206 ROLLER LOCKDOWN SHAFT 5401 P9962Z5401 HOUSING G9962Z G9962ZX 5301 P05825301 BRACKET MALE G0582 G0445 5402 P05825402...

Page 64: ...62 G0445 G0582 G9962Z 9962ZX Wide Belt Sander Upper Roller System Diagram...

Page 65: ...LT M8 1 25 X 20 6301 P9962Z6301 FIRING ADJUSTER 6113 P9962Z6113 AIR CYLINDER 6302 P9962Z6302 ECCENTRIC ROD 6114 P9962Z6114 LIMIT SWITCH HOLDER L TYPE 6303 PSB79 CAP SCREW 1 2 12 X 3 1 2 6115 P9962Z611...

Page 66: ...64 G0445 G0582 G9962Z 9962ZX Wide Belt Sander Cabinet Assembly Diagram...

Page 67: ...101 UPPER FRAME COVER G0582 G0582 7102 P9962Z7102 DUST HOOD 7106 P9962Z7106 DOOR LOCK 7103 PS39M PHLP HD SCR M6 1 0 X 10 7107 PB03 HEX BOLT 5 16 18 X 1 7104 P9962Z7104 LEFT DOOR UPPER FRAME 7108 PW07...

Page 68: ...6 8128 1 8109 8117 8111 8132 8115 8112 220V 8118 8129 1 8110 8129 2 8131 8108 8128 2 8130 8121 8120 8119 8123 8122 8122 8124 8103 8102 8101 8126A 8114 220V 8135 440V 8136 440V 8105 8104 8113 8116 8106...

Page 69: ...8111 P9962Z8111 CONTACTOR LC1 D50 G9962Z 8122 P9962Z8122 PU CONNECTOR 1 2 220V 8123 P9962Z8123 PU CONNECTOR 3 4 8111 P9962ZX8111 CONTCTR LC1 D386 220V 440V 8124 P9962Z8124 CABLE CONNECTOR 1 G0445 G99...

Page 70: ...68 G0445 G0582 G9962Z 9962ZX Wide Belt Sander Belt Oscillation System Diagram...

Page 71: ...9962Z9109 SOLENOID VALVE 9128 P9962Z9128 8MM FLEXIBLE HOSE 9111 P9962Z9111 PLASTIC CONNECTOR 9129 P9962Z9129 8MM FLEXIBLE HOSE 9112 P9962Z9112 AIR MANIFOLD 9131 P9962Z9131 6MM FLEXIBLE HOSE 9113 P9962...

Page 72: ...and ways to prevent injury The owner of this machine MUST maintain the original location and readability of the labels on the machine If any label is removed or becomes unreadable REPLACE that label...

Page 73: ...OOR 214 P9962Z7112 LABEL MACHINE DATA G9962Z 203 PLABEL 22 LABEL HAND PINCH 214 P9962ZX7112 LABEL MACHINE DATA G9962ZX 204 PLABEL 32 LABEL USE RESPIRATOR 214 P05827112 LABEL MACHINE DATA G0582 205 P99...

Page 74: ...72 G0445 G0582 G9962Z 9962ZX Wide Belt Sander Hardware Recognition Chart...

Page 75: ...G0445 G0582 G9962Z 9962ZX Wide Belt Sander 73 Notes...

Page 76: ...rizzly shall be tried in the State of Washington County of Whatcom We shall in no event be liable for death injuries to persons or property or for incidental contingent special or consequential damage...

Page 77: ...0 2 Years ____ 2 8 Years ____ 8 20 Years ____20 Years 6 How many of your machines or tools are Grizzly ____ 0 2 ____ 3 5 ____ 6 9 ____10 7 Do you think your machine represents a good value _____Yes __...

Page 78: ......

Page 79: ......

Page 80: ...ly Trusted Proven and a Great Value OR SECURE ORDERING ORDERS SHIPPED WITHIN 24 HOURS E MAIL RESPONSE WITHIN ONE HOUR Visit Our Website Today And Discover Why Grizzly Is The Industry Leader Call Today...

Reviews: