background image

4

1. Camera Setup

Before installing the camera in your nest 

box, 

wire it up inside the house fi rst 

to 

make sure everything is working as it 

should.

First, 

remove the lens cap

Take your 3-way cable 

and plug it into the 

camera’s trailing cable. Please note that not 

all camera models have audio.

To power up, 

plug in the mains power 

supply at the other end 

of the cable.

Info-Circle


The camera does not emit a visible glow, 

even when the night vision is active.

Bracket

IR LEDs

Lens

Direct connection to TV (RCA/AV)

To TV/Recorder

From Camera

Audio not available on all models

Summary of Contents for NCTV2A

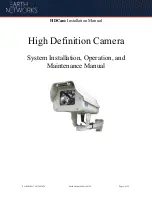
Page 1: ...HDWired Bird Box Camera Kit Quick Start Guide Please read me before you start NCTV2A NCTV2WP NCTV8A...

Page 2: ...2...

Page 3: ...a read through this booklet before you get started Not only are there some helpful hints and tips but we also have some guidelines to help you plan the installation of your camera With just a bit of...

Page 4: ...e lens cap Take your 3 way cable and plug it into the camera s trailing cable Please note that not all camera models have audio To power up plug in the mains power supply at the other end of the cable...

Page 5: ...not available on all models A Direct Connection SDViewing If your TV has RCA phono connections you can connect the AV cable directly to your TV using the provided adaptor for standard definition view...

Page 6: ...HDMI connection Simply plug the cable with adaptor into the converter and run the HDMI cable between the converter and your TV or monitor see diagram below Select the correct source on your TV that co...

Page 7: ...ter and your TV or monitor You will need to change the camera mode to TVI see page 9 HDMI Converter Sold Separately HDMI Cable to TV Sold Separately USB Power In From Camera In Out DC 5V HD Out Not us...

Page 8: ...iasts can use this camera with HD DVRs using the BNC connection for recording Connect the twist fit connector into an available channel on the rear of your recorder Set the camera to the compatible mo...

Page 9: ...by default to CVBS Info Circle If you are using our Full HD HDMI converter you will need to set the camera to TVI to get the best experience To change the camera mode power up the camera and press an...

Page 10: ...n cable 3 Physical Installation Now you are ready to mount the camera into your nest box Focussing your camera lens Place a small bird sized object in your bird box You can gently twist the camera s l...

Page 11: ...bracket Our innovative anti slip bracket design will hold the camera in place against the wood There is a gap in the eaves of the box through which to pass your cables B If you do not have one of our...

Page 12: ...ning through your garden then it is a good idea to protect it from the weather and burrowing animals A simple way to do this is with some spare hose pipe Simply run your cable through the hose tape ov...

Page 13: ...efficient LED lamps to help with this Our daylight lamps automatically switch off at night to ensure the birds are not disturbed and get a good night s sleep They provide extra light during the day t...

Page 14: ...ctivates Point a smartphone or digital camera at the front of the camera If it is operating correctly the camera should see a red glow from the IR LEDs 3 Check wired connections Make sure there are no...

Page 15: ...quire more assistance setting up your bird box camera or you need further support then please head to our Help website where you ll be able to find all our support guides and videos Find more help onl...

Page 16: ...For more help visit green feathers co uk help Ver 2010NCTV...

Reviews: