4. Workflow
Please follow this guide to ensure the proper functioning of the device.
4.1 Preparation for Data Acquisition
4.1.1 Set up the equipment
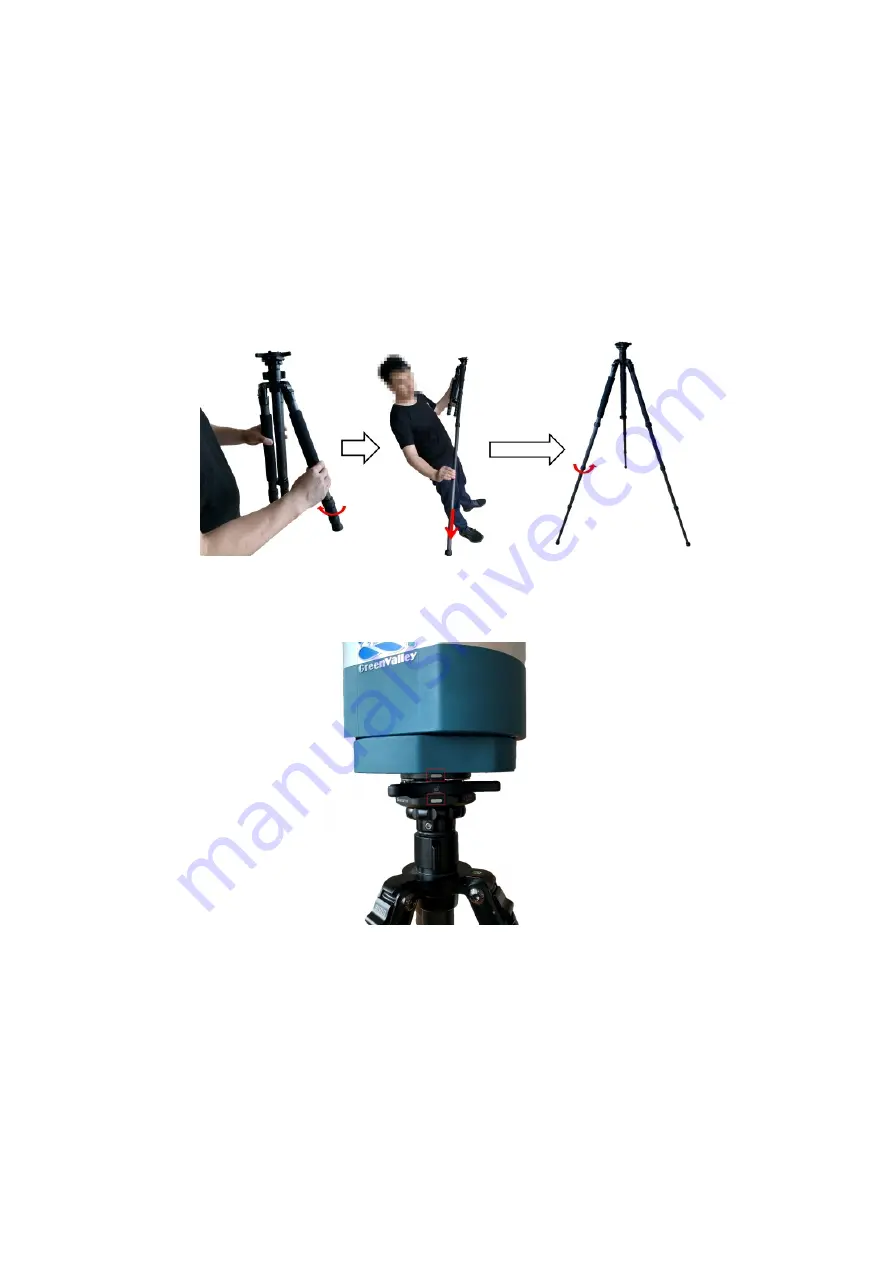
1.Set up tripod: turn the locking clamp of the tripod clockwise to extend each carbon fiber leg, and then lock each clamp by screwing counter-
clockwise. Place the tripod on the ground. Make sure the tripod is level: make a flat surface with a level bubble or by adjusting the tilt angle of
the legs.
Set up tripod
2.Set up equipment: turn the bayonet lock on the tripod counterclockwise and place the main body of the sensor on the tripod base in a point-
to-point manner. After it is placed stably, the bayonet will lock automatically. You can shake the tripod gently to make sure if it is well stationed
on the ground.
Set up equipment
3.Install battery compartment: Press the black and red buttons under the tripod and attach the compartment from the bottom. Release the
buttons and make sure the battery compartment is properly attached. You can shake the battery compartment gently to make sure it is
properly installed.
8


