


5
1-855-GRN-RYDE
(1-855-476-7933)
www.greenlightcycle.com
USER MANUAL - URBAN RYDER™
ASSEMBLE THE BIKE: HANDLEBARS
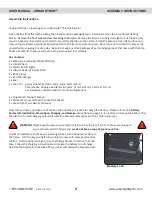
Tools required (received in your Tool Kit):
5 x Hex Wrenches (2mm, 3mm, 4mm, 5mm, 6mm)
3 x Wrenches, double sided (8mm & 10mm, 13mm & 15mm, 14mm & 17mm)
1 x Screwdriver, double sided (star & slot configuration)
Assemble the Bike: Handlebars
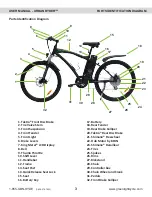
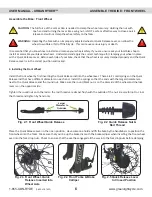
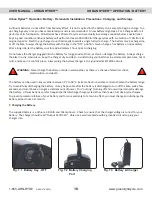
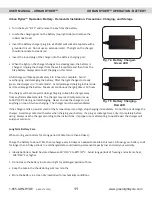
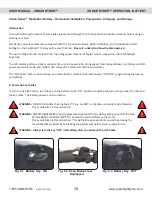
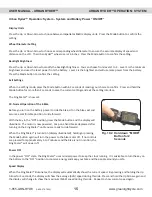
1. Handlebars
Install the handlebars by removing the 2 stem faceplate bolts. Turn the handlebar to ensure that the wiring is not twisted
and flows upward toward the handlebars without kinking. Place the handlebars in the half round stem cut-out making sure
that the grooves (splines) are aligned correctly, in the centre of the cut-out. Replace the faceplate and tighten the bolts
evenly so that the faceplate sits flat over the handlebar.
Fig. 1.1 Handlebars
Fig. 1.2 Handlebar Stem Cut-out
Fig. 1.3 Handlebar Stem With
Handlebar Inserted
Fig. 1.4. Handlebar Face
-
plate With Tight
-
ened Bolts
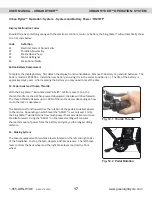
Fig 1.5. Quick Release Lever, Front
Wheel
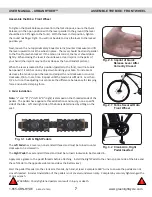
Quick Release Lever on the Front Wheel
Urban Ryder™ uses a quick release lever to lock the front wheel into
the fork dropouts. Quick release levers are safe and convenient when
adjusted properly. Before riding your bicycle you must understand how
they work and how to use them properly to prevent serious injury or
death from a fall.
Quick release levers use a cam action to clamp the front wheel in place.
Due to their adjustable nature, it is critical that you understand how they
work, their proper use, and how much force is needed to secure them
correctly.