15
4. OPERATION GUIDE
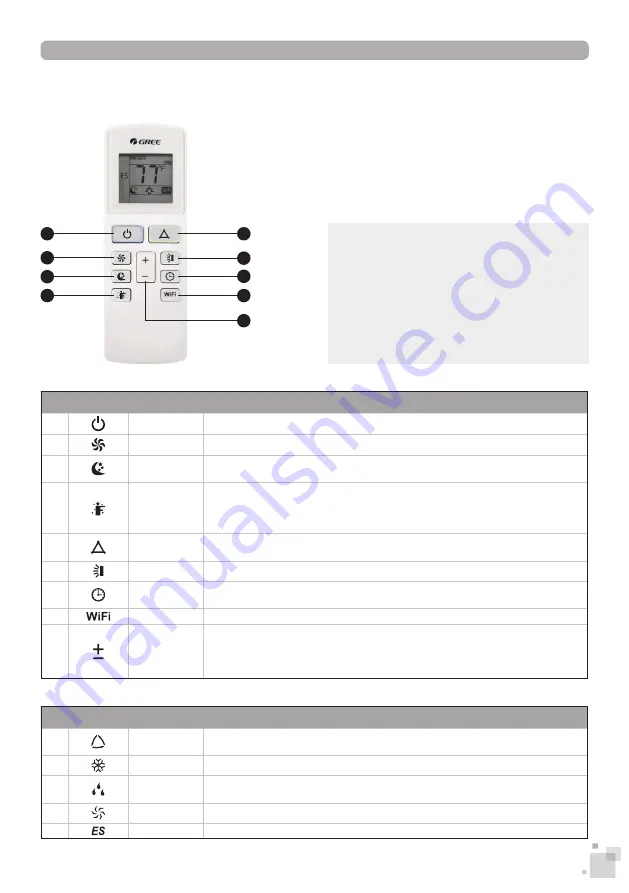
4.3. REMOTE CONTROL BUTTON FUNCTIONS
SYMBOL
BUTTON
DESCRIPTION
1
Power
Turns the air conditioner on or off.
2
Fan Speed
Selects a fan speed setting in the following order : Auto, Low, Medium and High.
3
Sleep
Activates or deactivates Sleep mode. This function is available only in Cooling, Drying
and Energy Saving mode to maintain the most comfortable temperature.
4
“I Feel”
Activates or deactivates the “I Feel” function. When switched on, the remote control
will serve as the ambient temperature sensor instead of the window unit in order to
offer better comfort in the area of the user. If power is lost, this function will need to
be reactivated.
5
Mode
Selects an operation mode from the following options : Auto, Cooling, Energy Saving,
Drying or Ventilation. See table below for mode description.
6
Swing
Activates or deactivates the automated flap oscillation.
7
Timer
Allows the setting of a switch-on or switch-off timer. Pressing this button twice will
cancel any set timer.
8
WiFi
Activates or deactivates WiFi control.
9
Increase /
Decrease
While operating under Cooling, Drying or Energy Saving modes, increases or de-
creases the set temperature by 1º with each press. Hold the two buttons simultane-
ously for 2 seconds to quickly adjust the temperature on the remote control.
While setting a timer, increases or decreases the time value.
SYMBOL
MODE
DESCRIPTION
1
Auto
Monitors the room’s ambient temperature and humidity level, and automatically ad-
justs to provide comfortable room temperature.
2
Cool
Cools the room to the desired temperature as well as remove moisture from the air.
3
Dry
Reduces humidity in the air by automatically. Fan speed cannot be adjusted in this
mode.
4
Fan
Operates in ventilation only.
5
Energy Saver Adjusts its own operation to achieve energy-saving performance.
NOTICE :
▪
The distance between the remote control
and the window unit must not exceed 8 me-
ters (26 ft), and there must be no obstacles
in between.
▪
If you do not use the remote control for an
extended period of time, please remove the
batteries.
1
2
3
4
6
7
8
9
5
Summary of Contents for GJC08BS-A6NRNJ1B
Page 2: ...2...


