background image

WARRANTY

Great Planes

®

Model Manufacturing Co. guarantees this kit to be free from defects in both material and workmanship at the date of

purchase. This warranty does not cover any component parts damaged by use or modification. In no case shall Great Planes’ liability
exceed the original cost of the purchased kit. 
Further, Great Planes reserves the right to change or modify this warranty without notice.

In that Great Planes has no control over the final assembly or material used for final assembly, no liability shall be assumed nor
accepted for any damage resulting from the use by the user of the final user-assembled product. By the act of using the user-assembled
product, the user accepts all resulting liability.

If the buyer is not prepared to accept the liability associated with the use of this product, the buyer is advised to return this
kit immediately in new and unused condition to the place of purchase.

READ THROUGH THIS  MANUAL  BEFORE
STARTING CONSTRUCTION. IT CONTAINS
IMPORTANT WARNINGS AND INSTRUCTIONS
CONCERNING THE ASSEMBLY AND USE OF
THIS MODEL.

GPMZ0209 for GPMA1100  V1.1

© Copyright 2003, Printed in China 

Champaign, Illinois

(217) 398-8970, Ext 5

[email protected]

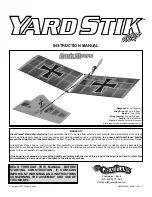
INSTRUCTION MANUAL

Wingspan: 41 in [1040mm] 

Wing Area: 496 sq in [32 dm

2

Weight: 12 oz [340 g]

Wing Loading: 3 oz/sq ft [9 g/dm

2

Length: 38.5 in [980mm] 

Radio: 3-channel w/2 micro servos,

micro receiver and electronic speed control

TM

Summary of Contents for Yard Stik

Page 1: ...user assembled product By the act of using the user assembled product the user accepts all resulting liability If the buyer is not prepared to accept the liability associated with the use of this pro...

Page 2: ...stem Check with your local solid waste officials for details in your area for recycling options or proper disposal This product contains a chemical known to the state of California to cause cancer and...

Page 3: ...ngle stick radio is suitable It comes with a micro receiver and two Futaba S 3106 micro servos The transmitter also has NiCd s Following are descriptions and part numbers for suitable radio equipment...

Page 4: ...Pro CA GPMR6001 1 2 oz 15g Medium Pro CA GPMR6007 1 Hobby knife HCAR0105 11 blades 5 pack HCAR0211 medium grit sandpaper Propeller balancer TOPQ5700 Balancing propellers on Park Flyers is important as...

Page 5: ...Control Horn Retainers 2 Pushrod Retainers 2 2 x 1 2 Screws 2 Wheel Retainers Decal Sheet Kit Contents Photographed Kit Contents Not Photographed Before starting to build use the Kit Contents list to...

Page 6: ...same way Note The top of the stabilizer has the slot for the fin offset to the left 4 Cut a narrow slot in the elevator to accommodate one of the control horns 15 16 24mm from the edge of the slot in...

Page 7: ...e front of the boom The rear wing mount should be approximately 19 480mm from the front of the boom The exact location of the wing mounts will be determined later when balancing the model and the tail...

Page 8: ...elevator will be centered Cut off any excess wire so approximately 1 4 6mm of the L remains Connect the pushrods to the second from the outer holes in the control horns Later after the elevator and r...

Page 9: ...gear from the motor Add a small drop of gear cement to the hole in the end of the gear that goes on the shaft Install the gear until the end is even with the end of the shaft Allow the cement to harde...

Page 10: ...connections Mount the speed controller to the receiver and mount the receiver to the battery holder using double sided foam mounting tape Connect all the wires Use the black strips provided on the dec...

Page 11: ...itches in the transmitter to change the direction 7 Reminder The propeller should be removed from the motor while performing setup operations in the shop Follow the instructions included with whatever...

Page 12: ...e the decal is to be applied with window cleaner Then apply the decal and squeegee out the cleaner with a soft sheet of balsa This will remove air bubbles from under the decals for the best appearance...

Page 13: ...G and leveled the wings use a few drops of thin CA to permanently glue the wing mounts to the fuselage boom Before taking your Yard Stik out to the flying field for the first time or to your back yar...

Page 14: ...k charge the battery then to discharge it Many battery chargers have peak charging and automatic discharging capabilities If you do not have a charger that is able to discharge batteries you can disch...

Page 15: ...or a flying site In addition to obstacles it is important to be aware of people who may wander into the area once you begin flying At AMA club flying sites it is a severe rule infraction to fly over o...

Page 16: ...eir size weight just 10g and range make them perfect for theYard Stik and other small electrics Designed for park slow and indoor flyers Mini FM Receivers feature SMT components for maximum dependabil...

Reviews: