OPERATING AND MAINTENANCE MANUAL
LS100 IQ - LS100 EX -
LS100 ENERGY
LS100 EX ENERGY
ENGRAVING LASER / CUTTING LASER
M_LS100IQ EX Energy_EN_C - Last updated: 01/2018 - Translation of the French original document
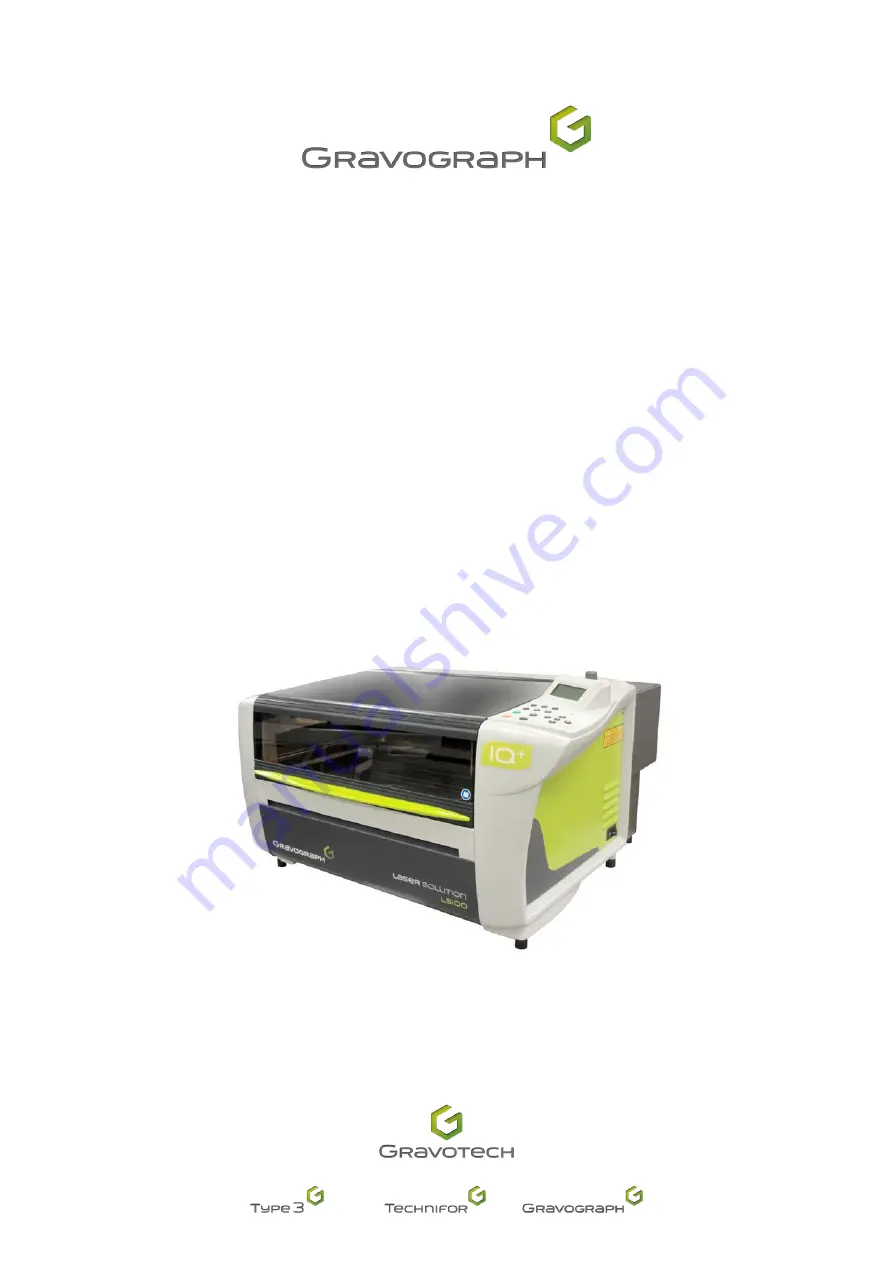
Page 1: ...OPERATING AND MAINTENANCE MANUAL LS100 IQ LS100 EX LS100 ENERGY LS100 EX ENERGY ENGRAVING LASER CUTTING LASER M_LS100IQ EX Energy_EN_C Last updated 01 2018 Translation of the French original document ...
Page 2: ...Water chiller only for ENERGY machines 17 Cardboard box Content only for ENERGY machines 17 G Laser safety 18 1 Recommendations and safety regarding laser devices 18 Personnel safety 18 2 Work station safety 19 Proposed warning label at the entrance to the laser controlled zone 19 General Instructions 20 Wearing safety glasses 20 3 optical components 21 Safety precautions 21 Protective measures in...
Page 3: ... Initial installation if necessary 32 Filling the tank 33 Disconnecting the water chiller shipping position 34 8 Electrical installation 35 J Connections Installation 36 1 Power supply connection Water chiller only for ENERGY machines 36 Switching on the chiller 36 Resolution of the problems Water chiller 37 K Connections Installation 38 1 Power supply connection Machine 38 Using the PLC function ...
Page 4: ...achment 56 2 Cutting out kit 56 3 Compressor kit Air assist 57 4 Honeycomb cutting table 57 O Preventive maintenance 58 1 General maintenance 58 2 Accessories provided 58 3 Cleaning the system 59 Engraving table 59 Guides belts 59 Fume extraction outlets 59 4 Optics maintenance 60 Mirror s Lens es 60 5 Removing and cleaning the Z Auto sensor 61 6 Autofocus adjustment 62 7 Setting point zero Origin...
Page 5: ...5 9 Firmware characteristics driver 68 10 Characteristics of the water chiller only for ENERGY machines 69 Q Appendix Engraving menu 70 1 Parameters sub menu 71 2 File sub menu 71 3 Info sub menu 71 4 Configuration sub menu 71 ...
Page 6: ...ed to refer to it For the attention of users having an individual cardiac assist device fitted Our equipment is designed and manufactured with the greatest care in order to guarantee their compliance with the EMC Directive currently in force This means that the levels of electromagnetic emissions produced by this equipment when in operation are limited and do not exceed the thresholds defined by t...
Page 7: ...relessness inadequate supervision or maintenance failure to observe the safety or usage instructions described herein or otherwise communicated to the User the use of poor quality or non recommended lubricants fluids and additives or where there is fault on the part of the User or a third party As provided in this manual the User shall furthermore i observe the normal conditions of use ii not exce...
Page 8: ...ted machinery APF Rotary APF Laser PFD500 TAG3500 Cylinder attachment DMC15 DMC25 DMC25PN DP3500 DP4500 DP4500PN RD1 RD2 RDM Low voltage 2014 35 EU EMC 2014 30 EU RoHS 2 2011 65 EU Dot peen marking Portable machine XM700 Low voltage 2014 35 EU EMC 2014 30 EU RoHS 2 2011 65 EU Cells and batteries 2006 66 EC CO2 Yag and fiber laser marking Machine gantry LS100 Energy LS100 Ex Energy LS900 Energy LS1...
Page 9: ...y LS100 LS100 Ex LS100 Energy LS900 LS900 XP LS1000 XP Warning Flammable materials Warning Hot surface LS100 Ex Fibre LS900 Fibre Warning Flammable materials Warning Hot surface LS900 Edge Laser Solution Fiber Series Energy Laser Solution Hybrid Series Energy Laser Solution Green Series Energy 9 M_LS100IQ EX Energy_EN_C ...
Page 10: ...Required safety labels Laser Solution CO2 Series Energy LW1 LW2 LaserTop 2000 M_LS100IQ EX Energy_EN_C 10 Required safety labels ...
Page 11: ...pment The marking equipment is identified by 1 identification plate on the rear face Have the model and serial number of the equipment available when contacting Gravotech 3 Work station safety Turn off the machine before beginning any cleaning maintenance or repair procedure Never operate the machine without the protective covers properly mounted Never operate the machine if the doors are damaged ...
Page 12: ... demineralised water level is always adequate Cooling capacity begins to decline when the demineralised water level falls below the green area NORMAL on the gauge Never drain the water tank while the chiller is in operation Ensure that the air intake and air outlet are well ventilated There must be a clearance of at least 8 cm 3 150 in at the air intake and of 30 cm 11 811 in at the air outlet Bew...
Page 13: ...ur if incorrect lifting techniques are used The head must be handled with the greatest care In the event of an extended period of non use unplug the power cable and protect the machine Never move the head manually unless the machine is jammed mechanically Never pour or spill liquid on the machine drinks cleaning products etc except where recommended by Gravotech example lubrication ...
Page 14: ...ing system that can lift 300 kg 661 387 lb or more 1 Unpacking Only for ENERGY machines 1 Cut and remove the straps holding the 2 parcel s together water chiller LS100 ENERGY EX ENERGY 1 Water chiller 2 LS100 ENERGY EX ENERGY 2 Separate the 2 parcel s 1 Water chiller 2 LS100 ENERGY EX ENERGY 1 2 1 2 ...
Page 15: ...machines 4 Protection s 6 Release and remove the strap 7 Remove all the protective elements 8 Remove the machine from the packaging 1 person s on each side 9 Remove the water chiller from the packaging 1 person s on each side only for ENERGY machines Check that nothing is missing from the parcel If anything is missing contact Gravotech Keep the packaging in order to move the machine safely This pa...
Page 16: ...box Content 1 2 3 4 5 6 7 8 9 10 11 1 1 bottle s of cleaning solution 2 1 packet s of lens cleaning wipes 3 1 packet s of cotton buds for mirrors 4 Driver 5 Ball tip hex key 6 Brush 7 Set of 6 keys 8 Compressed air hose for air assist Length 100 mm 3 937 in Tube diameter 4 mm 0 157 in 9 Autofocus adjustment gage LS100 IQ LS100 EX 10 Autofocus adjustment gage LS100 ENERGY LS100 EX ENERGY 11 Barb fi...
Page 17: ...npacking Package contents Water chiller only for ENERGY machines 1 2 1 Water chiller 2 Cardboard box Cardboard box Content only for ENERGY machines 1 2 3 4 5 1 Power cable 2 Water hose s 3 Outlet connector 4 2 Hose clamp s 5 O ring ...
Page 18: ...erning the controls and signage access panels doors emergency stops Example application of safety pictograms installation of suitable guards use of the electrical safety channel provided on the equipment non exhaustive list Only trained personnel aware of the risks posed by the machine are authorized to use it Only Gravotech personnel or persons authorized by Gravotech may service the elements tha...
Page 19: ...in which this sign is posted is defined as a restricted laser area in normal production phase 1 maintenance and setting phase 1 1 Regulation in the restricted area Access to the restricted laser area is regulated Only competent personnel having attended proper training can remain during the operation this implies medical aptitude and laser safety training Any person authorized access to the restri...
Page 20: ...d out by competent LT HT personnel In the event of an incident or even doubts concerning the functioning of the installation inform the person in charge of laser safety Wearing safety glasses Under normal conditions of use the machine operates at Class 1 2M protective goggles are not necessary Laser radiation safety glasses are mandatory whenever in an area where laser radiation emission exceeds c...
Page 21: ...atched or cracked ZnSe lenses refer to the manufacturer s safety data sheets By default take the protective measures described in the paragraphs below Protective measures in the event of thermal decomposition or scored or scratched lenses Deposits in the form of red or white powder and an unpleasant smell indicate that thermal decomposition of the ZnSe has occurred Selenium oxide and zinc oxide va...
Page 22: ...metically sealed containers or plastic bags together with the fragments brush shovel and protective clothing used in the operation Never dispose of optical components with household waste And do not allow them to enter drains or water circuits The equipment must be disposed of at an appropriate collection point for processing sorting and recycling of Waste Electronic and Electrical Equipment WEEE ...
Page 23: ... examples of the most sensitive materials plastics and rubber painted materials anodized and galvanized metals ceramics materials containing lead or mercury Do not cut engrave or mark PVC based polyvinyl chloride materials The fumes are extremely toxic and can chemically destroy the metal parts of the machine For a more detailed list of the risks related to the material worked with consult Annex A...
Page 24: ...aser tube is supplied with high voltage 20kV by the anode located at the back of the laser source left hand side of the machine The high voltage is completely isolated To prevent any risk of serious electric shock the plastic cover must always be in place when the machine is switched on Wait for 5 minute s before disconnecting the high voltage supply and replacing the glass laser tube A fatal volt...
Page 25: ... bridge 2 Ruler X 3 Head 4 Lamp s 5 Rotary device connection optional 6 Ruler Y 7 Engraving table 8 Frame 9 General stop button On Off switch 10 Control panel 11 Air assist Adjustment button 12 LCD sCreen 13 Green light Red light 14 KeyboArd Always switch the machine off before connecting or disconnecting the cylinder attachment optional ...
Page 26: ...hiller 2 Cooled water intake IN coming from the water chiller For all machines 3 Pneumatic connection for tube Air assist 4 Power inlet outlet Dangerous voltage 5 Opening for air evacuation hose to air extraction system 6 Input output link Air extraction system SELV 7 Standard input output link SELV 8 Do not use The protective cap should not be removed under any circumstances 9 Port USB SELV To av...
Page 27: ... Front view 1 Temperature controller 2 Insufficient flow alarm red light 3 Air inlet air filter 4 General stop button On Off switch 5 Normal flow green light Rear view 1 Water tank intake 2 Cooling water intake water to be cooled 3 Water level gauge 4 Drain 5 Alarm output connector 6 Power inlet outlet with fuse Dangerous voltage 7 Cooling water outlet cooled water 8 Air outlet 1 2 3 4 5 1 2 3 6 5...
Page 28: ...e of 20 cm 7 874 in all around the machine The back of the machine should be kept clear and should not be close to any items of furniture It must not be placed on a shelf or installed in a corner Overheating could seriously damage the machine and lead to major costs This marking equipment is designed to function at a room temperature between 10 C 50 F and 35 C 95 F If the equipment is stored at a ...
Page 29: ...nd outlet filters must be cleaned regularly in order to prevent an accumulation of dust from obstructing the air flow 3 Air extraction system optional Never operate the machine without a fume and gas extraction system that is properly configured installed and maintained in good working order Laser marking certain materials emits dangerous fumes and fine particles that may damage health Call an app...
Page 30: ... system blown air requires the use of an air compressor not supplied Configuration Air flow rate 12 l mn Minimum Use the compressed air hose supplied to connect the machine to the air compressor 1 Pneumatic connection for tube Air assist 2 Compressed air hose for air assist Length 100 mm 3 937 in Tube diameter 4 mm 0 157 in 2 1 ...
Page 31: ...e Port s 2 USB port s available Protection key Machine 4 USB port s available Protection key Machine 1 Machine 2 Machine 3 Graphics card NVIDIA Or ATI Radeon 512 Mo MB NVIDIA Or ATI Radeon DX10 1 Go GB compatible Monitor 17 1024 768 pixels 22 1280 1024 pixels Peripheral s Printer Twain scanner The machine is an output peripheral like a printer 6 Software compatibility Program Laserstyle Operating ...
Page 32: ...or ENERGY machines Initial installation if necessary 1 Remove the caps present on the water intake and outlet of the machine retain them 2 Fix the water hoses to the cooler and to the machine using the hose clamps 1 Cooling water intake water to be cooled 2 Cooling water outlet cooled water 3 Water hose s 4 Hose clamp s 1 2 3 3 4 ...
Page 33: ...er pump it is strictly prohibited to operate it without demineralised water in the tank In order to ensure optimal performance it is advisable to keep the water level in the tank within the green area NORMAL on the gauge Demineralised water must be used in the tank in order to prevent damage to the metal material 2 Connect the water hoses between the cooler and the machine 3 Open the water intake ...
Page 34: ...iller shipping position 1 Switch off the chiller 2 Close the water intake and outlet valves on the cooler 3 Disconnect the water hoses between the cooler and the machine 4 Connect together the 2 water hoses attached to the machine Connect together the 2 water hoses attached to the cooler ...
Page 35: ...ength of cable to be used Separate the power cable from the link cable and make sure the power and link cables do not run through the same cable tray Connect the machine direct to a mains power line and avoid connecting more than one device to that line by plugging several devices into the same mains socket or into a multi way adapter Do not allow inductive or capacitive devices to be connected to...
Page 36: ...chiller in the event of a major problem unplug the power cord or actuate the general stop button on the chiller Switching on the chiller Place the switch in the I position On The pump starts up immediately The green indicator light illuminates and no alert is sounded The screen displays the current water temperature Always switch on the chiller before the machine Check that the water cooling circu...
Page 37: ... cord is connected correctly on both the chiller side and mains side Check that there is power to the mains plug The chiller switches on but encounters a problem Check that the intake and outlet valves are correctly opened Check the water level in the tank Check that the water hoses are correctly connected between the chiller and the laser machine ...
Page 38: ...e connector screws are properly tightened to prevent the cables from becoming disconnected while the machine is switched on This could cause permanent damage to the circuit boards 3 Using the PLC function Connect the user standard input output link cable to the connector See Using the PLC function User standard inputs outputs 4 Connect the female socket to the male connector of the power supply th...
Page 39: ...responsible for the final work station s compliance The activation menu for the PLC function is accessed from the Configuration menu This function is used to configure the machine as a PLC in an automated line Once it has been activated this function is used to operate the machine using signals sent through the PLC port To use the PLC function configure the inputs outputs X Y values to be defined ...
Page 40: ...ximum current 200 mA 6 I1 dry contact Input TTL compatible 7 I3 dry contact Input TTL compatible 8 Gnd Grounding The grounds are shared by pins 8 11 12 13 9 24 V Available for powering the loads switched by the NPN outputs O1 O4 Maximum current 100 mA 10 Maximum current 100 mA 11 Gnd Grounding The grounds are shared by pins 8 11 12 13 12 13 14 I2 dry contact Input TTL compatible 15 I4 dry contact ...
Page 41: ... Input I1 Control Unit Example of wiring for an Output O1 24 V inductive load Control Unit Example of wiring for an Output O1 5 V inductive load Control Unit When connecting inductive charges use an anti parasite protection and a freewheeling diode to avoid damaging the Outputs ...
Page 42: ...low on from one another L01 SETUP FPGA X X GRAVOGRAPH FPGA X XX LCD SOFT X XX 32 Mo BOOT X XX READY TO RECEIVE The machine is ready for operation Do not load files until the display says Ready to receive This could cause incorrect loading of the file Loading a damaged file could cause incorrect laser emission which could damage the engraving machine Resolution of the problems If the machine does n...
Page 43: ...n the machine etc mechanical electrical electronic faults suggesting a breakdown if there is a major problem or the machine is jammed mechanically the machine is jammed on the part to be engraved marked the machine is jammed on an object in the work area forced restart external internal cleaning filling the tank water chiller Restarting If the machine or the operating program locks the machine may...
Page 44: ... computer running Windows For help contact Gravotech Switch off the PC and the machine Follow the connection procedure for the type of link cable supplied with the machine The machine is supplied with a USB cable Machine PC connection USB connection 1 Connect the USB cable to the machine s USB port 2 Connect the USB cable to the PC s USB port ...
Page 45: ...ll the controls for cutting and engraving marking 1 Selection of the next file 2 Positioning pointer 3 Air assist 4 Air extractor 5 Autofocus 6 Start Start marking 7 Cancel 8 Pause 9 Check key 10 Air assist adjustment 11 Green light Red light 12 Selection of the previous file 13 Joystick 14 Focus adjustment 1 2 3 4 5 6 7 8 9 10 11 12 13 14 ...
Page 46: ...tart marking Start up engraving 7 Cancel Exit from menu without applying change to last parameter Return to reception during a pause during end of reception during end of engraving 8 Pause Marking suspended 9 Check key Access to the different menus Exit from current menu Move to next screen Move to next menu Validation of the entered data 10 Air assist adjustment Air flow adjustment 11 Green light...
Page 47: ...scription Lit Machine initializing Off Machine ready to receive a file Pause Flashing Marking in progress 2 Description of the human machine interface Joystick The arrow keys joystick are used to move the X Y axes manually The joystick is mainly used for positioning the head directly above the material to be engraved X movement Press and hold the key s Y movement Press and hold the key s Diagonal ...
Page 48: ...ld the key s The table moves vertically to the desired position 3 Release the key s 4 To confirm press the key The vertical position is saved Access to the different menus To access the machine menu s 1 Switch on the machine Wait until the following message appears on the screen READY TO RECEIVE 2 Press the key PARAMETERS FILE INFO CONFIGURATION To select a menu press the key s as many times as ne...
Page 49: ...e room Red light D2 Status Meaning Indicator light on The chiller is operating in cooling mode Indicator light not illuminated The chiller is operating in isolation mode The light flashes The chiller is operating in energy saving mode The arrows enable the operator to adjust the controller the display mode and the selection and adjustment of a setting In any mode press the down arrow and the displ...
Page 50: ...rculation loop obstructed Off On Yes Insufficient water alarm Off On Yes Malfunction of the water circuit pump Off On Yes General parameters The parameters of the industrial chiller supplied with the ENERGY machines are preset Initial setup It is not necessary to change these parameters Press the SET button in normal mode The red indicator light flashes This indicates that the controller is in par...
Page 51: ...l 3 F2 Cooling hysteresis 0 2 3 0 2 Constant temperature control 4 F3 Control mode 0 1 0 0 Constant temperature control 1 Intelligent control 5 F4 Alarm Maximum water temperature exceeded 1 20 5 6 F5 Alarm Water temperature below the minimum 1 20 5 7 F6 Alarm Maximum ambient temperature exceeded 40 50 40 8 F7 Password 00 99 08 9 F8 Permissible water temperature Maximum F9 40 Intelligent control 10...
Page 52: ...sword configured by default is 08 4 Press the key SET The red indicator light flashes this indicates that the controller is in parameter setting mode The screen displays the value F0 first parameter 5 Select a parameter 6 Press the key SET 7 Set the value of the parameter 8 Press the key SET 9 Select another parameter 10 Save the modified parameters Press the key RST The screen returns to temperat...
Page 53: ...imum size of the engraving area in the graphics software LS100 IQ ENERGY 460 mm 18 110 in x 305 mm 12 008 in LS100 EX EX ENERGY 610 mm 24 016 in x 305 mm 12 008 in 2 Enter the text to be marked It should have a black fill and no contour Example enter ABCDE 3 Position the text in the top left corner of the page depending on the position of the keyring on the engraving table Screen PC ABCDE 3 Settin...
Page 54: ... displays the file name and certain parameters 5 Positioning the object to be engraved To load and position the keyring on the engraving table inside the machine 1 Open the upper door 2 Position the keyring in the top left corner of the table against the scaled rules 6 Focusing Check that the table is low enough for the moving head not to touch the keyring Automatic focus adjustment automatic Z Re...
Page 55: ... beam is shut off once the machine has finished processing the material The head goes back to the origin top left corner Before opening the door wait a few seconds for any remaining fumes emitted during the marking or cutting process to be removed by the extraction system In the L Solution driver it is possible to enter a timeout value to set a delay before the air extraction system stops when mar...
Page 56: ...aterial to be cut at a distance from the surface of the engraving table to minimize the area of contact with the surface The cutting out kit comprises 4 removable plate s pins supports and end stops The plate to be cut out rests on the pins positioned in advance on 2 3 or 4 of the removable plates which are arranged on the engraving table according to the dimensions of the part In all cases place ...
Page 57: ...eycomb cutting table Used to support the material to be cut at a distance from the surface of the engraving table to minimize the area of contact with the surface The cutting table redirects the exhaust air over and under the material to clear the engraving area of fumes To limit the reflection of laser beam the honeycomb material is reflective only in the area in contact with the material Install...
Page 58: ... optical parts can damage them reduce the power of the laser or cause the premature failure of components Regularly cleaning the machine improves its operation extends the life of parts and reduces the risk of failure Recommendations Check and if necessary clean the machine every 8 hours of engraving marking or cutting If debris has accumulated on the optics and the movement system clean the machi...
Page 59: ...owels Never pour or spray solution into the machine Dampen the paper towel or cloth with the cleaning solution away from the machine Wipe the parts 5 Clean the glass with a chamois cloth and a soap solution Do not use paper towels Do not use solvent 6 Use a soft cloth or paper towels and a soap solution to clean the casing Do not use alcohol acetone or any other aggressive product because it could...
Page 60: ...es or mirrors to clean them Never touch an optic with your fingers Acids in the skin could destroy the coating on the optics Use the Gravotech accessories Mirror s Lens es Check the mirrors and lenses Clean them with a lens cleaning wipe access them through the mirror access To access the right hand mirror and the window remove the protective panel 1 Mirror access 2 Lens es 3 Mounting screw s 4 Pr...
Page 61: ...the Z Auto sensor upwards Pull the sensor hook upwards 1 Sensor hook 2 Z Auto sensor 2 Remove the Z Auto sensor from the bottom 1 Z Auto sensor 3 Clean the Z Auto sensor with a clean dry cloth 4 Place the Z Auto sensor back into position 1 Sensor hook 2 Z Auto sensor 5 Lower the sensor hook 1 2 1 1 2 ...
Page 62: ...the door of the machine 3 Switch on the machine The screen below appears L01 SETUP FPGA X X The machine emits an audible signal The following screen is displayed for 3 seconds GRAVOGRAPH FPGA X XX LCD SOFT X XX 32 Mo BOOT X XX 4 While this screen is displayed press the key 5 Select the following menu LASER SETTINGS TICKLE RE ALIGN MACHINE USING TIME XXX 6 To confirm press the key 7 Select the foll...
Page 63: ...ce the autofocus adjustment gage in position on the engraving table under the lens support of the head 1 1 Autofocus adjustment gage 11 Move the engraving table upwards until the lens support comes into contact with the gage 1 2 1 Autofocus adjustment gage 2 Lens support 12 Check that the gage can slide slightly 1 1 Autofocus adjustment gage 1 ...
Page 64: ...lose the door of the machine 15 Press the key Hold the key s down until Autofocus starts X Y ADJUSTMENT Z ADJUSTMENT ALIGNMENT MODE 16 To cancel exit press the key LASER SETTINGS TICKLE RE ALIGN MACHINE USING TIME XXX 17 To cancel exit press the key The following screen is displayed for 3 seconds GRAVOGRAPH FPGA X XX LCD SOFT X XX 32 Mo BOOT X XX The screen below appears READY TO RECEIVE ...
Page 65: ...R SETTINGS TICKLE RE ALIGN MACHINE USING TIME XXX 3 To confirm press the key 4 Select the following menu X Y ADJUSTMENT Z ADJUSTMENT ALIGNMENT MODE 5 To confirm press the key The head goes back to the origin top left corner The pointer is lit Red The screen below appears X Y ADJUSTMENT JOYSTICK X Y X X XX Y X XX 6 Position a plate on the table top left corner 7 Set the laser pointer to the top lef...
Page 66: ... in x 330 mm 12 992 in x 145 mm 5 709 in Travel distance Z 145 mm 5 709 in Surface flatness 0 2 mm 0 008 in 0 3 mm 0 012 in 2 Physical characteristics LS100 EX LS100 EX ENERGY LS100 EX LS100 EX ENERGY Dimensions L x w x h machine 1025 mm 40 354 in x 725 mm 28 543 in x 450 mm 17 717 in Net weight machine Maximum 70 kg 154 324 lb Maximum 67 kg 147 710 lb Dimensions L x w x h machine packing 890 mm 3...
Page 67: ...Y 0 05 mm 0 002 in 4 Noise emission of the machine ISO 11201 standard LS100 IQ LS100 EX LS100 ENERGY LS100 EX ENERGY 30 35 40 W 60 70 80 W 25 W when awaiting engraving LAeq dB A 61 61 52 during nominal engraving scanning LAeq dB A 70 72 66 5 Environment Operating temperature 10 C 50 F 35 C 95 F Storage temperature 5 C 23 F 45 C 113 F Humidity level 5 85 6 Laser characteristics LS100 IQ LS100 EX LS...
Page 68: ...traction system DIN 5 point connector Female Cylinder attachment DIN 8 point connector Female Air assist Pneumatic connection Internal diameter 4 mm 0 157 in Pressure 6 Bar 87 PSI Maximum Air extraction system Internal diameter 100 mm 3 937 in Air flow rate General mode With pre separator Minimum 0 5 kPa 0 07 PSI 200 m h 4 36 yard min 6 kPa 0 87 PSI 300 m h 6 54 yard min Water chiller only for ENE...
Page 69: ...2 677 in Weight water chiller packing Maximum 34 kg 74 957 lb tank empty Nominal voltage 220 240 VAC 110 VAC Frequency 50 Hz 60 Hz Absorbed current 1 4 2 1 A Absorbed power 500 W Cooling capacity 2361 Btu h 700 W 595 kcal h Coolant fluid R 134a Water tank capacity 6 L Water flow 6 L min Pump lift 10 m 32 808 ft Environment 5 C 41 F 40 C 104 F Temperature precision 1 C 34 F Diameter of the water in...
Page 70: ... the machine SET UP FPGA X X GRAVOGRAPH FPGA X XX LCD SOFT X XX 32 Mo BOOT X XX Waiting time 3 s READY TO RECEIVE 2 Press the key PARAMETERS FILE INFO CONFIGURATION To select a menu press the key s as many times as necessary To confirm press the key To cancel exit press the key Selected option Available sub menu s ...
Page 71: ...ration sub menu Used to configure the general machine parameters PARAMETERS FILE INFO CONFIGURATION PARAMETERS FILE INFO CONFIGURATION PARAMETERS FILE INFO CONFIGURATION PARAMETERS FILE INFO CONFIGURATION L SOLUTION 900 XP LANGUAGE XXXXXXX SERIAL PORT DISPLAY UNIT MM PLC OFF LENS MULTI JOB ON ENGRAVING ONCE OFF ALARM END JOB OFF APF MENU 001 FILENAME1 DELETE THIS FILE DELETE ALL 90 FREE MEMORY POW...