Graupher HoTT-MX-12 Programming Manual Download Page 1

H O P P I N G . T E L E M E T R Y . T R A N S M I S S I O N

GRAUPNER GMBH & CO. KG
POSTFACH 1242
D-73220 KIRCHHEIM/TECK
GERMANY

http://www.graupner.de

Modifi cations and availability reserved. 

Graupner

 products 

are only available through model shops. We will gladly 
inform you of your nearest stockist. We accept no liability 
for printing errors.

Printed in Germany PN.PG-02

Although we have carefully checked the information contained in these instructions and 
checked that it is correct, we can accept no liability of any kind for mistakes, incomplete 
information and printing errors. 

Graupner

 reserves the right to alter the characteristics 

and features of the software and hardware at any time and without prior notifi cation.
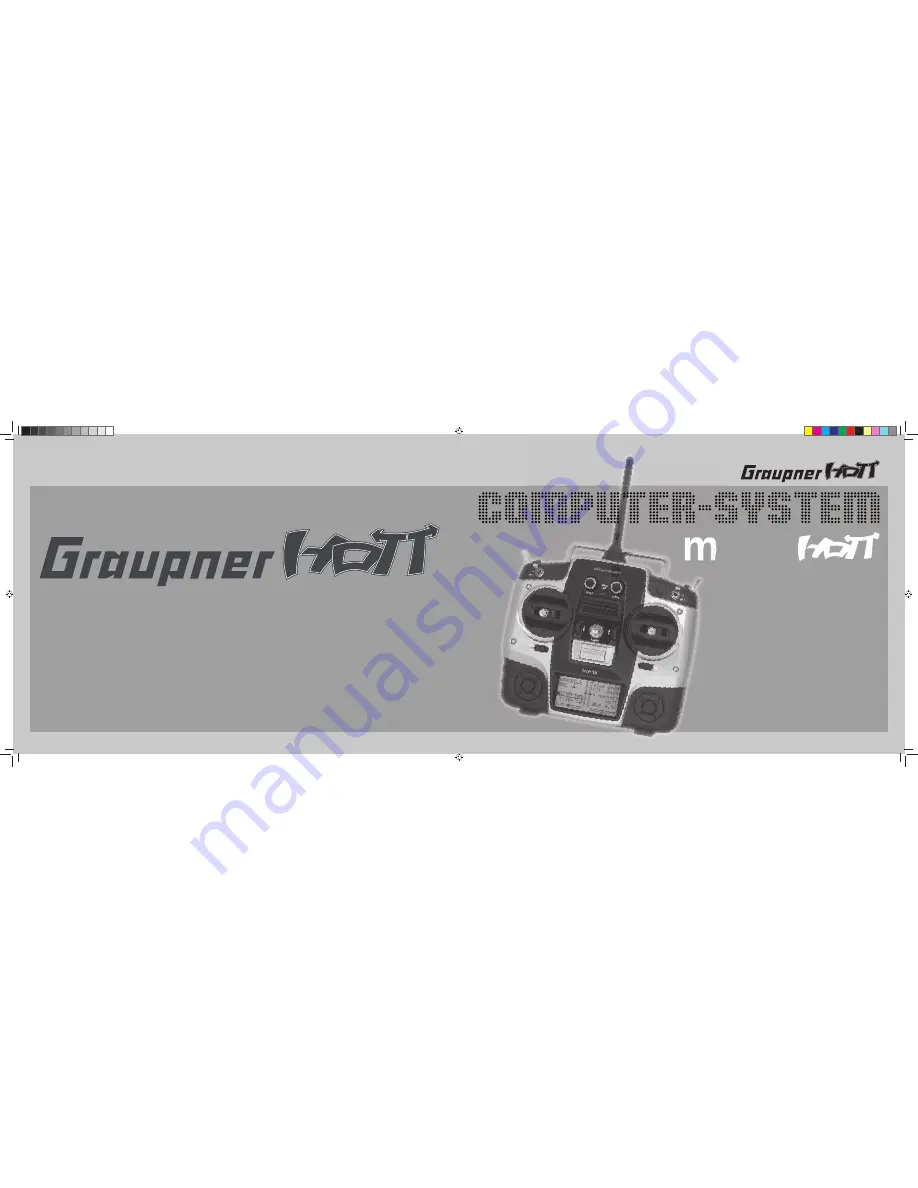
Programming Manual

33112.

mx-12

 HoTT.2.gb

H O P P I N G . T E L E M E T R Y . T R A N S M I S S I O N

mx-12

33112_Um_mx12_HoTT_2_GB.indd   1

33112_Um_mx12_HoTT_2_GB.indd   1

06.06.2011   19:46:36

06.06.2011   19:46:36

Summary of Contents for HoTT-MX-12

Page 1: ...02 Although we have carefully checked the information contained in these instructions and checked that it is correct we can accept no liability of any kind for mistakes incomplete information and prin...

Page 2: ...clus de la garantie Cette garantie ne remet pas en cause les droits l gaux des consommateurs Avant toute r clamation ou retour de mat riel v rifiez pr cis ment les d fauts ou vices constat s car si le...

Page 3: ...f the receiving system is switched on when you are transmitting the transmitter To be on the safe side disconnect the fueltank or the flight battery Protect all electronic equipment from dust dirt dam...

Page 4: ...ns are standing in front of the model Carry out at least one complete function check on the ground followed by a complete simulated flight in order to show up any errors in the system and the model s...

Page 5: ...efore important to suppress the electric motors and in electric powered models it is essential that every motor should be effec tively suppressed Suppressor filters reliably eliminate such interferenc...

Page 6: ...s can be used without incurring a safety risk Liability exclusion Compensation It is not possible for Graupner to ensure that the user observes the installation and operation instructions and the reco...

Page 7: ...7 For your notes 33112_mx12_HoTT_2_GB indd Abs56 7 33112_mx12_HoTT_2_GB indd Abs56 7 06 06 2011 19 39 25 06 06 2011 19 39 25...

Page 8: ...plenty of clean water before seeking medical help The cells air vents must never be blocked or sealed e g by solder When soldering the iron temperature should not exceed 220 C and each joint should be...

Page 9: ...age warning is triggered Caution When stored for a long period the cell voltage should not be allowed to fall below 1 2 V This means that you may have to recharge the battery before stor ing it Reflex...

Page 10: ...with his experience in handling radio controlled models In theory the Graupner HoTT process allows more than 200 models to be operated simultaneously Although in practice the mixed operation of diffe...

Page 11: ...t response times through direct ultra reliable data transmission from the main processor to the 2 4 GHz RF module No additional delay caused by detours through a module processor Telemetry menu for di...

Page 12: ...h side Single Side Servo Throw Variable sub trim range 125 for adjusting the neutral position of all servos Servo reverse programmable for all servos EXPO DUAL RATE system separately variable can be s...

Page 13: ...ht approx 7 g The set Order No 33112 contains mx 12 HoTT micro computer transmitter with integral 4NH 2000 RX RTU flat pack Ni MH transmitter bat tery specification reserved Graupner GR 12 HoTT bi dir...

Page 14: ...y of the mx 12 HoTT charge socket Commercially available battery charge leads produced by other manufacturers are often made up with the op posite polarity For this reason it is essential to use only...

Page 15: ...This timer is automatically reset to 0 00 when the transmitter detects that the voltage of the transmitter battery is significantly higher than the last time it was switched on e g as a result of a c...

Page 16: ...cturer The maximum charge current for the transmitter battery is 1 5 A Limit the charge current to this value on the charger If you wish to charge the transmitter battery at a current higher than 1 5...

Page 17: ...undo the six screws recessed into the back panel of the transmitter as shown in the illustration Arrangement of the case back screws Hold the two case sections together with your hand and turn the un...

Page 18: ...below centre Turn this screw clockwise until the stick on that side moves freely from one end stop to the other alterna tively unscrew it until the stick is fully self centring again Do not touch tra...

Page 19: ...ng tension horizontal horizontal vertical vertical Note The right hand stick unit is of mirror image construction i e the screw you require is located on the right below centre Brake spring and ratche...

Page 20: ...balanced even when suspended from a neckstrap Order No 1121 Neckstrap 20 mm wide Order No 70 Neckstrap 30 mm wide 3 possition switch SW 6 7 Rotary proportional control CTRL 8 Important note In the tr...

Page 21: ...in the German language For more details please see the section entitled Voice in the section SECRET MODE starting on page 26 and Telemetry on page 131 The volume of the headphone output can be adjust...

Page 22: ...Off switch in the OFF position when using a flight simulator and when using the mx 12 HoTT transmitter as a Pu pil unit in a Trainer system for only in this position is the RF section of the transmitt...

Page 23: ...or laptop If you wish the standard fixed date of creation can be changed on the PC using a suitable program and the data can subsequently be analysed on a compatible PC using the PC program available...

Page 24: ...level a warning display appears see pictures on right hand page at the same time a warning signal is emitted Visual display of the trim lever positions alternatively if rota ry controls CTRL 7 or 8 a...

Page 25: ...lines within the set up menus in the same manner as the left hand four way arrow buttons 2 Selects and adjusts parameters in set up fields af ter you have activated them by pressing the SET button the...

Page 26: ...e later on the Download page of the transmitter at www graupner de in the form of an update VOICE MESSAGES As mentioned in the section entitled Optional head phone socket on page 21 signals and messag...

Page 27: ...memory HIDDEN MODE CONTRAST LANGUAGE 0 ENGLISH VOICE ENGLISH 22 100 I The loading process is finished when the progress bar at the bottom edge of the screen disappears HIDDEN MODE CONTRAST LANGUAGE 0...

Page 28: ...screen displays function fields which vary according to the menu selected SEL STO SYM ASY The function fields are activated by pressing the SET button Function fields SEL select STO store e g transmi...

Page 29: ...r you cease operating one of the two rotary controls the screen reverts to a display of the current position of the four trim levers for the two dual axis stick units Position display Rotary proportio...

Page 30: ...In our example we of course switched off the RF signal In contrast if you switch the transmitter on without switching off the RF signal the central LED glows an intense blue and the symbolic transmit...

Page 31: ...ctive by default For more details of this please refer to page 74 fixed wing model or 76 helicopter The basic procedure for programming a new model memory can be found on page 48 and in the programmin...

Page 32: ...s is servo socket 5 which is also marked with a T in conjunction with a PC running Windows XP Vista or 7 To connect the receiver to a PC you require the separately available USB interface No 7168 6 an...

Page 33: ...n the in structions supplied with your speed controller before doing this Carefully raise the central lug of the connector slight ly 1 withdraw the red wire 2 and insulate the bare contact with tape t...

Page 34: ...vo retaining screws are fitted and tight ened properly The drawing below shows how to in stall a servo correctly The brass spacers should be pushed into the rubber grommets from the underside Servo mo...

Page 35: ...e switch or voltage regu lator not only reduces the risk of a cable fracture but also ensures a more even energy supply to the servos connected to the receiver Auxiliary function Y lead Order No 3936...

Page 36: ...ages Please note however that virtually all servos speed controllers gyros etc sold in the past and also most of those currently available are only approved for use on an operating voltage in the rang...

Page 37: ...37 For your notes 33112_mx12_HoTT_2_GB indd Abs13 37 33112_mx12_HoTT_2_GB indd Abs13 37 06 06 2011 19 39 35 06 06 2011 19 39 35...

Page 38: ...nd it is possible and likely that there will be differences between the number of the transmitter control as stated above and the number of the subsequent control chan nel Control channel There is a p...

Page 39: ...y Transmitter control switches Many functions are best controlled automatically by a particular freely programmable position of the Ch 1 transmitter stick or the throttle limiter in the case of heli c...

Page 40: ...ottle limit function see page 79 while the throttle limit slider is in the bottom half of its travel i e in the start up range the Ch 1 trim lever acts as idle trim on the throttle limit and the idle...

Page 41: ...41 For your notes 33112_mx12_HoTT_2_GB indd Abs44 41 33112_mx12_HoTT_2_GB indd Abs44 41 06 06 2011 19 39 36 06 06 2011 19 39 36...

Page 42: ...priate mixer functions for the two servos Up to three flight phases can be programmed in each of the ten model memories The digital trim positions are stored separately for each flight phase with the...

Page 43: ...ervo or speed controller electric model and 2 elevator servos tail type 2nd elevator Rudder Ailerons or left aileron 1st elevator Telemetry sensor or right aileron Receiver power supply Receiver power...

Page 44: ...udder reversed Reverse servos 3 4 in the servo set menu AND swap over at the receiver Delta flying wing Elevator and ailerons reversed Reverse servos 2 3 in the servo set menu Elevator correct aileron...

Page 45: ...45 For your notes 33112_mx12_HoTT_2_GB indd Abs18 45 33112_mx12_HoTT_2_GB indd Abs18 45 06 06 2011 19 39 36 06 06 2011 19 39 36...

Page 46: ...ts 5 6 in the Transmitter control settings menu In addition to three linear mixers which can be assigned to any functions and can also be switched on and off the Helicopter mixers menu provides five p...

Page 47: ...ce and safety features of the throttle limiter see section starting on page 79 the speed controller should be connected to receiver output 6 See page 96 for more details Receiver assignment for model...

Page 48: ...r supplied in the set is bound to it This is indicated by the receiver code displayed at top right of the screen in the example above this is R06 If on the other hand the model memory is unbound you w...

Page 49: ...a model memory which you inadvertently occupied you can simply erase it from a different model mem ory However if you erase a model memory which is not currently active after the procedure you will se...

Page 50: ...memory then this MUST first be bound to a further receiver before any servos connected to the receiver can be con trolled from the transmitter For more information on this please refer to the Binding...

Page 51: ...51 For your notes 33112_mx12_HoTT_2_GB indd Abs22 51 33112_mx12_HoTT_2_GB indd Abs22 51 06 06 2011 19 39 37 06 06 2011 19 39 37...

Page 52: ...t or right hand four way button to select the clear model sub menu then press the SET button Select the model to be erased using the arrow buttons cd of the left or right hand four way button 01 03 04...

Page 53: ...e a non active model memory then the message free appears in the Model select menu copy model model Use the arrow buttons cd of the left or right hand four way button to select the copy model model su...

Page 54: ...od export to SD import from SD Use the arrow buttons cd of the left or right hand four way button to select the model to be imported from the SD memory card 05 frei EXTRA ALPINA COBRA BELL47G import f...

Page 55: ...he re ceiving system associated with the original model memory can also be operated using the SAME trans mitter and the copied memory without repeating the binding procedure 33112_mx12_HoTT_2_GB indd...

Page 56: ...rottle at right stick MODE 4 Throttle at left stick MODE 1 Throttle at right stick elev down elev up left rudder right rudder full throttle idle left aileron right aileron full throttle left rudder ri...

Page 57: ...oo high see page 28 and the following op tion cut off are activated In the Wing mixer menu the Brake NN mixers are disabled no The brake system is retracted in the for ward position of the throttle br...

Page 58: ...Note regarding 2elev sv In this mode a transmitter control which is assigned to input 6 in the Transmitter control settings menu is de coupled from servo 6 this is for safety reasons Ailerons Camber...

Page 59: ...ny combination of times can also be selected Simultaneously pressing the cd or ef buttons of the right hand four way button CLEAR resets any settings you have made to 0 or 00 motor at C1 idle re tail...

Page 60: ...tral SET button of the right hand four way button and the current setting is shown highlighted Now use the arrow buttons of the right hand four way button to select an appropriate name from those avai...

Page 61: ...telemetry link to the transmitter For this reason all telemetry sensors installed in the model must be connected to this receiver since only the last bound receiver is able to transmit their data via...

Page 62: ...s back to full power and the blue LED glows constantly once more Within this period walk away from the model moving 6 the sticks all the while If at any point within a distance of about fifty metres y...

Page 63: ...63 For your notes 33112_mx12_HoTT_2_GB indd Abs59 63 33112_mx12_HoTT_2_GB indd Abs59 63 06 06 2011 19 39 38 06 06 2011 19 39 38...

Page 64: ...us of the Model memory menu point Stick mode Basically there are four possible ways of arranging the principal control functions of a model helicopter on the two dual axis sticks the primary functions...

Page 65: ...late link age using three linkage points connected to one pitch servo rear and two roll servos front left and right For collective pitch control all three servos move the swashplate axially 3sv 2nic A...

Page 66: ...the central SET button right the main rotor spins clockwise as viewed from above left the main rotor spins anti clockwise as viewed from above Simultaneously pressing the cd or ef buttons of the righ...

Page 67: ...ns the collec tive pitch min position to rear Note The Ch 1 trim always affects the throttle servo only By default what is known as the throttle limiter is set see page 79 this limits the travel of th...

Page 68: ...es not stop but continues to run to allow you to read off the time elapsed after reaching zero To make this clear the over run time is shown highlighted black background Sequence of sounds 30 sec befo...

Page 69: ...ith SET or alternatively press the cd or ef buttons of the right hand four way button CLEAR simultaneously to revert to the default sequence Please note that any subsequent changes to servo settings s...

Page 70: ...transmit their data via the down link channel The second and all other receivers run in parallel to the receiver last bound to the transmitter but completely independently of it they operate in Slave...

Page 71: ...ck to full power and the blue LED glows constantly once more Within this period walk away from the model moving 6 the sticks all the while If at any point within a distance of about fifty metres you n...

Page 72: ...ry The direction of rotation is indicated by the symbols and Be sure to set the direction of servo rotation before you make adjustments to the remaining options Simultaneously pressing the arrow butto...

Page 73: ...e side to be adjusted so that the marking frame only encloses the value you wish to change Press the central SET button of the right hand four way button to activate value adjustment the value field i...

Page 74: ...rans mitter controls with complete freedom in the Transmitter control settings menu and assign them to any function input see page 38 you like as this method ensures that the transmitter meets your ow...

Page 75: ...rotary proportional controls CTRL 7 or 8 or switches 4 5 and 6 7 to a position at which the marking frame encloses both sides of the travel setting I5 I6 trv 3 ctrl 7 100 100 100 100 If you wish to s...

Page 76: ...odel Any superfluous transmitter control will have an effect on your model if you operate it by mistake unless it is inactive i e unless no function is assi gned to it That is why you can select these...

Page 77: ...t hand four way button CLEAR with the switch assignment activated see illustration above resets the input to free Tips When assigning the switches please take care to set them to the appropriate direc...

Page 78: ...ixer system For this reason the Throttle input MUST always be left free when you are programming a model helicopter Gyr trv thr gyr lim 100 100 100 100 100 100 free ctrl 7 free If the gyro you are usi...

Page 79: ...ed controller can of course only reach its full throttle position if you release full servo travel using the throttle limit control That is why the lim input is reserved in the Helicopter program for...

Page 80: ...irection the illustration above changes if you alter the transmitter control direction for the collective pitch minimum position of the Ch 1 stick from back reflected in the picture above to forward i...

Page 81: ...81 For your notes 33112_mx12_HoTT_2_GB indd Abs58 81 33112_mx12_HoTT_2_GB indd Abs58 81 06 06 2011 19 39 39 06 06 2011 19 39 39...

Page 82: ...ion of the linkage point on the output disc or lever You can compensate for this effect by setting an Expo value greater than 0 with the result that the angular travel of the output device increases d...

Page 83: ...tely in the highlighted field using the arrow buttons of the right hand four way button Simultaneously pressing the cd or ef buttons of the right hand four way button CLEAR resets an altered value in...

Page 84: ...e increases disproportionately as stick travel increases Like Dual Rates the Expo setting applies directly to the corresponding stick function regardless of whether that function controls a single ser...

Page 85: ...of the left or right hand four way button to move to the right hand column marked at the bottom edge of the screen with the switch symbol then press the central SET button and assign a switch to the f...

Page 86: ...ch to phases 2 or 3 in the Basic settings menu i e you have not assigned switches to these alternative phases you automatically remain in flight phase 1 normal The number and name normal of this fligh...

Page 87: ...way to trans mitter control sub trim or offset settings with other radio control systems it is possible to set values within the range 99 to 99 However typical values are nor mally in single figures...

Page 88: ...to inter connect a pair of servos where two control surfaces are actuated by separate servos In all these cases the signal which flows directly from the output of a transmitter stick to the associate...

Page 89: ...pposite direction to the desired turn This effect is much more pronounced in model gliders with high aspect ratio wings than in power models with their much shorter moment arms and usually has to be c...

Page 90: ...this is not usu ally necessary if the correct channels are used diff flaps Camber changing flap differential The aileron flap mixer see below is designed to superimpose an aileron function on the fla...

Page 91: ...y pressing the cd or ef buttons of the right hand four way button CLEAR resets an altered value to 0 Usual values are generally in single to low double figures It is essential to check and adjust this...

Page 92: ...ed If you have programmed aileron differential the re sponse of the ailerons will inevitably be adversely affected by the extreme up deflection of the ailerons in the butterfly setting because the dif...

Page 93: ...ions then you should leave the value for this mixer at 0 See the notes on page 89 in this regard diff red Differential reduction The problem of reduced aileron response in the but terfly configuration...

Page 94: ...phase described in the section starting on page 104 instead they are automatically switched to a user varia ble pre defined value A value must be entered in the Gyro line press the central SET button...

Page 95: ...varied within the range 125 and 125 at a maximum of five reference points The control signal modified in this way affects the collective pitch servos only In the picture on the left the stick is exact...

Page 96: ...g should be adjusted relative to the collective pitch curve in such a way that the correct system rotational speed is obtained at this point At the minimum position of the throttle collective pitch st...

Page 97: ...on starting on page 104 Helicopter with speed GOVERNOR REGULATOR In contrast to speed controllers which simply adjust pow er output in the same way as a carburettor speed gover nors maintain a constan...

Page 98: ...e then you should set up the mixer as follows The tail rotor control curve can be defined using up to five points in a similar way to the collective pitch curve see previous page You can therefore mod...

Page 99: ...ting upon the swashplate control stick restricting its range of travel which is usually rectangular to a circular pattern This is designed to solve the following problem if the helicopter is set up in...

Page 100: ...ws a curve with a slightly altered throttle setting below the hover point at the cen tre of stick travel 100 100 OUTPUT 2 3 4 5 1 Control travel Different throttle curves are programmed for each fligh...

Page 101: ...100 OUTPUT 2 3 4 5 1 Control travel Hover point b Rotational speed too high Remedy on the Collec tive pitch graphic page increase the blade pitch angle for collective pitch by increasing the value at...

Page 102: ...e damage which a model helicopter can cause if its spinning rotor blades are allowed to wreak havoc Make sure that nobody else is standing in the primary hazard zone around the helicopter You must nev...

Page 103: ...103 For your notes 33112_mx12_HoTT_2_GB indd Abs34 103 33112_mx12_HoTT_2_GB indd Abs34 103 06 06 2011 19 39 41 06 06 2011 19 39 41...

Page 104: ...ive pitch value Press the central SET button of the right hand four way button to select the graph page of Collective pitch and then move the vertical line to Point 5 using the transmitter stick Start...

Page 105: ...e there is no torque effect for which compensation is required i e which the tail rotor would have to correct For this reason all the appropriate mixers are automatically switched off in auto rotation...

Page 106: ...ign dual functions to particular switches accidentally The two important mixer parameters are as follows the mixer ratio which defines the extent to which the input signal acts on the output of the co...

Page 107: ...now high lighted black background Use the arrow buttons of the right hand four way but 3 ton to define the mixer input fro m Press the central 4 SET button of the right hand four way button switch to...

Page 108: ...ssential to remember that the mixed travels of the individual mixers are cumulative when multiple stick commands are made simultaneously and this brings a danger that the servo concerned may strike it...

Page 109: ...os con nected to receiver output 6 using a Y lead These control surfaces are to be employed as landing flaps i e when the associated transmitter control is operated they deflect down only However this...

Page 110: ...ght hand four way button Remember that the set mixer value always refers to the input signal from the associated transmitter control control signal Setting a negative mixer value reverses the directio...

Page 111: ...the switch position the offset value now jumps to X or X e g MIX3 S el trv 0 0 100 offs SET STO Use the arrow button c of the left or right hand four way button to move to the Travel line then press...

Page 112: ...plate linkages employing 2 4 collective pitch servos the mixer ratios and directions are set up by default as can be seen in the screen shot above The pre set value is 61 in each case but the value ca...

Page 113: ...150 to 150 of normal travel 0 corresponds exactly to the servo centre position The servo display provides a quick method of checking your settings with out having to switch on the receiving system How...

Page 114: ...battery The voltage range offered in the next line Battery warning threshold will vary according to this setting Simultaneously pressing the arrow buttons cd or ef of the right hand four way button CL...

Page 115: ...7v 0 2 Display light unlim RF Country Euro The purpose of the country setting is to fulfil the require ments of various directives FCC ETSI IC etc For example radio control systems operated in France...

Page 116: ...e arrow buttons ef of the left or right hand four way button to select the desired servo socket 1 to 6 z then press the central SET button of the right hand four way button to switch between hold and...

Page 117: ...When setting up the radio control system please ensure at all times that the transmitter aerial is an adequate distance from the receiver aerials A safe distance is about one metre If you ne glect thi...

Page 118: ...ntain no user variable values If you wish to change a parameter press the central SET button of the right hand four way button to highlight the parameter black background Change the value within the p...

Page 119: ...n the interests of safety the distance to the model should be reduced until the audible warning ceases Receiver temperature R TEM Ensure under all flight conditions that the receiver stays within its...

Page 120: ...mit ter control to the desired position and press the SET button again to store the current transmitter control position This position is now stored as the new neutral position TRIM trim position The...

Page 121: ...be assigned to the same control function for example you may wish to be able to operate each aileron with two servos or to control an oversized rudder using two coupled servos instead of a single one...

Page 122: ...d This setting applies to all channels but only affects the servos programmed to FAIL SAFE mode Default setting 0 75 s FAIL SAFE ALL global fail safe setting This sub menu can be used to define the Fa...

Page 123: ...Possible settings MODE Mixer select 1 2 or 3 MASTER CH Primary channel 0 1 according to transmitter SLAVE CH Secondary channel 0 1 according to receiver S TRAVEL Negative mix value 0 100 S TRAVEL Posi...

Page 124: ...on Servo travel Transmitter control travel Expo 100 100 100 0 100 100 0 Servo travel Transmitter control travel Expo 100 TYPE A 100 100 0 100 100 0 Servo travel Transmitter control travel linear 100 1...

Page 125: ...s side of control travel 2000 s corresponds to full travel 1500 s corresponds to the neutral position ALL MIN minimum servo travel In this line you can set the maximum servo travel for the servo test...

Page 126: ...servos and especially where multiple servos are employed for a single function e g ailerons to ensure that the groups of servos run absolutely synchronously If you are using digital servos we recommen...

Page 127: ...the result that sporadic range problems might be expected For this reason it is essential to connect the most im portant control functions to the primary receiver the one programmed as SUMI so that in...

Page 128: ...ast time it was switched on TMP The thermometer indicates the receiver s current operating temperature RX GENERAL MODUL 0 0V BAT1 BAT2 0 0V T2 20 C T1 20 C E FUEL F CELL V 1 0 00 2 0 00 3 0 00 4 0 00...

Page 129: ...entre of the screen also displays the current actually being drawn from a power source At the right hand edge the screen shows an alternating display of the actual cell voltages of the battery packs m...

Page 130: ...left or right hand four way button TELEMETRY SETTING DATA VIEW SIMPLE DATA VIEW RF STATUS VIEW VOICE TRIGGER and then press the central SET button of the right hand four way button to open the selecte...

Page 131: ...tions as described in the following section VOICE TRIGGER TRIG TRANSFER RECEIVER 1 3 REPEAT 1SEC VARIO VARIO If you assign a switch in this line and activate the RX VARIO sub menu of the DISPLAY DATA...

Page 132: ...SENSOR This line only appears if you have already activated one of the RX sub menus of the SIMPLE DATA VIEW menu and then returned directly to the VOICETRIG GER menu VOICE TRIGGER REPEAT 1SEC TRIG TR...

Page 133: ...133 For your notes 33112_mx12_HoTT_2_GB indd Abs52 133 33112_mx12_HoTT_2_GB indd Abs52 133 06 06 2011 19 39 44 06 06 2011 19 39 44...

Page 134: ...ht hand four way button to select the transmitter controls 1 to 6 z to be transferred to the pupil and briefly press the central SET button of the right hand four way button in each case so that they...

Page 135: ...transmitter with the required model type Fixed wing or Helicopter Assign the model name Pupil to the memory and set up the stick mode Mode 1 4 and Throttle min forward back to suit the pupil s prefer...

Page 136: ...ed correctly Incorrect cable connection see next section for cable selection Pupil transmitter not set to PPM 10 18 24 mode Further possible errors Teacher transmitter and HoTT receiver in trainer mod...

Page 137: ...er No 3290 24 mc 19 s iFS mc 22 s iFS and mc 24 mc 19 to mc 24 mx 22 iFS mx 24s mitter Pupil transmitter with DSC socket Pupil transmitter with Pupil module Order No 3290 3 3290 10 3290 33 Trainer lea...

Page 138: ...ixer contr set phase trim free mixer servo disp basic sett fail safe telemetry info disp teach pupi servo set D R expo free mixer contr set heli mixer swashp mix servo disp basic sett fail safe teleme...

Page 139: ...h Binding the Pupil transmitter to theTeacher trans mitter Note During the binding procedure the distance between the two transmitters should not be too great You may need to change the relative posit...

Page 140: ...ely quiet audible signals are heard GRAUBELE 01 2 22h stop flt normal K78 0 00 0 00 5 5V 51 5 2V HoTT P RFC Teach then this indicates that the Pupil signal has also been lost but the Trainer transfer...

Page 141: ...141 For your notes 33112_mx12_HoTT_2_GB indd Abs53 141 33112_mx12_HoTT_2_GB indd Abs53 141 06 06 2011 19 39 45 06 06 2011 19 39 45...

Page 142: ...he binding process this ID is transmitted to the receiver amongst other data so that it is able at any time to identify the radio signals of its transmitter Firmware version RFID firmware ver SD CARD...

Page 143: ...already mentioned it may take a certain amount of time for the available memory to be displayed after you switch the transmitter on depending on the total capac ity of the installed memory card 33112...

Page 144: ...f them up simply by setting up a suitable mixer see the section starting on the next double page Such systems are generally more often used in gliders and electric gliders than in power models In such...

Page 145: ...33h stop Flug K78 0 00 0 00 0 0V 50 5 2V HoTT M throttle too high Your choice of none no motor or throttle min forward or back also affects the range of mixers available in the Wing mixers menu The m...

Page 146: ...oo low Once you have overcome this initial hurdle you may need to bind the receiver installed in the model to this model memory in the Basic settings menu pages 56 62 This is accomplished by moving to...

Page 147: ...ype normal V tail delt FlW or 2elev sv aile flap 1 or 2 aileron servos and 0 or 2 flap servos Note If your model is fitted with only one camber changing flap servo you should still select 2FL Later in...

Page 148: ...the AIL RUD aileron rudder mixer sometimes known as a combi switch and perhaps the mixers Brake AIL and Brake FLAP As already described in detail on pages 89 and 90 the purpose of AIL Diff aileron di...

Page 149: ...about 50 and 100 for this option The flaps are controlled using the transmitter control or switch assigned to the input E6 Preferably however one of the rotary proportional controls CTRL 7 or 8 shoul...

Page 150: ...onal control after a brief delay the entry ctrl 7 will appear in the highlighted field I5 I6 trv ctrl 7 100 100 100 100 free In the third column you can adjust servo travel to suit the speed controlle...

Page 151: ...t the speed controller you are using alternatively you could I5 I6 trv 100 100 100 100 free 3 In the third column you can adjust servo travel to suit the speed controller you are using alternatively y...

Page 152: ...n the Transmitter control settings menu page 74 mod name stick mode motor at C1 1 no tail type normal GRAUBELE aile flap 2aile leave the motor at Ch 1 line at none if you have set Motor ON forward or...

Page 153: ...e switch assignment by pressing the central SET button of the right hand four way button and moving the switch from forward to back i e towards you With the mixer switched on move to the column above...

Page 154: ...Servo display menu and move the Ch 1 stick alone you will see that the bar display for Channel 1 either remains at around 100 while the displays for channels 2 5 follow the stick movement or the other...

Page 155: ...at they start running at the same moment you turn the motor on In contrast if you have decided on the solution de scribed in Example 1 then unfortunately there is no al ternative but to operate the mo...

Page 156: ...s you Select the appropriate line name and switch assign ment in the usual way i e using the various four way buttons 5 00 3 4 5 aile flap 2ail2fl timer phase 2 phase 3 takeoff speed tail type normal...

Page 157: ...set 2elev sv in the tail type line The two elevator servos are then connected to receiver output sockets 3 and 6 Two rudder servos In this example we will connect two rudders in parallel using the Fre...

Page 158: ...levator servo Free or auxiliary function and with four wing mounted control surfaces as fol lows Right flap aileron elevator Receiver power supply Receiver power supply Airbrakes or throttle or speed...

Page 159: ...f these settings is to define the range of wing mixers which the software makes avail able If you select the Delta flying wing tail type the software automatically superimposes the elevator and ailero...

Page 160: ...ng the mc 20 with the following additional refinements flap settings used as trim and butterfly crow as landing aid the latter exploiting the Brake AIL and Brake FL wing mixers to provide complete com...

Page 161: ...Ch 1 stick is usually at the forward end point when the airbrakes are retracted and the winglet rudders are only required to deflect outwards proportionally when the brakes are extended 33112_mx12_HoT...

Page 162: ...ure adjustment control for the carburettor This is gener ally operated by one of the rotary proportional controls CTRL 7 or 8 connected to one of the auxiliary channels not already in use Telemetry se...

Page 163: ...e mixer inputs on the second screen page and set the appropriate mixer ratios In both cases the mixer neutral point should be left at the centre posi tion of the Ch 1 stick travel For this reason you...

Page 164: ...be found by flight testing In most cases relatively small mixer values are called for typically below 10 but this does vary from model to model Vertical climb and descent 2 Many models exhibit a tend...

Page 165: ...lt state however the servos remain in their last valid position hold mode when in terference occurs You can program any individual servo output of your receiver to a fail safe position fail safe mode...

Page 166: ...sic description you will also find set up notes on gyro gain speed governors and flight phase programming Note If in contrast to the glow powered machine described here your main interest lies in elec...

Page 167: ...copters In the Swashplate type line select the number of servos which are used to actuate the swashplate See page 65 for more details of this In the Rotor direction line we enter the direction of rota...

Page 168: ...ls and directions of rotation of the individual servos The basic aim here should be to keep servo travels at 100 wherever possible as this maintains best possible resolution and accuracy Use Rev if ne...

Page 169: ...e the mechanical centre point of the collective pitch stick as this position feels completely natural to most pilots You can of course set up the curve to locate the hover at a different point but you...

Page 170: ...n tail ptch thro Autorot gyro 0 SEL 0 125 swash lim off This setting ensures that the motor stops reliably in the auto rotation phase to allow you to cope with an emergency Later when you have gained...

Page 171: ...h can be called up via switches which you assign The first step in this process is to call up the Basic model settings menu pages 64 71 pitch min rear timer 10 01 C3 phase 2 hover autorotat 3 7 rotor...

Page 172: ...which includes the throttle limiter function can be found in the section starting on page 96 If you have set up your helicopter as described in this programming example you will find that it is capab...

Page 173: ...173 For your notes 33112_mx12_HoTT_2_GB indd Abs60 173 33112_mx12_HoTT_2_GB indd Abs60 173 06 06 2011 19 39 48 06 06 2011 19 39 48...

Page 174: ...with altitude signals and five different tones for climb and descent altitude display and storage of min and max altitude Additional warning thresholds for min altitude max altitude two stage climb a...

Page 175: ...oltage current and capacity measurement with warning thresholds for min and max voltage max capacity and max current Rev count measurement and programmable speed governor also warning thresholds for m...

Page 176: ...lay with user variable warning threshold Country setting Range check Signal quality Receiver temperature Receiver voltage Servo reverse Servo neutral position Servo travel Cycle time Channel swap Fail...

Page 177: ...alled and used in accordance with the instruc tions may cause harmful interference to radio communi cations However there is no guarantee that interference will not occur in a particular installation...

Reviews: