8
Cutting Plotter Controller
OPS664
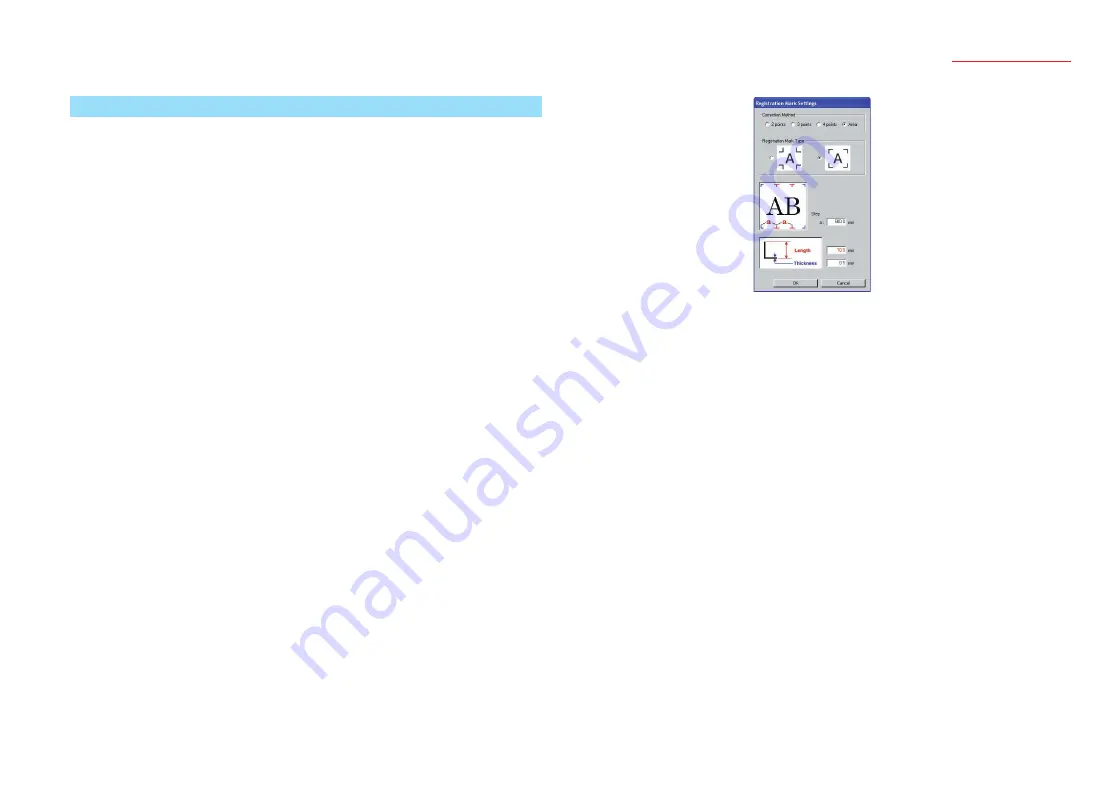
2.5 Registration Mark Settings
Use this window to specify parameters such as the number of reading points and the
registration mark type.
Using Registration Marks to Perform Correction
The plotter reads registration marks in order to align the origin points and the
coordinate axes. Moreover, depending on the number of points selected, correction is
performed as follows.
• Correction Method: 2 points (Correction of the horizontal distance and axial tilt)
Scales the coordinate system on the plotter up or down so that the distance that
was read between the lower left and lower right registration marks matches the
Controller's "X Distance", and corrects any axial tilt.
• Correction Method: 3 points (Correction of the vertical and horizontal distances
and axial tilt)
Scales the coordinate system on the plotter up or down so that the distance that
was read between the lower left and lower right registration marks matches the
Controller's "X Distance", and the distance that was read between the lower left and
upper left registration marks matches the Controller's "Y Distance". Any axial tilt is
also corrected.
• Correction Method: 4 points (Correction at four points)
Corrects all of the positions that were read (lower left, lower right, upper left and
upper right) so that they match the positions (lower left, lower right, upper left and
upper right) in the data that was calculated based on the X Distance and the Y
Distance values, while taking into account any distortion of the coordinates within the
range.
• Correction Method: Area
This setting is effective when cutting a design that is extremely long in the media feed
direction (as a guideline, a design that is longer than 2 m). Intermediate registration
marks are used as boundary points for dividing the design up into multiple areas.
4-point correction is then performed for each area. This function enables even more
accurate correction of media skew or other alignment problems that occurred when
the design was printed.
Note: The "Correction Method: Area" parameter cannot be specified when the plotter is a
Craft ROBOPro2 model.
Note: Load the design in the plotter so that the intermediate registration marks are in the
plotter's media feed direction. Intermediate registration marks in the cutter movement
direction will not be read.
Correction Method
............ Specifies the number of registration mark reading points.
Select [Area] when using intermediate registration points to perform
segment area correction.
Registration Mark Type
............ Selects whether the registration marks face inward or outward.
Step ................. Specifies the interval at which the intermediate registration marks are
placed.
This setting is effective when performing segment area correction.
Length.............. Specifies the length from the corner of each registration mark.
Thickness ........ Specifies the thickness of the registration mark lines.
Note: Unlike drafting units such as plotters, few printer types guarantee
precision in the printing position and in the dimensions. Distance
correction and 4-point correction are operations that adjust the coordinate
system of the plotter according to the printed results so that the printing
positions and cutting positions are as closely aligned as possible. These
operations usually improve the cutting positions. To ensure higher
precision when adjusting the cutting positions, it is recommended that you
use a precision-guaranteed inkjet plotter or suchlike instead of a printer.
Note: Generally, laser printers are less precise than inkjet printers. In particular,
distortion may occur when using sheet paper with a laser printer due to
paper skew. Accordingly, it is difficult to obtain good results when using
such a device for print & cut applications.


