Graco ISPC090BA, Owner'S Manual
The Graco ISPC090BA Owner's Manual is an essential guide for users who want to fully maximize their product's potential. This comprehensive manual is available for free download at manualshive.com, providing users with easy access to all the necessary information and instructions needed for a hassle-free experience.
Share
Download


Reviews:
No comments
Related manuals for ISPC090BA
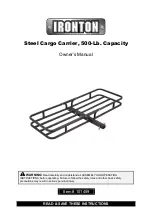
101459
Brand: Ironton Pages: 12

Mimoso
Brand: Safety 1st Pages: 16

TwinTrexx 2
Brand: Stuff 4 Multiples Pages: 7

SK515
Brand: PerfecTron Pages: 22

HARMONY
Brand: BabyBjorn Pages: 184

DOUBLE TIE
Brand: Moby Pages: 19

4820190021465
Brand: love & carry Pages: 21

DLIGHT
Brand: love & carry Pages: 34

Squid SKU-086-36
Brand: Amfeltec Pages: 19


