background image

5

307001

Installation

General

Note: 

Reference numbers and letters in parentheses

in the text refer to the callouts in the figures and parts
drawings.

D

These pumps are designed to be part of a Hydra-
Cat

R

 sprayer that will proportion, mix, and spray

polyurethane chemicals. Refer to your separate
Hydra-Cat

R

  instructions. If you are using this

pump to mix antifreeze and water, refer to page 9
for special plumbing instructions.

D

Mount the pump to suit the type of installation
planned. The pump dimensions and mounting hole
layout are shown on page 11.

D

The pump is supplied with a 3/4 npt(m) intake
nipple. If your installation requires a 3/4 npt(f) or 1”
npt(m) intake, remove and discard the 3/4 npt(m)
nipple, and connect your plumbing directly to the
intake housing. Refer to manual 307430 for a parts
breakdown of the displacement pump.

WARNING

Two accessories are required in your system: a
bleed-type master air valve and a fluid drain valve.
These accessories help reduce the risk of serious
injury, including splashing in the eyes or on the
skin, and injury from moving parts if you are adjust-
ing or repairing the pump.

The bleed-type master air valve relieves air trapped
between this valve and the pump after the air is
shut off. Trapped air can cause the pump to cycle
unexpectedly. Locate the valve close to the pump.

The fluid drain valve assists in relieving fluid pres-
sure in the displacement pump, hose, and gun;
triggering the gun to relieve pressure may not be
sufficient.

Grounding

To reduce the risk of static sparking, ground the spray-
er and all other spray equipment used or located in the
spray area. Check your local electrical code for de-
tailed grounding instructions for your area and type of
equipment. Ground all of this spray equipment:

D

Pump: 

use a ground wire and clamp to connect the

sprayer to a true earth ground. See Fig. 1.

D

Feed pumps: 

use a ground wire and clamp to

connect the pump to a true earth ground. See your
separate feed pump instruction manual.

D

Air compressors: 

refer to manufacturer’s recom-

mendations.

D

Air and Fluid Hoses: 

use only grounded hoses and

check resistance regularly.

D

Heaters: 

wire into a properly grounded power

supply. If using a generator, be sure it is positively
connected to a true earth ground.

D

Spray gun: 

obtain grounding through connection to

a properly grounded fluid hose and sprayer.

D

Fluid supply containers: 

according to local code.

D

Object being sprayed: 

according to local code.

D

All solvent pails 

used when flushing, according to

local code. Use only metal pails, which are conduc-
tive, placed on a grounded surface. Do not place
the pail on a non-conductive surface, such as paper
or cardboard, which interrupts grounding continuity.

D

To maintain grounding continuity when flushing or
relieving pressure, 

always hold a metal part of the

gun firmly to the side of a grounded metal pail, then
trigger the gun.

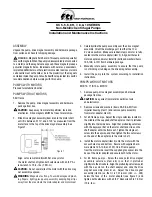
To ground the pump, loosen the grounding lug locknut
(W) and washer (X). Insert one end of a 12 ga (1.5
mm

2

) minimum ground wire (Y) into the slot in the lug

(Z) and tighten the locknut securely. See Fig. 1. Con-
nect the other end of the wire to a true earth ground.
Order Part No. 222011, grounding wire and clamp.

Fig. 1

0720

Y

W

X

Z

Summary of Contents for Hydra-Cat A Series

Page 1: ...p 600 psi 4 0 MPa 40 bar Maximum Working Pressure Part No 207914 Series E 1 1 Mix Ratio by Volume Includes Model 215932 Displacement Pump Part No 903843 Series A 1 1 Mix Ratio by Volume Includes Model 904287 Displacement Pump This model is certified and approved 307001N 01328 Important Safety Instructions Read all warnings and instructions in this manual Save these instructions Parts ...

Page 2: ...odify this equipment Use only genuine Graco parts and accessories D Check the equipment daily Repair or replace worn or damaged parts immediately D Do not exceed the maximum working pressure of the lowest rated system component This equip ment has a 600 psi 4 0 MPa 40 bar maximum working pressure D Do not lift pressurized equipment D Route the hoses away from the traffic areas sharp edges moving p...

Page 3: ...yed D Extinguish all the open flames or pilot lights in the spray area D Electrically disconnect all the equipment in the spray area D Keep the spray area free of debris including solvent rags and gasoline D Do not turn on or off any light switch in the spray area while operating or if fumes are present D Do not smoke in the spray area D Do not operate a gasoline engine in the spray area D If ther...

Page 4: ...4 307001 Notes ...

Page 5: ... reduce the risk of static sparking ground the spray er and all other spray equipment used or located in the spray area Check your local electrical code for de tailed grounding instructions for your area and type of equipment Ground all of this spray equipment D Pump use a ground wire and clamp to connect the sprayer to a true earth ground See Fig 1 D Feed pumps use a ground wire and clamp to conn...

Page 6: ...e risk of serious injury whenever you are instructed to relieve pressure always follow the Pressure Relief Procedure on page 6 The displacement pump was factory tested in light oil which was left in to protect the pump parts To prevent contamination of the fluid being pumped flush the pump before using it Be sure the solvent used is compatible with the fluid being pumped Place each pump intake int...

Page 7: ... always follow the Pressure Relief Procedure on page 6 Keep the wet cups packing nuts 1 3 filled with ISO Pump Oil and check the tightness of the packing nut weekly The packing nut should be tight enough to prevent leakage no tighter Too tight an adjustment will cause the packings to bind or wear prematurely and leak Always relieve the pressure before adjust ing the packing nut Never allow the sup...

Page 8: ...an service See manual 307430 Pump runs but RES output low on both strokes Dirty worn or damaged RES pump intake valve Clean service See manual 307430 Empty or inadequate fluid supply Refill or change container Pump runs but ISO output low on upstroke Dirty worn or damaged ISO pump piston valve Service See manual 307430 p Worn or damaged ISO pump piston pack ings Service See manual 307430 Pump runs...

Page 9: ...he displacement rods and secure with the cotter pins 9 Secure the rod extensions to the yoke 18 with the lockwashers 5 and nuts 7 3 Position the tie rods 19 in the tie plate 16 and install the nuts 8 torquing evenly to 30 50 ft lb 47 68 NSm 4 Screw the shouldered nut 15 down onto the yoke 5 Reconnect the ground wire if it was disconnected during service Mixing Antifreeze and Water To ensure comple...

Page 10: ...81 NUT hex jam 5 8 in 11 2 8 101712 NUT lock 5 8 in 11 4 9 101946 PIN cotter SST 0 125 in 3 2 mm dia 1 50 in 38 1 mm lg 3 10 156082 O RING Model 903843 only 2 14 168418 PLATE adapter 1 15 168453 NUT shouldered 1 16 168600 PLATE tie 1 17 168606 ROD connecting 1 18 168607 YOKE connecting 1 19 171313 ROD tie 10 687 in 272 mm 4 20 171314 EXTENSION displacement rod 2 21 207352 AIR MOTOR See manual 3069...

Page 11: ...aximum Recommended Pump Speed 60 cycles min 6 gpm 22 8 liters min Recommended Speed for Optimum Pump Life 20 40 cpm Wetted Parts Stainless Steel nitralloy steel Buna n PTFE Mounting Hole Layout Dimensions 7225A 4 75 in 121mm Square Cutout Four 0 438 in 11 1 mm Holes on 5 5 in 140 mm Bolt Circle 7224A 6 375 in 162 mm 1 2 npt f Fluid Outlet 3 4 npt f 1 in npt m 1 1 2 in npt m or 3 4 npt m Fluid Inle...

Page 12: ...ove The buyer agrees that no other remedy including but not limited to incidental or consequential damages for lost profits lost sales injury to person or property or any other incidental or consequential loss shall be available Any action for breach of warranty must be brought within two 2 years of the date of sale Graco makes no warranty and disclaims all implied warranties of merchantability an...

Reviews: