background image


Directive 1999/5/EC 


ADVISORY 

FCC Compliance and Advisory Statement: This device complies with Part 15 of the FCC Rules.  

Operation is subject to the following two conditions: 1) this device may not cause harmful 

interference, and 2) this device must accept any interference received, including interference 

that may cause undesired operation


NOTE:  This equipment has been tested and found to comply with the limits for a Class B digital 
device, pursuant to Part 15 of the FCC Rules.  These limits are designed to provide reasonable 
protection against harmful interference in a residential installation.  This equipment generates 
uses and can radiate radio frequency energy and, If not installed and used in accordance with 
the instructions, may cause harmful interference to radio communications.  However, there is no 
guarantee that interference will not occur in a particular installation.  If this equipment does 
cause harmful interference to radio or television reception, which can be determined by turning 
the equipment off and on, the user is encouraged to try to correct the interference by one or 
more of the following measures: 
 
To comply with FCC RF exposure compliance requirements, a separation distance of at least 20 
cm must be maintained between the antenna of this device and all persons.  This device must 
not be co-located or operating in conjunction with any other antenna or transmitter.” 


WARNING 

This product may contain chemicals listed in 

Proposition 65


(

http://www.oehha.ca.gov/prop65/prop65_list/Newlist.html

) that may be known to cause cancer, 

birth defects or other reproductive harm 


Summary of Contents for Primo GDI-IRCA700

Page 1: ...Primo By Grace Digital User s Guide Model No GDI IRCA700 ____________________________________________________________ ...

Page 2: ...ation to listen to 19 Choosing a Pandora radio station 21 Changing the volume 21 Storing a radio station in a preset 22 Playing a preset radio station 22 Requesting a station that is currently unavailable 23 Stations which allow you to choose what you listen to 24 Setting the clock 25 Setting the alarm 27 Setting the sleep timer 32 Configuring My Stuff 33 Registering an account on Grace Digital Au...

Page 3: ...0 Speaker On Off 40 Headset Speaker Setup 40 Reset to Factory Default 40 Master Power Reset 41 Network Firmware Update 41 Language 41 Media Player 42 UPnP Servers 42 USB Media 46 Playback Mode 46 Queue 46 Troubleshooting 48 Specifications 49 License Information and Warranty 49 Customer Service and Support 50 Appendix 51 Using the USB connection as a USB Ethernet connection 51 ...

Page 4: ...ing Do not block or cover these holes especially with cloth or paper Please allow a minimum distance of 5cm around the apparatus for sufficient ventilation DAMAGE Never use your Internet radio if it is damaged in any way Always place your Internet radio on a flat level surface Please to not position the radio in any location which may be subject to strong vibration TEMPERATURE Avoid extremes of te...

Page 5: ...e product 5 Power cord protection protect the power cord from damage Do not walk on the power cord Please take care not to let the power cord become pinched particularly at plug 6 Water and moisture the product should not be used near water for example near a bathtub washbowl kitchen sink laundry tub in a wet basement or near a swimming pool etc 7 Heat keep the product away from heat sources such ...

Page 6: ...ed in accordance with the instructions may cause harmful interference to radio communications However there is no guarantee that interference will not occur in a particular installation If this equipment does cause harmful interference to radio or television reception which can be determined by turning the equipment off and on the user is encouraged to try to correct the interference by one or mor...

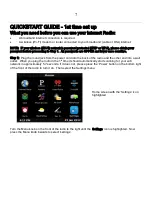
Page 7: ...sensitive Step 1 Plug the round jack from the power cord into the back of the radio and the other end into a wall outlet When you plug the radio in the 1st time it should automatically start scanning for your wi fi network in approximately 5 7 seconds If it does not please press the Power button on the bottom right of the front of the radio to turn it on Then select the Settings menu Turn the Menu...

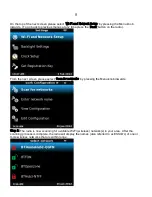
Page 8: ...he Back button on the radio From the next screen please select Scan for networks by pressing the Menu knob inwards Step 2 The radio is now scanning for available Wi Fi wireless network s in your area After the scanning process is complete the radio will display the names also referred to as ESSID s of one or more wireless networks that are within range ...

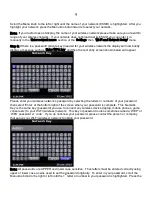
Page 9: ...w will appear Please enter your wireless network s password by selecting the letters or numbers of your password then select Enter at the bottom right of the screen when your password is complete This Network Key is the same key password you use to connect any wireless device laptop mobile phones game console etc to your Wi Fi wireless network This key or password is also sometimes called a WEP or...

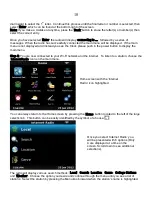
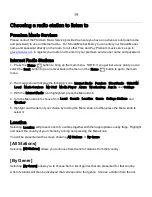
Page 10: ...4 You are now connected to your Wi Fi network and the internet To listen to a station choose the Internet Radio icon on the main menu You can always return to the Home screen by pressing the Home button located to the left of the large select knob This button can be easily identified by the symbol of a house The radio will display various search methods Local Search Location Genre College Stations...

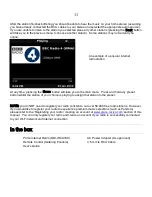
Page 11: ...n whilst the station of your choice is playing to assign that station to the preset NOTE you do NOT need to register your radio to listen to our over 50 000 free radio stations However If you would like to register your radio to experience premium music selections such as Pandora please refer to the Registering your radio creating an account at www grace reciva com section of this manual You can o...

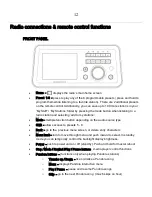
Page 12: ...e function button depending on the audio source type Shift allows access to presets 5 8 Back go to the previous menu screen or delete entry characters Menu knob turn to move through menu and push inward to select In standby mode you can temporally control the backlight display brightness Power push to power unit on off standby Push and hold for master reboot Stop Mode Rewind Play Pause buttons med...

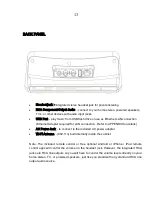
Page 13: ...nnection Refer to APPENDIX for details AC Power Jack to connect to the included AC power adapter Wi Fi Antenna 802 11n built internally inside the cabinet Note The included remote control or free optional Android or iPhone iPad remote control apps will control the volume on the headset jack However the integrated RCA jacks are RCA line outputs so you will have to control the volume levels directly...

Page 14: ... Quick key to Main Menu Pandora Thumbs Down selection Pandora Skip Song selection Pandora Thumbs Up selection Mute Headset jack Volume Up Down Preset 1 to 10 Alarm Timer Play Pause Stop Next Previous Media Queue media player files Extra features Pandora menu ...

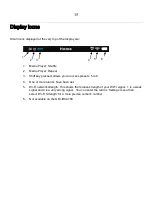
Page 15: ...ows you to access presets 5 to 8 4 One or more alarms have been set 5 Wi Fi network strength This shows the relative strength of your Wi Fi signal 1 is a weak signal and 4 is a very strong signal You can enter the radio s Settings menu then select Wi Fi Strength for a more precise numeric number 6 Not available on the GDI IRCA700 1 2 3 4 5 6 ...

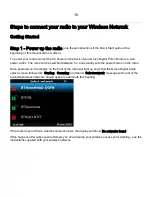
Page 16: ...andby with the power button on the radio Once powered on the display on the front of the radio will light up and show the Grace Digital Audio splash screen followed by Starting Scanning and then A Select network message with a list of the available wireless networks should appear underneath this heading If the radio does not find a wireless network router the display will show No networks found If...

Page 17: ... is using one of the encryption systems Wired Equivalent Privacy WEP or Wi Fi Protected Access WPA or WPA2 You therefore need to enter the correct WEP or WPA password on your PRIMO radio to communicate with your network The person who set up the network initially knows this password If that person is not you please consult the individual or company that set up your home or office network You may a...

Page 18: ...ing the large Menu knob inward Hint Use the Back button to be found to the left of the Menu knob to erase any incorrect characters that you may have entered If the display now shows Invalid key or Network Error then you have entered an incorrect password Please try again or contact the person who set up your wireless network Once the password is entered correctly your PRIMO radio will connect to y...

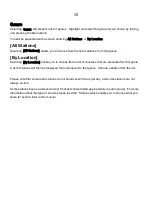
Page 19: ...ra iHeartRadio SiriusXM Local Music Services My Stuff Media Player Alarm WeatherBug Aux In and Settings 3 With the Internet Radio icon highlighted press the Menu knob 4 Turn the Menu knob to choose from Local Search Location Genre College Stations and Weather 5 Highlight and the item of your choice by turning the Menu knob and then press the Menu knob to select it Location Selecting Location will ...

Page 20: ...ocation allows you to choose from a list of countries that are presented for that genre A list of stations will then be displayed that correspond to that genre Choose a station from the list Please note that some radio stations do not broadcast 24 hours per day and some stations are not always on line Some stations have on demand and or Podcast content listed appropriately in sub menu s For more i...

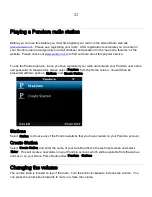
Page 21: ...e and password on the website please select Pandora from the Home screen You will then be presented with two options Stations and Create Station Stations Select Station to choose any of the Pandora stations that you have created on your Pandora account Create Station Select Create Station and enter the name of your favorite artist on the text input screen and select Enter This will create a new st...

Page 22: ...r remote There are an additional 2 presets on the remote Playing a preset radio station When your radio is powered on and connected to your Wi Fi network press the preset button on the radio to play a preset station Note that from time to time radio stations change their internet location URL If the preset no longer works go into the Internet Radio Search section of the radio Type in the call sign...

Page 23: ...st to add the station to the list Note you must have an account on this site to be able to perform this function Please note that some radio stations do not pass the automated audio stream quality test so we are not able to add every request Typically we can add a station within 10 business days if the station provides us a quality stream You can check back on our web site periodically to see if t...

Page 24: ...not start playing immediately but instead the display shows Selecting On Demand will bring up a list of the available on demand content from that station After selecting a program to listen to you will be presented with a screen like this By turning the Menu knob you can start part way through the content rather than at the beginning or simply press the Menu knob to start right at the beginning of...

Page 25: ... the Home screen select the Settings icon Select Clock Setup from the list of available menu items You are now presented with three options Set Time Date Clock Format and DST Set Date Time Selecting Set Date Time will take you to a list of available time zones Turn the Menu knob until the correct time zone is seen on the display Push the Menu knob to set your time zone ...

Page 26: ...hat hour and move on to the minutes field Repeat that process for the time and date fields Clock Format The Clock format menu allows to change from the 12 hour clock with AM and PM to the 24 hour clock DST Daylight Savings Time This menu allows you to set your preference for daylight savings ...

Page 27: ...at any point press the Back button to go back to the previous screen Turn the Menu knob until the Alarm icon is highlighted and then press the Menu knob to select it You will be presented with two options Set Alarms and Sleep Timer Select Set Alarms to see the alarms menu ...

Page 28: ...further items 1 Off 2 Off Etc Selecting Disable All will disable all the alarms Select any other field to set up to five alarms Here is an example of how to set an alarm on your Grace Primo Use the Menu knob to highlight 1 Off The item changes to read ...

Page 29: ...en Turn the Menu knob until the hour setting is correct and AM PM is correct and then press the Menu knob Please note that it will scroll through 12 hours of AM and then 12 hours of PM Next turn the Menu knob until the minute setting is correct and then press the Menu knob to enter those details ...

Page 30: ...to sound As you can see from the screen below it is possible to wake up to your favorite station with the Grace Primo In the example above you can see that there are the standard choices of Buzzer and Aux in followed the stations that have been assigned to your presets in this example there is a Pandora station and a regular internet radio station Select your choice to wake up by using the Menu kn...

Page 31: ...e displayed in the header top of the display of the radio NOTE If you set a station to be used as the alarm if that station is unavailable for whatever reason when the alarm was due to sound after trying for sixty seconds the radio will fall back to the regular buzzer Therefore for optimal performance please choose a radio station that typically buffers quickly and is normally on air during your w...

Page 32: ... and 99 hours When the desired time is reached Press the Menu knob Sound continues once you have set the sleep timer until the allotted time has expired At that point the radio will enter standby Once the sleep timer has expired and the radio has entered Standby mode the Menu knob can be used to adjust the backlight from maximum down to zero blank screen This setting is not saved as a back light s...

Page 33: ...registration you should never have to repeat them Important Before beginning please ensure that your radio is connected to your WiFi router Step 1 Go to the main menu of your radio by pressing the Home button Use the Menu knob to select the Settings icon Scroll down the available options using the Menu knob until you reach Get Registration Key and select it Your radio will create a registration co...

Page 34: ... key will expire In this situation please simply go back and repeat step 1 Step 2 Open the website grace reciva com from your computer s web browser Enter in the registration code key that you obtained from your radio onto the web site and choose submit on the web site This picture is just an example of a registration key Your key will be different and delivered to your radio personally when you s...

Page 35: ...d with this web site Choose the My Stuff icon on the Home screen of the radio to access your personalized content Making the most of My Stuff Important Note Please complete the previous section Registering your radio creating an account before starting this section This section will cover how to set up your own stations list create a new station add a private stream to your radio access your Pando...

Page 36: ...your radio under the My Stuff icon you will find My Stations Selecting My Stations will show the stations you placed in My Stations My Streams and My Podcasts If you want to listen to a station or podcast that is not in the Reciva stations list and you know the streaming url for the station then you can add it to your own personal list of stations This is entirely personal to you On the Grace webs...

Page 37: ...any of Pandora s services or streams Please see Pandora s web site for information on how to update and activate your Pandora services If you have any questions concerns or problems with Pandora s services please contact Pandora directly Now follow these simple steps to start using Pandora on your Grace Primo Radio Step 1 Log in to your Grace Digital Audio account at grace reciva com and select Se...

Page 38: ...mation once the radio is connected to your broadband network select SiriusXM on the home page of the radio You will be promoted to enter in your Username After selecting the appropriate letters numbers select enter Then you will be promoted to enter in your Password After your have entered in your password select enter Your radio will now show the SiriusXM menu At anytime you can change the Sirius...

Page 39: ... the radio will display its list of three menu modes Inactive Active and Standby These three states are explained below The radio gets into its inactive state when there is no button pressed for 30 seconds The active state is when there is user activity Standby is the state when the radio has been turned off The standby back light setting can be reduced to zero a blank screen 2 Rotate the knob to ...

Page 40: ...the exact software release serial numbers and other radio specifications Fahrenheit Celsius Selection to set the preferred temperature measurement Speaker On Off Turn audio on off from with this selection Headset Speaker Set up Select to view audio settings and select between mono or stereo settings Reset to Factory Defaults Puts all the settings back to their defaults as they were when the unit l...

Page 41: ...ownload it or not Note at this stage you can press the radio s Back button to cancel the radio beginning a firmware upgrade Important Note A Firmware upgrade may take several minutes so do not switch off the power to the radio until the operation is complete otherwise the radio may become permanently damaged WiFi Strength This menu will show the signal strength of your Wi Fi access point as it is ...

Page 42: ...from your laptop PC or other UPnP enabled storage device using the UPnP servers menu option When you select UPnP Servers the radio display will present a list of the media servers available on your network If there are no servers shown on your list please check the following 1 You have a PC laptop or other storage device running switched on and connected to the same network as the radio ...

Page 43: ...heck that your media server is set to enable sharing In Windows Media Player 11 right click on the black bar at the top and select tools then options and then select the library tab from the available tabs Click the configure sharing button and then the settings button You will be presented with a dialog titled Media Sharing Default Settings see below Tick the check box at the bottom titled Allow ...

Page 44: ...ft hand side of the screen you should see three options listed select the last one called Change advanced sharing settings Under Home or Work Current Profile about half way done the list there is a section titled Media Streaming You might see Media Streaming is On or Media Streaming is Off but whichever is ...

Page 45: ... on media streaming please select it This will enable media streaming from your PC or laptop to the radio using the UPnP industry protocol You should now be presented with a list of UPnP enabled devices on the network and at least one of them should be a Grace Digital radio Please ensure that the drop down beside it is set to allowed then press OK and then exit the menu ...

Page 46: ...enu knob to add the content to the media queue Playback can be paused by pressing the play pause button The other media buttons also work as you would expect them to Please note Currently we only support drives formatted with FAT32 file system FAT32 is limited to a disk size of 2TB and a file size of 4GB The maximum number of files supported is 268 435 437 However the radio is limited by its avail...

Page 47: ...ee and we upgrade them a 2 3 times a year Your device must be on the exact same Wi Fi network as our radio is or it won t find the radio You will not be able to control our radio if your phone is only on your cellular 2 3 4g network You have to be connected to the same home or office Wi Fi network The radio has to be powered on or in standby mode If the power switch is turned off on the back the r...

Page 48: ...7070 4 Check your access point does not restrict connections to particular MAC addresses You can view your Grace Primo s MAC address by selecting the Settings icon from the Home screen then select Network Configuration and then View Configuration The MAC address is listed in on the screen 5 If you have an encrypted network check that you have entered the correct key or pass phrase into your Grace ...

Page 49: ...nd specifically excludes fair wear and tear accident misuse of unauthorized modification This warranty is applicable in the United States only and does not in any way limit the customer s legal rights Claims and enquiries under the warranty for Grace products purchased outside the USA should be addressed to the local importers or distributors If you have reason to claim under the warranty please c...

Page 50: ... result in a correction of the defect by repair without charge for parts and labor b replacement with the same or similar design or c refund for the purchase price If purchased directly and returned within 30 days of purchase All replaced parts and products and products on which a refund may be made become the property of the manufacturer New or reconditioned parts products should be warranted for...

Page 51: ...enu item will be displayed named Wired wireless Select this menu and select wired only Your radio will now connect to your Ethernet connection IMPORTANT If you boot up power on the radio without a USB Ethernet adaptor connected to the radio s USB socket the radio will only recognize a USB thumb drive connected to the USB socket If a USB Ethernet adaptor is connected to the radio after the unit is ...

Reviews: