OM-06098
S SERIES PUMPS
PAGE E - 19
MAINTENANCE AND REPAIR
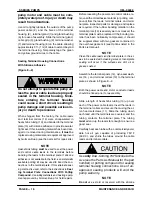
adhesive.
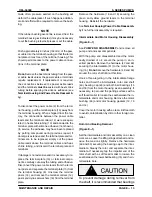
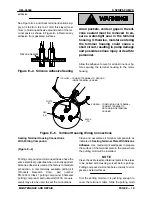
See Figure E-5 and check terminal locations. Ap
ply a 1/4 to 3/8 in. (6,4 to 9,7 mm) thick layer (maxi
mum) of silicone adhesive around each of the ter
minal posts as shown in Figure E-4. Remove any
adhesive from gasketed surfaces.
Silicone Sealant
Figure E-4. Silicone Adhesive Sealing
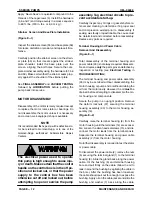
All air pockets, voids or gaps in the sili
cone sealant must be removed to en
sure a water‐tight seal in the terminal
housing. Otherwise, moisture entering
the terminal housing could cause a
short circuit, resulting in pump damage
and possible serious injury or death to
personnel.
Allow the adhesive to cure for at least one hour be
fore securing the terminal housing to the motor
housing.
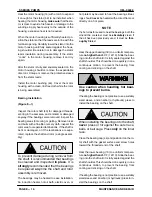
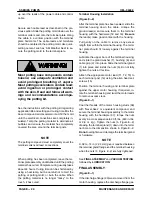
2 GREEN - TOGETHER IN ONE TERMINAL.
CONNECT TERMINAL TO
GROUND INSIDE TERMINAL
HOUSING
1 YELLOW - CONNECT TERMINAL TO GROUND
INSIDE TERMINAL HOUSING
RED
(T3)
WHITE
(T1)
BLACK
(T2)
Figure E-5. Terminal Housing Wiring Connections
Sealing Terminal Housing Connections
With Potting Compound
(Figure E-2)
Potting compound and silicone adhesive have the
same electrical properties when correctly applied.
Silicone adhesive is used at the factory to facilitate
production. A commercially available potting kit
(Products Research Corp., part number
PR‐1201‐Q Class 1 potting compound, Chemseal
potting compound, part number GS3100, or equiv
alent) may also be used to seal the connections.
Clean and assemble all terminal components as
indicated in
Sealing Terminal Plate With Silicone
Adhesive
. Use medium grit sandpaper to prepare
the surface of the terminal plate in the area where
the potting mold will be installed.
NOTE
Clean the cable lead and terminal plate in the areas
to be potted with cleaning solvent before potting.
Potting compound will not adhere properly to oil or
grease coated surfaces.
Trim the potting mold so it is just long enough to
cover the terminal collars. Slide the potting mold

