background image


10 

                                            USER MANUAL                                 EN


ATTENTION 

Thank you for choosing Healthcare OT 180 GB-GW scale. To ensure a proper operation procedure, 
please carefully read through the instruction manual. 


This appliance is marked according to the European directive 2002/96/EC on Waste Electrical 

and Electronic Equipment (WEEE). This guideline is the frame of a European-wide validity of 

return and recycling on Waste Electrical and Electronic Equipment. 

HELPFUL TIPS 

Your scale is a precision electronic instrument. One of the hardest things to weigh is the human body because it 
is always in motion. To ensure reliable readings, always try to place your feet on the scale in the same place 
and stand still. 
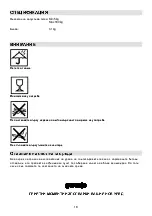
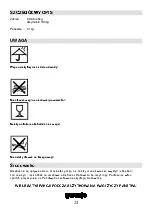
Treat your scale with care. Do not drop it or jump on it. The scale is durable, but misuse or abuse may render 
the electronic sensors inoperable. 
Never submerse the scale under water. To clean the scale surface, use either a damp cloth or glass cleaner. 
Do not open or take apart the scale or its components. 

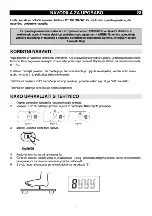
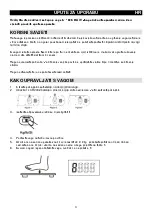
HOW TO OPERATE 

1. 

Open the battery cover at the backside of the scale. 

2. 

If there are batteries in the case, take the insulator out. Otherwise insert 1x CR 2032 batteries to the 
battery case. Then close the battery cover. 


3. 

Select the weight unit you want among kg/lb/st. 


4. 

Place the scale on a hard and even floor. 

5. 

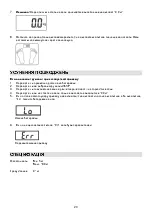
If there is a number other than 0.0 kg displayed, please wait for about 30 seconds until it automatically 
turns off; if there is nothing on the screen, please overlook next step . 

6. 

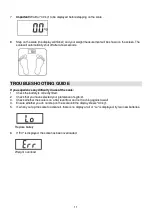
With your foot, firmly tap the centre of the scale until "8" displayed . 


Summary of Contents for OT 180 GB

Page 1: ...Gorenje OT 180 GW OT 180 GB...

Page 2: ...P P P P P P P P P P P P P P P P P q r s st s r s P...

Page 3: ......

Page 4: ...2 7 Pomembno 8 9 Stopite s se lahko ponovno stehtate 1 ali 2 ali 3 ali je tehtnica na ravnih tleh in da se ne dotika stene 4 5 zamenjati baterije 6 Err pomeni da je tehtnica preobremenjena...

Page 5: ...in 5 kg Max 180 kg Stopnjevanje 0 1 kg PAZITE Pazite da tehtnica ne pride v stik z vodo Previdno ravnajte z njo Medtem ko se tehtate mora biti tehtnica na ravnih tleh Ne stopajte na rob tehtnice OKOLJ...

Page 6: ...U HR Hvala se o GW u KORISNI SAVJETI topala na isto mjesto na vagi te mirno stojte stakla KAKO UPRAVLJATI S VAGOM 1 terije na donjoj strani vage 2 Ubacite 1x CR 2032 baterije u prostor koji je za 3 4...

Page 7: ...5 7 8 Stupit 9 Ukoliko ste na 1 2 da li ste izabrali ispravnu jedinicu za mjerenje kg ld st 3 4 ne stupite na vagu prije nego se 5 baterije 6 Err ena...

Page 8: ...6 Raspon Min 5 kg Max 180 kg Stupnjevanje 0 1 kg PAZITE Ne stupite na rub vage Okolina Simbol na proizvodu ili na nje...

Page 9: ...emojte da otvarate ili rastavljate vagu na njene sastavne delove KAKO RUKOVATI 1 Otvorite poklopac pregrade sa zadnje strane vage gde se postavljaju baterije 2 Ako su baterije u pregradi izvadite izol...

Page 10: ...1 Proverite da li su baterije pravilno postavljene 2 Proverite da li ste odabrali eljenu jedinicu te inske mere tj kg lb st 3 Proverite da li je vaga postavljena na ravnu i iznivelisanu d 4 Proverite...

Page 11: ...in 5 kg Max 180 kg Preciznost 0 1 kg PA NJA Ne izlagati vagu kontaktu sa vodom uvati vagu sa pa njom Ne postavljati vagu neravnu povr inu prilikom merenja Ne stajati nogom na ivicu vage postupati kao...

Page 12: ...still Treat your scale with care Do not drop it or jump on it The scale is durable but misuse or abuse may render the electronic sensors inoperable Never submerse the scale under water To clean the s...

Page 13: ...ficulty in use of the scale 1 Check the battery is correctly fitted 2 Check that you have selected your preference of kg lb st 3 Check whether the scale is on a flat level floor and not touching again...

Page 14: ...it on uneven floor while weighing Don t step on the edge of the scale Environment Do not throw away the appliance with the normal household waste at the end of its life but hand it in at an official c...

Page 15: ...13 Acest aparat este marcat cor WEEE aparatelor vechi SFATURI AJUTATOARE P P P P tarul nu P P UTILIZAREA 1 2 i baterii 1x CR 2032 3 4 P P 5 P P P 6...

Page 16: ...14 7 IMPORTANT 8 1 2 3 4 5 6 Err...

Page 17: ...15 Sc Min 5 kg Max 180 kg 0 1 kg l la un punct P...

Page 18: ...16 BG OT 180 GB GW P P 1 2 1x CR 2032 3 kg lb st 4 5 0 0 kg 6...

Page 19: ...17 7 0 0 kg 8 9 10 kg lb st 11 12 0 0 kg 13 Lo 14 Err...

Page 20: ...18 Min 5 kg Max 180 kg 0 1 kg P...

Page 21: ......

Page 22: ...20 7 8 1 2 3 4 5 P 6 Err 5 8...

Page 23: ...21 lb 0 45 st P PP P P...

Page 24: ......

Page 25: ...23 7 8 9 1 2 3 4 5 6 Err...

Page 26: ...24 Zakres inimalnie 5kg aksymalnie 180 kg 0 1 kg UWAGA P...

Page 27: ...25 N SK UPOZORNENIE akuj GW y T T T V P P P v P P e alebo P y P P P jej komponenty V 1 hy 2 P P qP r P st priestoru 3 r 4 P 5 P P P P 6 V y...

Page 28: ...26 7 8 P 1 2 3 y 4 5 6 Err...

Page 29: ......

Page 30: ...28 HU FIGYELEM P P P P P 1 P 2 P P q 3 r kg lb st 4 5 P s P 6 t t P...

Page 31: ...29 7 Fontos 8 1 2 t e ki kg lb st 3 e a falat 4 5 m Elemcsere 6...

Page 32: ...Min 5 kg Max 180 kg 0 1 kg FIGYELEM K rnyezetv delem A feleslegess v lt k sz l k szelekt v hullad kk nt kezelend K rj k hivatalos jrahasznos t gy jt helyen adja le gy hozz j rul a k rnyezet v delm hez...

Page 33: ...31 RU OT 180 GB GW P P P P P 1 P P 2 P P 3 q rst q rs q r 4 5 P 6...

Page 34: ...32 7 8 1 2 3 4 5 P 6 P...

Page 35: ...33 P P P P P P q r s q rts q...

Page 36: ...stesso posto sulla bilancia e stare fermi La bilancia va manipolata con cautela Non buttatela per terr Non immergere la bilancia nell acqua Per la pulizia esterna usare una spugna umida o un detersivo...

Page 37: ...Se 1 le batterie son posizionate bene 2 kg ld st 3 la bilancia si trova sul pavimento rigido e non tocca la parete 4 non siete saliti sulla bilancia prima che sul display appare la scritta 5 quando la...

Page 38: ...n viene in contatto con l acqua Maneggiarla con cura Mentre Vi state pesando la bilancia deve essere posizionata sul pavimento dritto Non salire sul bordo della bilancia utilizzato ma consegnatelo a u...

Page 39: ...37...

Page 40: ......
Reviews: