7. Press (and release) the Cassette Pause
button when you wish to start recording.
8. Press the Cassette Stop/Eject button to
stop the recording.
9. The recording will stop when the tape
has reached the end and the Record
and Play buttons will pop up.
10. To hear what you recorded, press TAPE
button, press Rewind and then the Play
button.
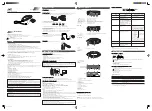
12. REMOTE CONTROL
By using the remote controller, you can
operate the system in almost the same
way as with the controls of the main unit.
MUTE BUTTON
To mute the sound press the MUTE
Button on remote controller. Press the
MUTE Button
REMOTE CONTROL RANGE
Use the remote control within an angle of
30 at the left and right horizontally and
over distances up to about 3 meters.
o
again to restored the sound.
1. Open the battery compartment cover.
2. Install 2pcs UM-4 (size AAA) batteries
into the battery Compartment matching
the polarity as shown in the battery
compartment.
3. Close the battery compartment lid.
Always remove batteries if the
remote controller is not going to
be used for a month or more.
Batteries left in the unit may
leak and cause damage.
NOTE:
INSERTING BATTERIES
REMOTE OPERATION
13. PRODUCT SPECIFICATIONS
Net Weight
Dimension
Power consumption
Power requirements
Output level
Speakers Impedance
Frequency range
Receiving bands
No. of channels
Wow and flutter
Frequency response
D/A conversion
Approx. 3.20Kg (not including batteries)
Approx. 446.6(L)X246.2(W)X170.2(H) mm
22W
AC 230V
DC 8* "C" size (or equivalents) batteries
Earphone: 20mW (32
)
2 channels (stereo)
4
5W*2
Below measurable limits
20-20,000Hz (+1/-3 dB)
1-bit DAC 8 times oversampling
AUDIO
RADIO
GENERAL
System
Cross-interleave Reed-solomon code
material: GaAIAs
Compact disc digital audio system
Error correction
Properties
Laser diode
PICK-UP
Wavelength:
=780nm
Emission Duration: continuous
Laser output: <44.6 W
MW
522-1620
KHz
FM
87.5 -108.0 MHz
MW/FM