background image

1.  Unpack  the  Unit.
        Check  the  following  attachments  in  the  packing:
                          Remote  Control                                                                                             


(1)

                          AV  Cable                                                                                                                 


(1)

                          User

'

s  Instruction  Manual                                                            (1)

                         
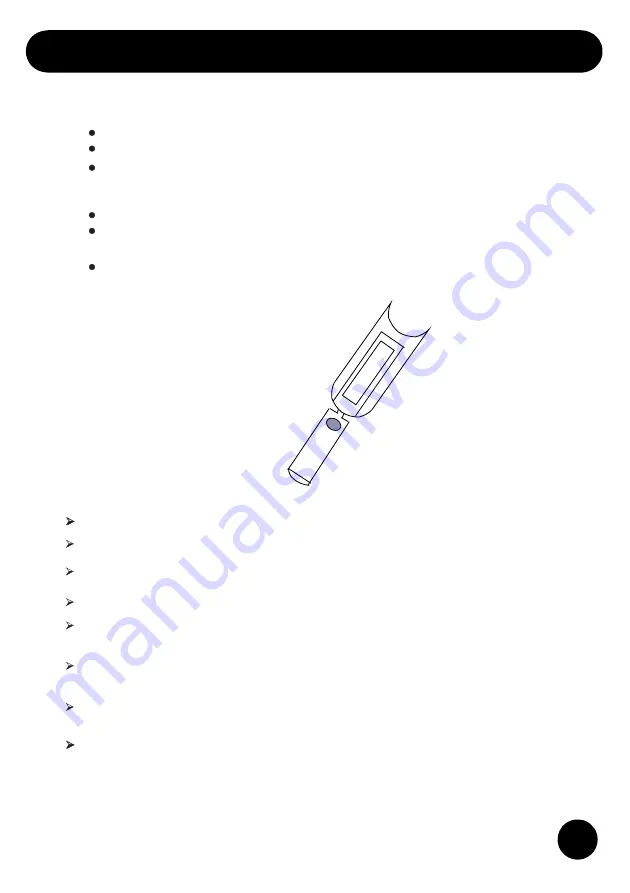
2.  Loading  Batteries  into  the  Remote  Control.


Turn  over  the  remote  control  and  take  down  the  cover  of  the  remote.


Load  two  AAA  batteries  into  the  battery  house  in  accordance  with 


the  polarities.


Close  the  cover  of  the  battery  house.


Preparation


Caution:


                                Do  not  use  charging  batteries.


                                Do  not  use  new  and  old  batteries  of  different  types  together.


                                Do  not  charge  the  batteries  or  make  them  short-circuit.


                                Do  not  disassemble,  burn  or  heat  the  batteries.


                                If  there  is  battery  leakage,  please  clean  the  remote  casing  and  load 


new


batteries.


                                If  the  remote  is  hard  to  control  when  very  near  the  unit,  please  load


  new


batteries.


                                Do  not  expose  the  remote  sensor  direct  to  sunlight  to  avoid  signal 


interruption.


                                The  effect  of  the  remote  is  the  best  within  the  range  of  7m  distance


  and


30    angle.

9

Summary of Contents for GDVD171X5

Page 1: ...GDVD171X5 DVD PLAYER ...

Page 2: ...structions DVD Information Remote Control Preparation Rear Panel and connections Basic Functions Menu Operations Remote Control Operation Kodak Picture CD Playback Troubleshooting Product Specifications Guarantee 1 2 3 4 5 7 8 9 10 11 15 16 19 20 22 23 24 25 26 27 ...

Page 3: ...1 Features of This Unit ...

Page 4: ...recreate the power cord is prohibited Turn off the power if you do not use the unit Make sure to pull out the power plug if the unit is not used for a long time or when thundering or lightning Do not place the unit in high temperature vibrating stuffy environment or directly expose to sunlight Do not put this unit together with high power electric appliance to ensure good ventilation Make sure the...

Page 5: ...The apparatus shall not be exposed to dripping or splashing and that no objects filled with liquids such as vases shall be placed on the apparatus Warning Warning and Importance This product incorporates copyright protection technology that is protected by U S patents and other intellectual property rights Use of this copyright protection technology must be authorized by Macrovision and is intende...

Page 6: ...4 ...

Page 7: ...DVD Information 5 ...

Page 8: ...O NEW ZEALAND 5 AFRICA RUSSIA INDIA NORTH KOREA PAKISTAN 6 CHINA The characteristics of DVD players Different DVD disc has different characteristics This is because of the programmer and manufacturer of DVD disc The following marks represent the characteristics of DVD discs REGION CODE AND VIDEO OUTPUT SYSTEM DOLBY DIGITAL SURROUND 5 1 CHANNEL HIDE CAPTION DTS DIGITAL CINEMA SURROUNDING DUAL CHANN...

Page 9: ...ensity compressed data needs proper handling Hold the disc with fingers holding the hole at center and the edge Do not bend or press the disc Do not explore the disc to direct sunlight or heating source Store the discs in cabinet vertically in dry condition prevent moisture or humidity Clean the disc with soft dry cloth only wipe gently radically from center to the edge Do not apply thinner alcoho...

Page 10: ... Control OPEN CLOSE NUMBER DISPLAY ZOOM UP ARROW RIGHT ARROW ENTER MENU NEXT PREV RESUME STANDBY SUBTITLE ANGLE PROG GOTO AUDIO SETUP TITLE FAST FORWARD PLAY PAUSE FAST BACKWARD 8 REPEAT A B STEP SHUFFLE SLOW ...

Page 11: ...ouse Preparation Caution Do not use charging batteries Do not use new and old batteries of different types together Do not charge the batteries or make them short circuit Do not disassemble burn or heat the batteries If there is battery leakage please clean the remote casing and load new batteries If the remote is hard to control when very near the unit please load new batteries Do not expose the ...

Page 12: ... 5 RIGHT TRACK 6 COAXIAL JACK 7 S VIDEO JACK 8 OPTICAL JACK 9 FL TRACK BASIC CONNECTION 1 POWER 2 DOOR TRAY 3 OPEN CLOSE 4 STOP 5 PLAY PAUSE 1 3 2 4 5 10 FR TRACK 11 SW TRACK 12 Y Jack 13 Cb Pb JACK 14 Cr Pr JACK 15 VIDEO JACK 16 SCART OUTPUT JACK AMPLIFIER COAXIAL AUDIO INPUT TV AV INPUT 10 TELEVISION POWER ...

Page 13: ...pen Close button the tray will automatically come out Insert a disc in the tray and close the disc tray by pressing the Open Close button again Press Stop button for memory stop function If you are not going to use for an extended period of time be sure to disconnect the player from the wall outlet Basic Functions 11 ...

Page 14: ...game a concert or an opera program you can 1 Press the Angle button on the remote control to select angle one the diagram angle one will indicate in the upper right corner of the TV screen 2 Press the Angle button again to select different angle Or you can choose to watch the same action taken from different points of view 1 4 2 4 SUBTITLE LANGUAGES This function enables you to select subtitle lan...

Page 15: ...played back 1 Press the OPEN CLOSE button the disc tray opens 2 Insert a MP3 file disc on the disc tray with the label side up 3 Press the OPEN CLOSE button the disc tray closes 4 The unit will take a short while to load the disc and automatically playback Press the PAUSE button To resume playback again press the PLAY button Press the STOP button Press the NEXT button of the remote control while p...

Page 16: ...Track No 22 Press numer ic button 10 for two times then press numer ic button 2 You can press Title button on remot e control for this function also Select Playing When playing a DVD disc you can repeat playing segment single title chapter etc Pressing repeat button repeatedly As for repeat segment press A B button on remote control to operate Press A B button once to finish repeat setting A Press...

Page 17: ...ress the Slow Backward button and the title of the picture will start playing disc with normal speed Slow Forward 1 While playing VCD disc press Time button screen will show the track PBC and time of the disc 2 Use the directional arrow buttons to select the position then intput enter numbe rs after that press ENT ER to affirm the disc will play from your selection 3 While playing DVD disc press T...

Page 18: ...art Menu Press the SETUP button Highlight Language language submenu appears Using the DIRECTION KEYS Highlight the desired item and press the ENTER button Highlight the desired item Press the ENTER button to confirm Press the SETUP button to save the setting and exit Video Output Selection Enter this menu to setup the Video setting Press the SETUP button Navigate DIRECTION KEYS to highlight Video ...

Page 19: ...Pan Scan The image will fit the screen The left and right edges of the image may be cut off from the screen 1 Aspect Ratio If your TV is a standard 4 3 type select 4 3PS or 4 3LB If you desire to view widescreen 16 9 DVDs If your TV is 16 9 Select 16 9 wide 2 View Mode select the view mode from Fill Original Auto Fit Pan Scan 3 TV System you can change the TV system from NTSC PAL AUTO 4 Video Out ...

Page 20: ... setting and quit The pre set password is 0000 1 Select the Digital Output between PCM RAW or Off 2 Set the Compression on or off 3 Set the Down Sampling on or off Audio Output Selection Enter this menu to setup the Audio setting Press SETUP button Highlight Audio Audio submenu appears Highlight the desired item and press ENTER button Highlight the desired item Press ENTER button to confirm Press ...

Page 21: ...SETUP button Highlight Misc Misc submenu appears Highlight the desired item and press ENTER button Highlight the desired item Press ENTER button to confirm Press SETUP button to save the setting and quit 1 Use Default settings Choose to reset the system to the Default settings 2 Screen Saver You can set the screen saver on or off Misc 19 ...

Page 22: ...Remote Control Operation 20 ...

Page 23: ...Remote Control Operation 21 ...

Page 24: ...Remote Control Operation 22 STOP ZOOM VOL SUBTITLE ANGLE LANGUAGE ...

Page 25: ...rily Press PREV or NEXT key to select You can use number keys to select a particular picture Image rotation There are three modes to rotate a picture 90 clockwise 180 clockwise and 90 counter clockwise operations are allowed only When a picture is being displayed normally and will be cancelled automatically when a new picture is displayed Press ANGLE repeatedly you can select the different rotatio...

Page 26: ...Trouble shooting 24 ...

Page 27: ...Trouble shooting 25 In the unlikely event of requiring spare parts please contact our spare parts department on Tel 0871 230 0790 Email sparesdist albaplc co uk ...

Page 28: ...26 Specification AC 100V 240V 50 60Hz 1A MPEG1 MPEG2 MPEG4 ...

Page 29: ...Guarantee 27 ...

Page 30: ...Warning ...

Page 31: ...74 G070502A A0 ...

Page 32: ...lssue 25 May 2007 cecustomerservice albaplc co uk 0871 230 1777 ...

Reviews: