background image

M E N U

V +

P +

M E N U

V +

P +

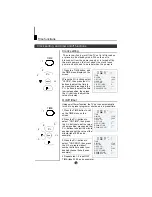
Sleep timer and program preset

Sleep timer

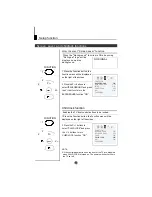
REMIND PROG function

2

2

3

3

3

3

2

2

1

1

19

0

10

20

170

180

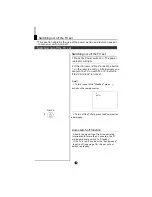
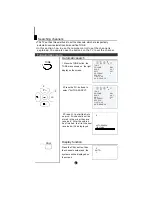
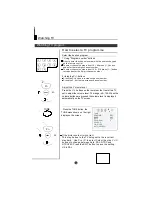
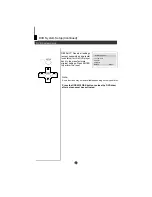
1 Press the TIME button, and
the TIME menu display on the
screen.

2 Press the P+/- buttons to
select "SLEEP TIMER ".

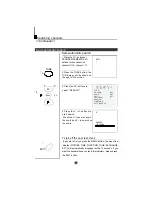
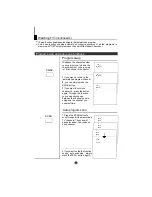
1 Press the TIME button to call
up the TIME menu on the
screen.

2 Press the P+/- buttons to
select "REMIND TIME", then
press the V-/+ buttons to set
the value in hour position;
press again the P+/- buttons to
select the minute position, and
then set the value of the
minute.(take 19:00 as an
example)

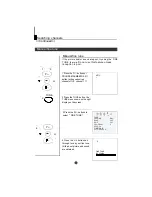
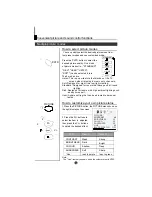
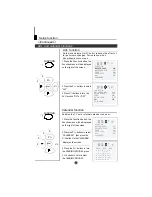
3.Press the P+/- buttons to
select "REMIND PROG", then
press the V -/+ buttons or the
program direct number buttons
to set the desired channel
(take 18 as an example).

TIME

TIME

Time functions

Continued

TIME

ON TIME

18:00

ON PROG

8

OFF TIME

23:00

SLEEP TIMER

120

REMIND TIME

--:--

REMIND PROG

1

CLOCK

17:18

TIME
CLOCK

17:18

ON TIME

18:00

ON PROG

8

OFF TIME

23:00

SLEEP TIMER

120

REMIND PROG

1

REMIND TIME

19:00

TIME
CLOCK

17:18

ON TIME

18:00

ON PROG

8

OFF TIME

23:00

SLEEP TIMER

120

REMIND TIME

19:00

REMIND PROG

18

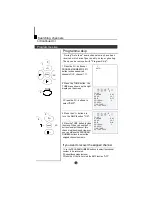
NOTE: For

CHILD LOCK must be

turned off.

REMIND PROG to

operate

Program remind timer, that displays an on-screen reminder
prompt, when a program on a different channel is due to start.

3 press the V -/+ buttons to set
the value of the SLEEP TIMER.

The TV has 18 option settings for

Sleep timer , each setting has

a time value of 10 minutes.

"

"

Summary of Contents for DTA-1489

Page 1: ...14 34cm COLOUR TELEVISION WITH DVD PLAYER GTV14T5DVD INSTRUCTION MANUAL GOODMANS HELPLINE 0 870 873 0080...

Page 2: ...19 20 Screen saver and childlock functions 20 AVL and calendar functions 21 22 23 25 26 27 28 32 33 34 35 3 Warning and cautions Using the remote control Switching on off the TV set Searching channel...

Page 3: ...ess the TITLE button on the remote then operate the arrow navigation buttons on the remote controller DVD Function Button Please note the DVD function button on the remote control switches the unit be...

Page 4: ...may be of sufficient magnitude to constitute a risk of electric shock to persons The exclamation point within an equilateral triangle is intended to alert the user to the presence of important operati...

Page 5: ...All tv must DANGER LASER SAFETY This unit employs an optical laser beam system in the CD mechanism designed with built in safeguards Do not attempt to disassemble refer to qualified service personnel...

Page 6: ...ed plug Do not leave the plug lying around where children might see it WARNING To prevent fire or shock hazard do not expose this unit to rain or moisture CAUTION DANGEROUS VOLTAGES EXIST INSIDE THIS...

Page 7: ...g one AV2 signal input one RGB signal input and one AV output 4 Coaxial in DVD mode coaxial signal digital and audio output 5 Rear AV interface AV2 signal input SCART2 in DVD mode containing one AV CV...

Page 8: ...TUNE PICTURE SOUND TIME FUNCTION 1 2 5 6 3 4 7 8 10 12 14 20 22 24 26 33 34 37 9 1 13 15 18 21 23 25 27 29 30 35 36 11 16 17 19 31 28 32 38 39 40 41 42 43 37 38 39 40 18 19 20 21 23 22 11 24 25 27 26...

Page 9: ...to switch off function This section explains the use of the power button and remote handset to turn your unit on and off 2 If the indicator is Red press the button on the remote control Alternatively...

Page 10: ...FF PROGRAM 0 SEARCH FINE TUNE AUTO SEARCH COLO R PAL U Display function Press the CALL button then the channel number and the systems will be displayed on the screen 3 AUTO I CALL TUNE SKIP OFF PROGRA...

Page 11: ...general after you press the MENU button the menu display PICTURE TIME ETC will automatically disappear within 15 seconds If you want to eliminate these contents immediately please press the EXIT butt...

Page 12: ...ess the P 4 Press the V buttons all through to carry out fine tune till the best picture and sound are obtained TUNE TUNE SKIP OFF PROGRAM 0 SEARCH AUTO SEARCH BAND UHF COLOUR PAL FINE TUNE 1 AUTO I I...

Page 13: ...the skipped channel numbers If you want to recover the skipped channel 1 Use the PROGRAM NUMBER buttons to select the channel number to be recovered 2 Repeat those steps just now 3 Press the V buttons...

Page 14: ...t channel numbers from 10 99 press button and enter the two digit channel number To select channel numbers from 100 218 press button twice and enter the 3 digit channel number 2 2 Using the P buttons...

Page 15: ...s 18 as shown in the figure 2 If you want to return to the last watched program channel 8 you can simply press the SWAP button 3 If you want to return to channel 18 press the button again Through this...

Page 16: ...ct the item to adjusted then press the V buttons to obtain the desired effect P STD PICTURE BRIGHTNESS SHARPNESS Hue CONTRAST COLOUR Weak Shallow Dark Soft lean to purple Strong Deep Bright Sharp lean...

Page 17: ...select NOISE REDUCE Press the P 3 Press the V buttons to turn the BLACK STRETCH function ON or OFF 3 Press the V buttons to turn the NOISE REDUCE function ON or OFF PICTURE FUNCTION PICTURE BRIGHTNES...

Page 18: ...nd sound control functions Continued MUTE Sound mute MUTE Mute 1 Press the MUTE button on the remote control to turn off the sound MUTE will appear on the top left of the display 2 Press MUTE again to...

Page 19: ...ep 1 2 to set OFF TIME take 23 00 as an example 3 Press the P buttons to select ON PROG then press the V or program direct number buttons to select your desired channel take 8 as an example 2 Press th...

Page 20: ...tons or the program direct number buttons to set the desired channel take 18 as an example TIME TIME Time functions Continued TIME ON TIME 18 00 ON PROG 8 OFF TIME 23 00 SLEEP TIMER 120 REMIND TIME RE...

Page 21: ...ct CHILD LOCK and press the V buttons to turn CHILD LOCK function ON Child lock function 1 2 2 FUNCTION NOTE All the control panel buttons on the front of the TV are disabled when CHILD LOCK is turned...

Page 22: ...nction 1 3 2 FUNCTION 2 Press the P buttons to select CALENDAR then press the V buttons to the CALENDAR display on the screen 2 3 AVL function Enables the TV sets internal calendar to be set Automatic...

Page 23: ...ROGRAM NUMBER 0 9 buttons to set PROGRAM 2 TO 9 3 buttons to select PROGRAM 2 Press the P 5 buttons to select EXCHANGE Press the P 6 Press the V buttons to set EXCHANGE EXCHANGE PROGRAM 2 2 EXCHANGE P...

Page 24: ...or previous page Page number entering Mix mode Volume adjustment but without OSD display Mute function but without OSD display 23 To select Teletext press the Teletext button on the handset To switch...

Page 25: ...teletext pages or data on the same page number Pressing the button changes between full screen top half bottom half full screen This feature is very useful as it magnifies the image making the charact...

Page 26: ...k from the location where playback is stopped or from the beginning of the disc Press STOP twice to stop completely 2 3 Stop playback Previous and Next Fast forward and Fast reverse 1 2 3 4 Press FWD...

Page 27: ...3 Note Press this key to display root menu select item according to your preference This function will work with a DVD having a multi layer menu ANGLE When enjoying sports concert or theatre press thi...

Page 28: ...JPEG DISC PLAYBACK MP3 PLAYBACK SCREEN SAVER FUNCTION Special Function Playback 27 When playing an MP3 disc a navigation menu will be displayed automatically In the menu use UP or DOWN cursor buttons...

Page 29: ...ed form allowing the entire picture area of the original film to be viewed without any side cropping Black bars will appear above and below the picture 16 9 You may select this if you have a widescree...

Page 30: ...2 CH audio out or 5 1 CH audio out 2 This surround sound format is output to a Dolby Digital DTS decoder through the coaxial connector on the back panel of the product SPDlF OFF SPDlF RAW or SPDIF PCM...

Page 31: ...There are up to 8 censorship classes for DVDs Note 1 To change this setting you must enter your password Initial password is 1234 2 When set to OFF all discs may be viewed Preference Page TV Type Defa...

Page 32: ...or this DVD player back to the manufacturers original settings Press ENTER to perform the reset Note Some functions may not be available depending on the type of disc TV Type Parental Default Auto Pas...

Page 33: ...other than those listed above You cannot play discs of non standardized discs even if they may be labelled as above The performance of CD R or CD RW disc is depend on the way of disc burning In a few...

Page 34: ...2cm 8cm Disc diameter 30cm 20cm 12cm 12cm Horizontal resolution More than 500 line No more than 430 line No more than 350 line No more than 250 line Multiple kinds Picture proportion One kind One kind...

Page 35: ...er audio amplification equipment to the scart digital coaxial sockets at the rear of the set to enjoy higher quality sound and picture 34 Stereo To video audio input DVD VCD and other reproducing equi...

Page 36: ...or no picture No or low signal Check aerial connection Aerial may be damaged Screen lit No noise Set in AV mode Switch set to TV Mode No colour Colour turned down Adjust colour settings Picture Ok No...

Page 37: ...d specifications are subject to change without notice Dimensions quoted in this manual are approximate 35 AC 230V 50Hz I 70W Picture tube Accessories M o d e l Colour system Sound system Sound output...

Page 38: ......
Reviews: