background image

7

2. After the gas has escaped, remove the nut and discard

the black or brass cap.

3. Remove the check piston to verify it is correct and then

replace the piston. See piston kit chart in instructions.

4. Use a tube cutter to remove the spin closure on the

suction line.

5. Remove the tailpiece clamped to the exterior and 

slide

the 13/16 nut into place.

6. Braze tailpiece to the line set liquid tube.

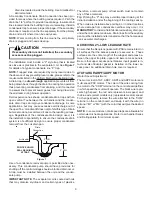
WHITE
TEFLON SEAL

PISTON

TAILPIECE

13/16” NUT

PLASTIC or BRASS CAP

Figure 1

7. Insert the suction line into the connection, slide the in-

sulation and the rubber grommet at least 18" away from
the braze joint.  Braze suction line.

8.

AFTER THE TAILPIECE HAS COOLED

, confirm posi-

tion of the white Teflon

®

 seal and hand tighten the 13/

16 nut.

9. Torque the 13/16 nut to 10-25 ft-lbs. or tighten 1/6 turn.

Excessive torque can cause orifices to stick. Use the 
proper torque settings when tightening orifices.

10. Replace suction line grommet and insulation.

RUBBER
GROMMET

SUCTION LINE
WITH SPIN CLOSURE

Figure 2

Downflow Conversion

NOTE: ATUF models should not be converted to
Downflow applications.

“D” nomenclature models are factory equipped for “Dedicated
Downflow” operation and no field conversion is required.

Conversion to downflow MUST be performed in an area that
allows access to all sides prior to placing the air handler in its
final location.  To prevent the evaporator coil pan from “sweat-
ing” the DPI accessory insulation kit is to be used when per-
forming this conversion.  NOTE: The DPI kit is not supplied
with this product and is to be purchased separately.  See

Table 7

 for the correct DPI kit.

ARUF, ATUF

 or ARPF Model

Insulation Kit

1729 / 1824

DPI18-30/20

3030  / 1931 /   3636

DPI36-42/20

3642 /  3743 / 4860 /  4961

DPI48-61/20

Table 7

Refer to 

Figures 3 through 5

 for the location of the compo-

nents referenced in the following steps. 

Figure 3 

illustrates

the new installation location for the removed components.

1. Before inverting the air handler, remove all access pan-

els, the coil rear channel bracket, and the filter close-off
panel.

2. Remove the evaporator coil and the horizontal drain pan.

Discard horizontal drain pan.

3. Install the provided plastic plug into the vacated access

panel.

4. Remove the two (2) zee coil support brackets and insu-

lation retaining brackets.

5. Remove the tie bracket.

6. Install the DPI Insulation Kit onto the bottom of the drain

pan.

NOTE: The filter provision is not applicable

in THIS downflow application.

ACCESS
PANEL

RETURN AIR SIDE
OF UNIT

REAR CHANNEL
BRACKET

ZEE COIL
SUPPORT BRACKET

COIL RETAINING
BRACKET

TIE BRACKET

Figure 3

7. Install the zee coil supports and the wrapper stiffeners.

8. Install the tie bracket.

9. Install the rear channel bracket.

10. To prevent possible condensate “blow off” the insula-

tion retainers are to be laid into the evaporator coil pan
as shown in 

Figure 4.

Summary of Contents for ADPF

Page 1: ...LING PERSONNEL Prior to installation thoroughly familiarize yourself with this Installation Manual Observe all safety warnings During installation or repair caution is to be observed It is your respon...

Page 2: ...Canadian Electric Code CSA C22 1 uninterrupted unbroken When installing or servicing this equipment safety clothing including hand and eye protection is strongly recommended If installing in an area t...

Page 3: ...he Prod uct Registration page Product limited warranty certificates for models currently in production can be viewed at www goodmanmfg com or www amana hac com If your model is not currently in pro du...

Page 4: ...e con structed in a manner that limits restrictions and maintains suitable air velocity Ductwork is to be sealed to the unit in a manner that will prevent leakage Return Ductwork DO NOT TERMINATE THE...

Page 5: ...g the ground lug in the unit control box to the building electrical service panel Other methods of grounding are permitted if performed in accordance with the National Electric Code NEC American Natio...

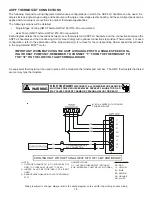
Page 6: ...n denser or heat pump The 24V control voltage connects the air handler to the room thermostat and condenser Low volt age wiring is to be copper conductors A minimum of 18AWG must be used for installat...

Page 7: ...r handler in its final location To prevent the evaporator coil pan from sweat ing the DPI accessory insulation kit is to be used when per forming this conversion NOTE The DPI kit is not supplied with...

Page 8: ...left side access panel and slide out the evaporator coil and horizontal drain pan 4 Remove the gasket from the horizontal pan drain con nections 5 Remove the oval shaped plastic plug from the left sid...

Page 9: ...EQUIRED AT TRAP Drain Connection 2 MIN Figure 7 Use of a condensate removal pump is permitted when nec essary This condensate pump should have provisions for shutting off the control voltage should a...

Page 10: ...Assumes dry coil with filter in place SCFM correction for wet coil 4 208V 240V 0 1 0 2 0 3 0 4 0 5 High 1 155 1 090 1 025 950 895 ADPF18241 16 Med 940 890 860 815 755 Low 695 665 650 610 550 High 1 7...

Page 11: ...ge Return air is not obtained from any areas where there may be objectionable odors flammable vapors or prod ucts of combustion such as carbon monoxide CO which may cause serious personal injury or de...

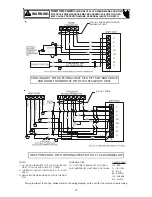
Page 12: ...STAT W Y G R 18 GA 4 WIRES WITH COOLING 3 WIRES WITHOUT R G W Y TO CONDENSING UNIT 24V CONNECTIONS 18 GA 2 WIRES BLUE WHITE GREEN RED CONTACTOR COIL AT AR UNIT Figure 8 Low Voltage Wiring Diagram for...

Page 13: ...STAT CLOSE ON TEMPERATURE FALL RED GREEN WHITE BLUE AT AR UNIT R Y O W BL 18 GA 5 WIRE 18 GA 7 WIRE NOTE R G BR W BL R R I B 18 GA 6 WIRE NEEDED WHEN OT IS USED R 18 GA 7 WIRE NEEDED WHEN TWO OT S ARE...

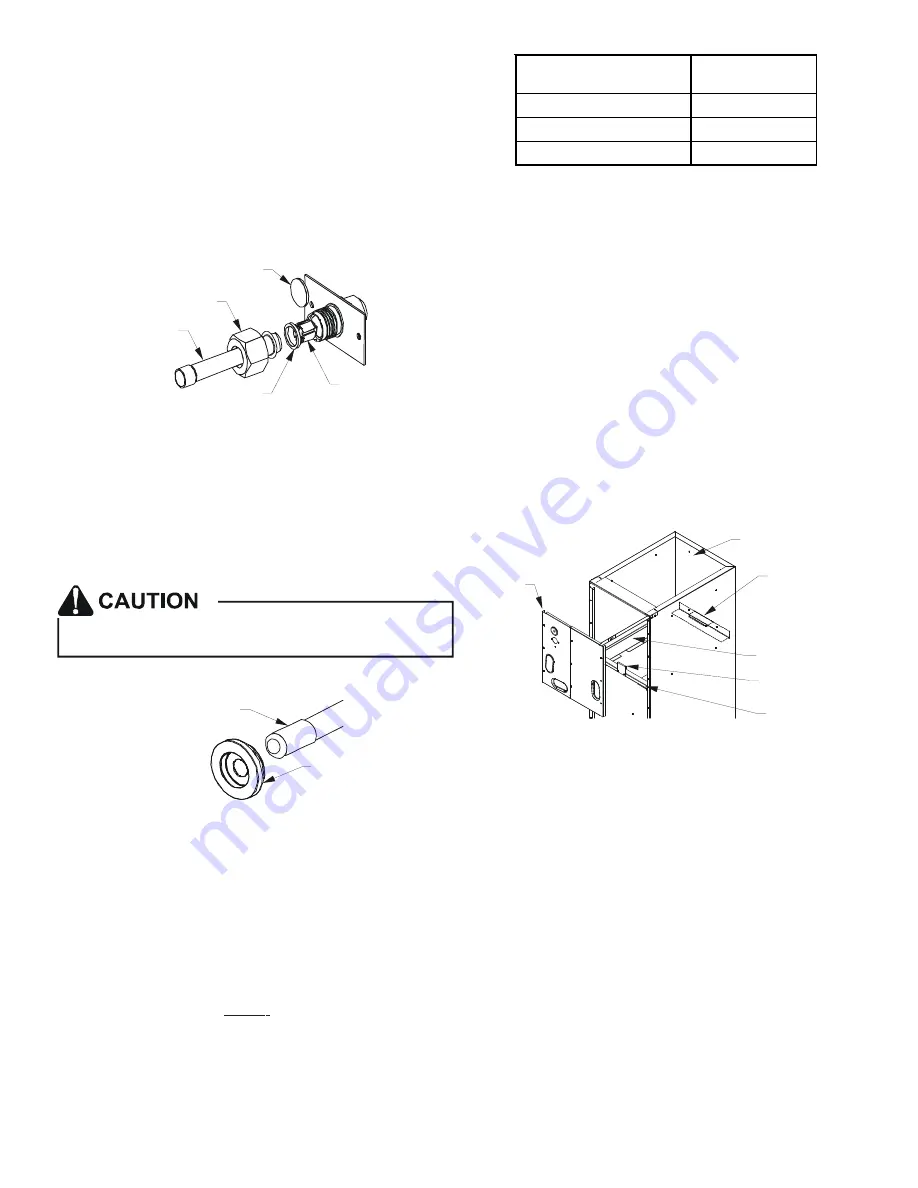
Page 14: ...HEN MATCHING THE ASPF AIR HANDLERS TO A SINGLE SPEED COOL ING OR HEAT PUMP UNIT REMEMBER TO CONNECT Y FROM THE THERMOSTAT TO THE Y2 ON THE LOW VOLTAGE TERMINAL BOARD An equivalent thermostat can be us...

Page 15: ...B YL BL CONDENSING UNIT 24V CONNECTION BL YL GR RD 18 GA 5 WIRES WITH COOLING 4 WIRES WITHOUT WH YL BR BR BR YL G C R HEAT PUMP UNIT WITH OPTIONAL HEAT KITS OF 10 kW AND BELOW C W1 W2 Y2 Y1 O G R TB 1...

Page 16: ...IT WITH OPTIONAL HEAT KITS OF 15 kW AND ABOVE C W1 W2 Y2 Y1 O G R TB 18 GA 7 WIRE O Y C W2 R Y O W2 E RD GR BL OR YL YL BL OR WH BR WH BL WH WH RD BR RD WH GR YL OR OR RD OR NOTES 1 OUTDOOR THERMOSTAT...

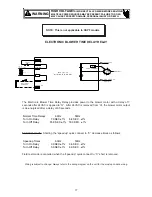
Page 17: ...R A L G H E A T K I T M O T O R The Electronic Blower Time Delay Relay provides power to the blower motor with a delay of 7 seconds after 24VAC is applied to G After 24VAC is removed from G the blower...

Page 18: ...18 THIS PAGE LEFT INTENTIONALLY BLANK...

Page 19: ...19 THIS PAGE LEFT INTENTIONALLY BLANK...

Page 20: ...20 Goodman Manufacturing Company L P 5151 San Felipe Suite 500 Houston TX 77056 www goodmanmfg com 2004 2010 Goodman Manufacturing Company L P...

Reviews: