GF-DIO MANUAL
2012
3
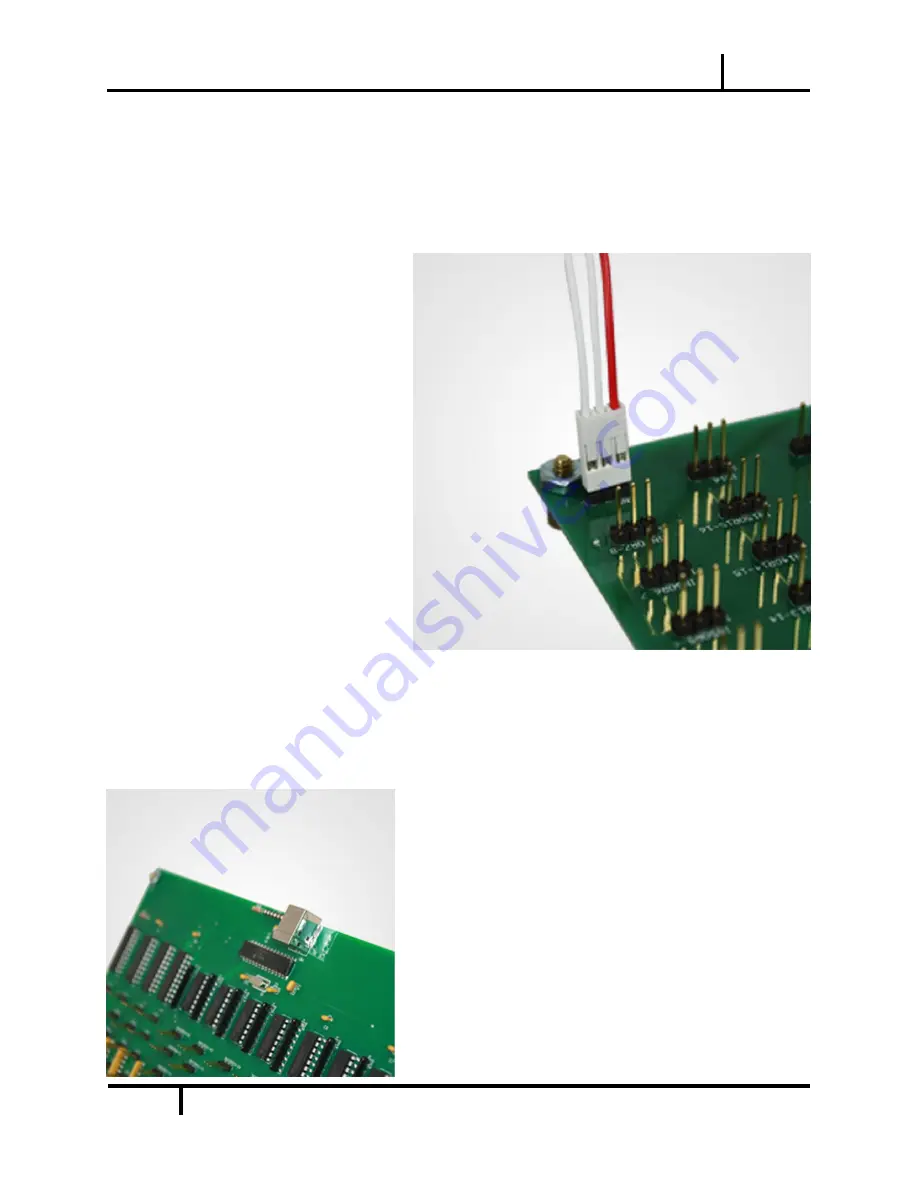
STEP 4:
Connecting the hardware to the DIO
Board
The GF-DIO Board comes with 88
positions for components to be added.
Each position is a made up of a 3-pin
connection. Once the hardware
components are plugged into the wire
assembly, plug the other end of the
wire assembly into one of the positions
on the DIO board, taking note of the
number position for later configuration.
Take note the 3-pin connectors have
two positions each and a ground wire in
the middle. The order works like this,
first pin is the first position, second pin
is the ground wire and the third pin is
the second position. Then on the next
wire, the first pin repeats the second
position, the second pin remains as the
ground and the third pin is the third position. The pattern repeats throughout the DIO board.
STEP 5:
Connecting the GF-DIO Board
Now the GF-DIO Board must be connected to the
computer. With the provided USB cable, simply plug
the appropriately matching ends into both the GF-DIO
Board’s USB slot and any non USB 3 port on the
computer tower.
Once the GF-DIO board is completely connected to
the computer, it is ready to be configured for use with
your flight simulation software.


