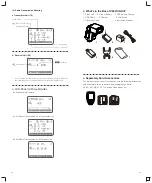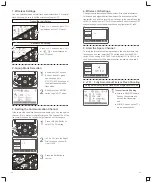
Press <
> button so that
<
>
or
< >
are displayed on
the LCD panel.
Receiver Unit Setting
Transmitter Unit Setting
Press <
> button so that
<
>
is displayed on the LCD panel.
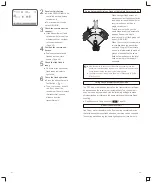
2. Group Mode Selection
Short press the Function
1
Button 1 and <M> group
can be changed in
OFF/TTL/M. Choose one of
them as transmitter unit's
flash mode.
Short press the <MODE>
2
button to gain RPT mode.
1
.
Wireless Settings
You can switch between normal flash and wireless flash. For normal
flash shooting, be sure to set the wireless setting to OFF.
3. Setting the Communication Channel
If there are other wireless flash systems nearby, you can change the
channel IDs to prevent signal interference. The channel IDs of the
transmitter unit and the receiver unit(s) must be set to the same.
Press <MENU> Button to
1
enter C.Fn CH setting.
In C.Fn CH, turn the Select
2
Dial to choose channel ID
from 1 to 32.
Press the Set Button to
3
confirm.
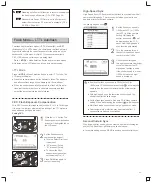
4. Wireless ID Settings
Change the wireless channels and wireless ID to avoid interference
for it can only be triggered after the wireless IDs and channels of the
transmitter unit and the receiver unit are set to the same.Press the
<MENU> button to enter C.Fn ID. Press the Set Button to choose OFF
channel expansion shutdown, and choose any figure from 01 to 99.
5. Scan
the
Spare
Channel
To avoid the interference of using the same channel by others, this
function can be used: enter the C.Fn settings and find the SCAN
option. When setting it to START, it will scan from 1% to 100%. And
the 8 spare channels will be displayed after the scan is completed.
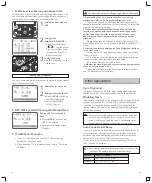
6. i-TTL
Fully Automatic Wireless Flash Shooting
Using Automatic Wireless Flash with a Single Receiver Unit
Transmitter Unit Setting
1
●
Attach a
camera
V860IIIN
flash on the camera and
set it as the transmitter
unit.
●
M/A/B/C can be set as TTL
mode independently.
C.Fn
Ver 0.5
CLEAR
CH
ID
BEEP
STBY
07
SCAN
C.Fn
Ver 0.5
CLEAR
CH
ID
BEEP
SCAN
22 08 32 23
30 21 07 06
C.Fn
Ver 0.5
CLEAR
CH
ID
BEEP
STBY
99
SCAN
- 45 -
- 46 -
RX
RX


