4. Connect the power cable of the external PS to the wall outlet as shown in figure 4.
5. Push the power-on switch.
6. Check if the printer is powered on.
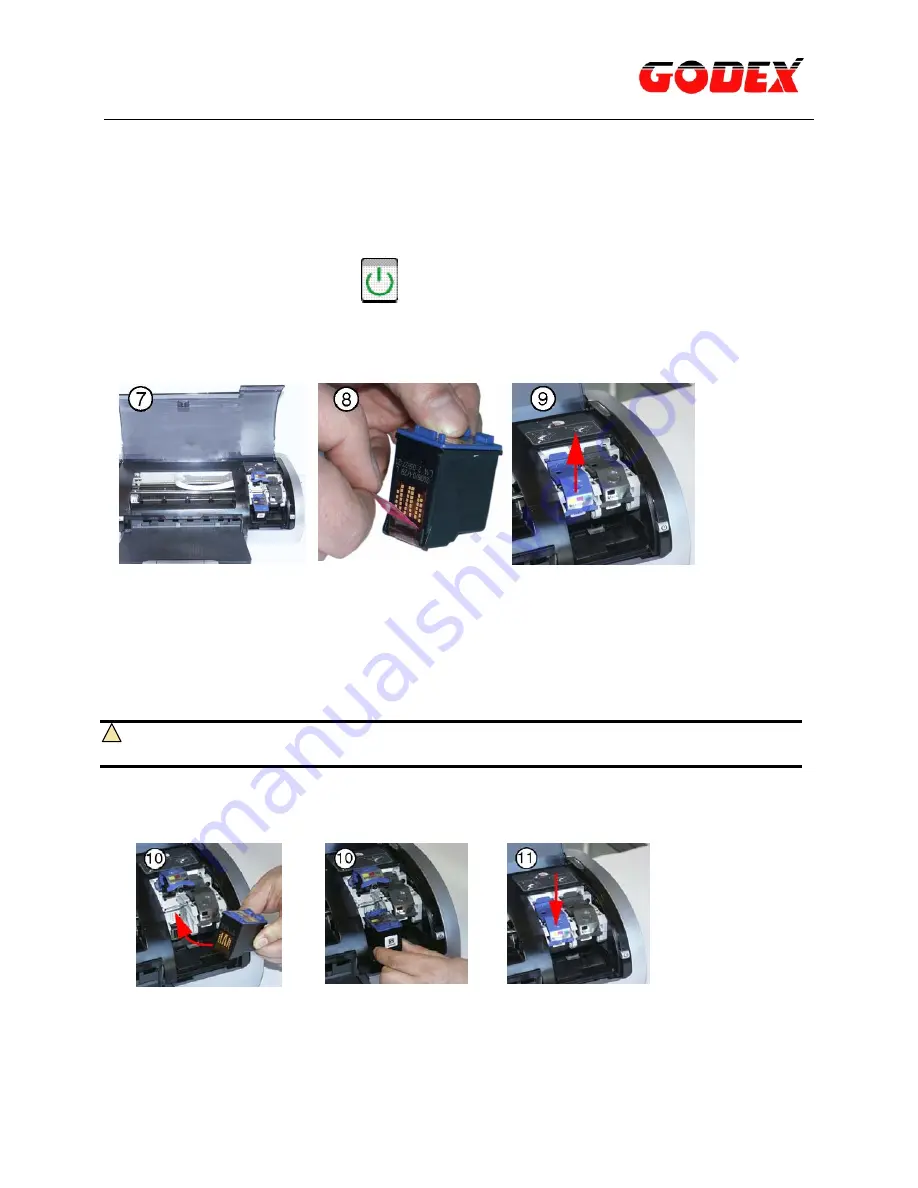
7. Open the top cover as shown in figure 7.
8. Remove the tri-colour ink cartridge from its packaging and carefully remove the
plastic tape as shown in figure 8.
9. Open the print head carriage latch as shown in figure 9.
Caution:
Do not touch the print head ink nozzles or copper contacts!
10. Gently push the print head into place in the print carriage as shown in figure 10.
11. Close the print carriage, then press the print head carriage latch into position until it
clicks as shown in figure 11.
12. Follow steps 8 to 11 to install the black ink cartridge an close the top cover.
8


