Gnome-PII
30
Figure 30: Scheduled recording shortcut
menu
for example, Timer 1, select the Setup option
(Figure 30).
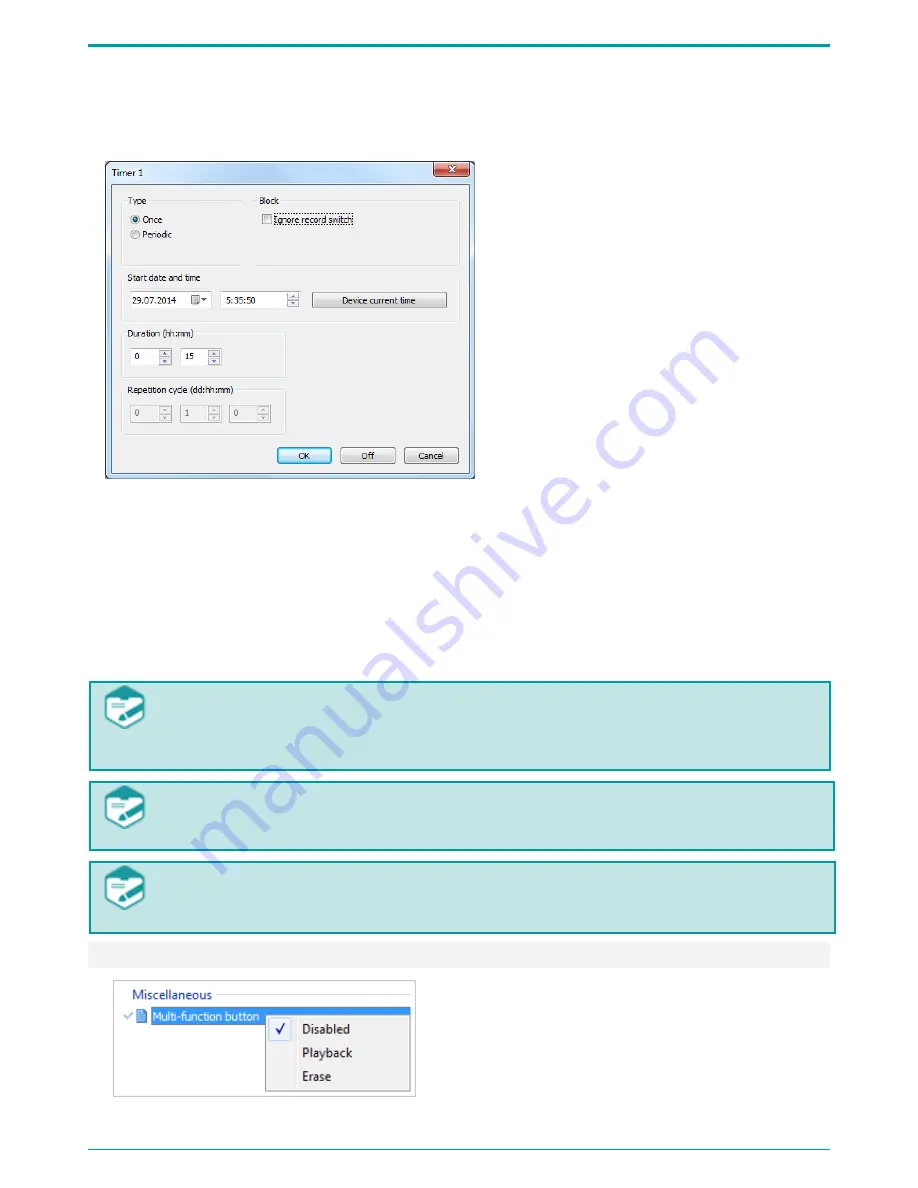
Figure 31: Adjusting timer recording
In the Timer 1 dialog (Figure 31) select
one of the Types: Once or Periodic.
If the Once option is selected, specify
start date and time in the relevant
setting areas.
The Device current time option enables
quick current device time setting for
further time adjustment.
For setting Periodic recording type you also need to specify Repetition cycle.
To prevent accidental timer recording disabling, set the timer priority over manual recording
switch. To do so, tick the Ignore record switch checkbox. After doing so the recording process will
be impossible to stop with the switch slider located on the device case or with the remote control.
After all the parameters are set, click OK to enable the timer.
To disable timer, click Off.
To cancel all the current selections, click Cancel.
In case you set two periodic timers with the exact same parameters or if the device
detects errors while applying timer parameters, you will see an error message in the
area
3
of the application main screen (Figure 17).
Scheduled recording will not start if device memory is full. After you clear device
memory, scheduled recording will start automatically.
During the recording pauses the battery accumulates charge. That is why if during
periodic recording the battery discharges, audio files might be of shorter duration.
9.4.11 Erase/Playback Button
Figure 32: Erase/Playback shortcut menu
Erase/Playback button shortcut menu (Figure 32)
is used for assigning the button (7 on Figure 1)
one of the following options:
Disabled;
Playback (to play the last recorded
audio file);
Erase (for quick memory formatting).


