


For Yukon Denali, the equipment is located behind the
left trim panel in the rear of the vehicle. Unlatch the
release lever to open the trim panel door. Skip the first
step and follow the last three.
For Yukon XL Denali, the equipment you’ll need is
under the storage tray in the left trim panel.
1. Remove the tray to access the tools.
2. There is a wing nut used to retain the tool kit.
To remove it, turn the wing nut counterclockwise.
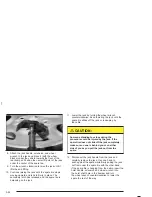
3. To release the bottle jack from its holder, turn the
knob on the bottle jack counterclockwise to lower
the jack head.
4. The wheel blocks and the wheel block retainer can
be removed by turning the wing nut
counterclockwise.
You’ll use the jack handle extensions and the wheel
wrench to remove the underbody-mounted spare tire.
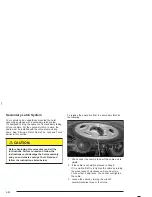
A. Spare Tire (Valve
Stem Pointed Down)
B. Hoist Assembly
C. Hoist Cable
D. Tire Retainer
E. Hoist Shaft
F. Hoist End of
Extension Tool
G. Hoist Shaft
Access Hole
H. Wheel Wrench
I. Jack Handle
Extensions
J. Hoist Lock
(If Equipped)
5-78
Summary of Contents for 2004 Yokon Denali
Page 5: ...These are some examples of symbols that may be found on the vehicle v...
Page 6: ...NOTES vi...
Page 34: ...Put someone on it Get it up to speed Then stop the vehicle The rider doesn t stop 1 28...
Page 69: ...Yukon Denali Second Row Seat Yukon Denali Third Row 50 50 Split Seat 1 63...
Page 100: ...NOTES 1 94...
Page 150: ...NOTES 2 50...
Page 153: ...NOTES 3 3...
Page 154: ...Instrument Panel Overview 3 4...
Page 424: ...5 108...
Page 430: ...NOTES 5 114...
Page 445: ...Engine Drive Belt Routing 6 15...
Page 462: ...NOTES 7 14...
Page 480: ...NOTES 18...


