


Once the seatbacks are folded down, on
Yukon XL Denali models only, the rear seat footwell
area will be exposed and will have to be covered by
the load floor panel. To create a load floor, do the
following:
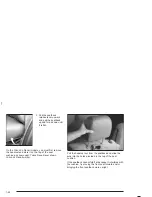
1. Release the panels from the seatbacks by pushing
forward on the latches.
2. Then fold the panels back to cover the rear seat
footwell area.
Returning the Seatbacks to an Upright
Position
{
CAUTION:
If the seatback is not locked, it could move
forward in a sudden stop or crash. That could
cause injury to the person sitting there. Always
press rearward on the seatback to be sure it is
locked.
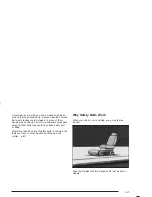
To return the seatbacks to the upright position, do the
following:
1. On Yukon XL Denali models, lift the load floor
panels and latch them into the seatback.
2. Lift the seatback up and push it rearward all the
way. On Yukon XL Denali models, move the
headrest to the seatback.
3. Lower the seat cushion until it latches into position.
4. On Yukon Denali models, return the headrests
to the upright position.
5. Pull forward on the seatback and up on the seat
cushion to make sure the seat is securely in place.
1-25
Summary of Contents for 2004 Yokon Denali
Page 5: ...These are some examples of symbols that may be found on the vehicle v...
Page 6: ...NOTES vi...
Page 34: ...Put someone on it Get it up to speed Then stop the vehicle The rider doesn t stop 1 28...
Page 69: ...Yukon Denali Second Row Seat Yukon Denali Third Row 50 50 Split Seat 1 63...
Page 100: ...NOTES 1 94...
Page 150: ...NOTES 2 50...
Page 153: ...NOTES 3 3...
Page 154: ...Instrument Panel Overview 3 4...
Page 424: ...5 108...
Page 430: ...NOTES 5 114...
Page 445: ...Engine Drive Belt Routing 6 15...
Page 462: ...NOTES 7 14...
Page 480: ...NOTES 18...


