background image

www.glp.de


10  

Highlander Wash Quick Start and Safety Manual 


Restrict access below the work area and work from a stable platform whenever 
installing, servicing or moving the fixture. 


If the fixture becomes damaged, stop using it immediately and disconnect it from 

power. Do not attempt to use a fixture that is obviously damaged. 


Do not modify the fixture in any way not described in its user documentation. 


Install genuine GLP parts only. 

PRELIMINARY

Summary of Contents for Highlander Wash

Page 1: ...Fixture software version 26 Quick Start and Safety Manual P R E L I M I N A R Y...

Page 2: ...affiliated companies disclaim liability for any injury damage direct or indirect loss consequential or economic loss or any other loss occasioned by the use of inability to use or reliance on the inf...

Page 3: ...age from dust and airborne particles 12 Transportation and storage 12 Overview 13 Overview of features 14 Lamp 14 Control panel and display 14 Base and rigging options 14 Preparation for use 15 Includ...

Page 4: ...Adjusting the lamp 26 Main fuse 26 Lubrication 26 GLP Service and Support 26 Technical specifications 28 Dimensions 31 P R E L I M I N A R Y...

Page 5: ...The User Manual explains features and control of Highlander Wash fixtures The Highlander Wash DMX Channel Index available for download from www glp de The Channel Index is a separate guide to the DMX...

Page 6: ...ure Refer all repairs and any service operation not described in this manual to a technician authorized by GLP Read and follow the user documentation for all additional equipment Electrical safety Do...

Page 7: ...m the fixture is powerful enough to cause burns or fire in illuminated objects at close range Keep all combustible materials e g fabric wood paper at least 1 m 3 3 ft away from the fixture Ensure that...

Page 8: ...the person s first seizure or if the person is injured While waiting for help to arrive protect the affected person from injuring themselves on hard or sharp objects If necessary move the person to a...

Page 9: ...nd only with hardware that is specifically designed approved and rated for its purpose Do not use a safety cable as the primary means of support Check that installation hardware is in perfect conditio...

Page 10: ...whenever installing servicing or moving the fixture If the fixture becomes damaged stop using it immediately and disconnect it from power Do not attempt to use a fixture that is obviously damaged Do...

Page 11: ...nual Oils solvents and other chemicals commonly used for cleaning can damage the lens coatings and surfaces Use only original spare parts Do not make any structural modifications to the fixture or you...

Page 12: ...ctly clean Wear clean gloves when changing the lamp Avoiding damage from dust and airborne particles Carry out regular visual inspections of every fixture to make sure that there is no accumulation of...

Page 13: ...Cooling vent H Safety cable attachment point I Floor stand J Mini base K Cooling vent L Backlit LCD display M Quick Menu ESC button N Jog wheel O ENTER button P DMX OUT THRU 5 pin XLR Q Fuseholder R...

Page 14: ...e the lamp before it reaches its rated lifetime Lamp power The lamp can be operated at two power levels At the NORMAL power setting the lamp runs at 1400 W At the ECO power setting the lamp runs at 10...

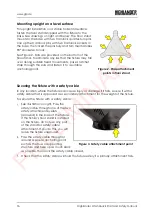
Page 15: ...xture s floor stand supplied to the fixture using the camlock bracket attachment points in the base of the fixture Lift the fixture straight up out of the flightcase turn it upside down and place it o...

Page 16: ...afety cable In any location where the fixture can cause injury or damage if it falls secure it with a safety cable that is approved as a secondary attachment for the weight of the fixture To secure th...

Page 17: ...aximum 11 mm 0 43 in into the base of the fixture when tightened See Figure 4 Fasten the bolts or screws through the half coupler clamps and into holes A in the base of the fixture so that the clamps...

Page 18: ...n page 16 Make sure that the head will not collide with another fixture or any other object when it moves through its full pan and tilt ranges Sideways Mounting For sideways mounting i e mounting with...

Page 19: ...at nobody will be looking directly at the fixture if it lights up suddenly Powering the fixture off Turn off the lamp but leave the fixture connected to power for 30 minutes before powering the fixtur...

Page 20: ...en EU system Brown Blue Yellow green Setting up fixture control The Highlander Wash can be controlled via USITT512 DMX over a standard DMX cable link Art Net network or sACN network If you would like...

Page 21: ...t it is possible to transmit DMX data as broadcast or unicast packages via Art Net If a large number of universes more than 30 is broadcast data loss can occur If you suspect that this is happening co...

Page 22: ...For guidance on using the Highlander Wash see the latest version of the fixture s User Manual available for download from www glp de Check that the software version given at the front of the user manu...

Page 23: ...o prevent the fixture from cooling correctly and this will reduce the fixture s lifetime The rate of dirt buildup will vary depending on environmental factors such as airborne dust use of smoke machin...

Page 24: ...losion replace the lamp before it reaches the end of its lifetime Do not touch the lamp with bare fingers If you get any grease or oil on the lamp clean it carefully with an alcohol wipe and wipe it d...

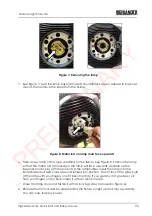
Page 25: ...up the bayonet mount pins with the pin slots in the lampholder Insert the lamp into the lampholder and twist clockwise until locked into position Do not touch the glass bulb of the lamp with your fin...

Page 26: ...n right and see Overview on page 13 The main fuse sits in a fuseholder in the base If the fixture appears to be completely shut down even though power is applied the main fuse may have blown Disconnec...

Page 27: ...German Light Products Highlander Wash Quick Start and Safety Manual 27 GLP U K 44 1392 690140 GLP Asia 852 3151 7730 GLP Nordic 46 737 57 11 40 P R E L I M I N A R Y...

Page 28: ...us linking system Output lens diameter 230 mm 9 in Movement Resolution 8 16 bit Position feedback Yes Pan 640 Tilt 262 Effect movement Fast Normal and Smooth performance options Control Pan and tilt c...

Page 29: ...temperature controlled or constant fan options Max ambient temperature 45 C 115 F Min ambient temperature 5 C 41 F Max surface temperature at 40 C ambient 100 C 212 F Total heat dissipation at 230 V 1...

Page 30: ...ht Width head at max horizontal extension 724 mm 28 6 in Width across yoke 492 mm 19 4 in Height head vertical 773 mm 30 5 in Height head at max vertical extension 794 mm 31 3 in Height incl floor sta...

Page 31: ...German Light Products Highlander Wash Quick Start and Safety Manual 31 Dimensions Dimensions are given in millimeters P R E L I M I N A R Y...

Page 32: ...P R E L I M I N A R Y...

Page 33: ...P R E L I M I N A R Y...

Page 34: ...P R E L I M I N A R Y...

Page 35: ...P R E L I M I N A R Y...

Page 36: ...P R E L I M I N A R Y...

Reviews: