background image

USER MANUAL

Range BEAT-Tr

Edition: January 2016
Revision: No. 3

MODE OF USE -     

39

 COMPULSORY

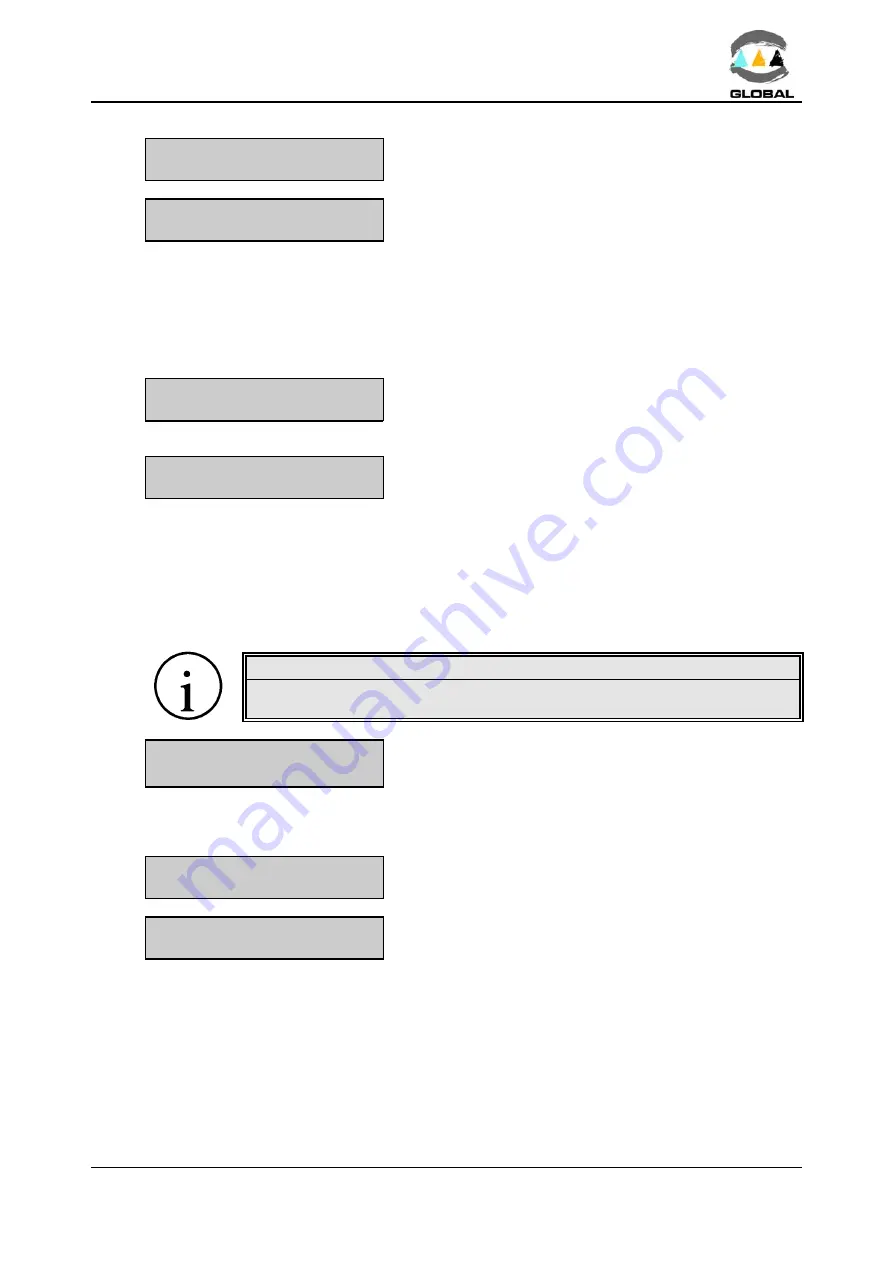
>CONTROL ISO 12176-3

Pressing START/VALIDATE key the current configura-

tion is showed.

CONTROL ISO 12176-3

<YES>/<NO>

<YES> corresponds to the identification according to ISO

12176-3 whereas selecting <NO> there is no observance.

Use the 

¨

 or 

§

 keys to shift from <YES> to <NO> or vice versa. Click the START /

VALIDATE key to accept the selection made. Click <STOP> to exit this option without

making a modification.

Finally, the latest option RESET allows to establishing the way to delete the operator’s

identification entered.

 CONTROL ISO 12176-3

>RESET

Pressing START/VALIDATE key the current configura-

tion is showed.

RESET

<YES>/<NO>

<YES> the operator’s ID is deleted every time the unit

is switched off. <NO> with the change of date only.

Use the 

¨

 or 

§

 keys to shift from <YES> to <NO> or vice versa. Click the START /

VALIDATE key to accept the selection made. Click <STOP> to exit this option without

making a modification.

C

 JOB:

To modify the existing configuration of the option JOB, proceed as follows:

WARNING !
This  option might have restricted access. If enabled, the following screen

will appear initially:

OPERATOR:

Enter the supervisor PIN number.

Once the supervisor code has been introduced and the START/VALIDATE button pressed,

the following screen that is directly shown that not having the restriction enabled:

>SHOW

 COMPULSORY

Pressing START/VALIDATE key the current configura-

tion is showed.

SHOW

<YES>/<NO>

<YES> corresponds to the job identification enabled

whereas <NO> to disenabled.

Use the 

¨

 or 

§

 keys to shift from <YES> to <NO> or vice versa. Click the START /

VALIDATE key to accept the selection made. Click <STOP> to exit this option without

making a modification.

The next option allows to establishing the obligation or not in carrying out the identifica-

tion.

Summary of Contents for BEAT-Tr

Page 1: ...USER MANUAL ELECTROFUSION CONTROL BOX MODELS BEAT Tr MINI BEAT Tr Edition January 2016 Revision No 3 Publication MU 78 15E ...

Page 2: ...apajedla Czech Republic info stp fittings cz 420577913065 STP Acuster Baltics Bullu str 45 Riga LV1067 Latvia riga stpfittings lv 37167815281 STP Acuster South Africa 54 Richard Road Industria North PO BOX 2203 Wilro Park 1731 Roodepoort South Africa shawn pretorius stp sa com 27315397451 Agru Acuster Chile Lo Echevers 891 Bodegas 11 y 12 Quilicura Santiago Chile info agrusa cl 56229493910 Agru Ac...

Page 3: ... 13 2 3 Right and left sides 13 2 4 Top and rear sides 14 CHAPTER 3 MODE OF USE 15 3 1 Electrofusion procedure 15 3 1 1 Introduction 15 3 1 2 Scraping pipe surfaces 15 3 1 3 Fitting installation 15 3 1 4 Unit connection 16 3 1 5 Using the Barcode reader 18 3 1 6 Entering the operator number 19 3 1 7 Entering the job number 20 3 1 8 Entering auxiliary data 21 3 1 9 Traceability 22 3 1 10 Fitting co...

Page 4: ...utput voltage 45 4 2 6 Protection against internal temperature 45 CHAPTER 5 MAINTENANCE 46 5 1 General 46 5 1 1 Introduction 46 5 1 2 Storage 46 5 1 3 Cleaning 46 5 1 4 Checks 46 5 2 Control unit 47 5 2 1 Electronic control unit 47 5 2 2 Internal battery 47 5 2 3 Updating the programme software 47 CHAPTER 6 TECHNICAL CHARACTERISTICS 49 6 1 Electrofusion control unit 49 6 1 1 General specifications...

Page 5: ... according to ambient temperature Refer to the fitting manufacturer s instructions Both electrofusion units are provided with traceability so it allows the data entry such as operator s ID job order ID auxiliary data and fitting traceability The unit stores all this data in its memory for further treatment These models can be optionally supplied as AR Series High Performance with the same original...

Page 6: ...loses the programmed bar code system in accordance with ISO TR 13950 1 3 GENERAL INFORMATION The development documentation production tests and shipping of the products herewith described have been made M Complying with the respective safety rules and M In accordance with the requirements of quality guarantee WARNING The electrofusion control box can only be opened by the STPAcuster group After sa...

Page 7: ... 1 Políg Ind del Sud oest Telf 34 93 4703070 Sant Just Desvern Barcelona Figure 1 The quality control identification plate includes the fusion control box serial number The plate includes room for future maintenance date stamping 1 4 2 CE marking The electrofusion unit is supplied with the appropriate plate with the CE mark as the European Community norm indicates on the new Machine Security Regul...

Page 8: ...p the fusion control box out of the reach of non authorised personnel non qualified personnel and children Protect the control unit from water rain snow etc M When transporting the unit and during loading and unloading operations the appropriate precautionary measures must be taken to ensure that all unit components are completely secured in the vehicle and that they are free from impact during tr...

Page 9: ...ve equipment such as hard hat safety glasses etc For indoor fusion jointing work adequate ventilation of the premises must be provided M Before using the fusion control box its external condition will have to be checked as well as its working condition All components must be correctly assembled in order to guarantee the correct functioning of the unit M The damaged components must be repaired or r...

Page 10: ...Tr to which this declaration relates is in conformity with the following Directives and also the following relating standards Directive Related Specification Model 2006 95 CEE Low Voltage EN 60204 1 EN 60335 1 EN 60519 1 BEAT Tr MINI BEAT Tr 2004 108 CEE Electromagnetic compatibility EN 61000 6 2 EN 61000 6 3 2002 95 CEE ROHS EN 62321 1 2002 96 CEE WEEE ISO 12176 2 ISO 12176 3 ISO 12176 4 ISO TR 1...

Page 11: ...arantee for the period of TWO years 2 If the product proves defective during this period due to the materials or its assembly it will be repaired free of charge including the cost of materials and labour at STPAcuster s authorised Technical Service 3 The Guarantee is not valid in the following cases When the fault in the product is a result of Abuse or incorrect use of the unit Not following the i...

Page 12: ...n cables Additionally it is fitted with a D sub connector for the connection of scanner PC and printer The front part is formed by a membrane which incorporates tactile push buttons to enter the data and a back lit LCD display Inside the unit is formed by a processor board CPU transformer in addition to all of the electronics necessary for the electrofusion process current and voltage controls Fig...

Page 13: ...Where 1 Membrane with push buttons 2 Display 3 Master switch 4 Connector D sub 9 pins 5 Connector USB A 6 Adhesive of model Tr 7 Adhesive MINI for MINI BEAT Tr only Figure 4 2 3 RIGHT AND LEFT SIDES On the right and left sides of the electrofusion unit looking at it from the front the following elements are located Where Where 1 Technical specifications sticker 1 Document holder bag 2 CE plate 2 R...

Page 14: ...ision No 3 14 2 4 TOP AND REAR SIDES At the top and rear of the of the electrofusion unit are located the following components Where Where 1 Transport handle 1 Rear cover 2 Power cable 2 Fixing screw 3 Electrofusion cables 3 Seal label Figure 6a Top view Figure 6b Rear view ...

Page 15: ...ipe s most exterior oxidation which would otherwise lead to a dissatisfactory electrofusion joint Next clean the scraped area with a degreasing towel or with a clean dry white cloth which does not shed lint dampened with isopropanol or recommended PE solvent 3 1 3 Fitting installation For joints of tapping saddles and branch saddles place a rounder on each side of the scraped area if the fusion is...

Page 16: ... switching on the unit Checking the fitting connection cable terminals before starting up the unit is advised There are different types of adopters depending on the type of fitting to be used Ø Set the master switch in the ON position BEAT TR No xxxx V v vv EN dd mm yy The display backlight will be enable an acoustic signal heard and the following information will appear BEAT TR model BEAT Tr No x...

Page 17: ...f faulty probe send the unit to an authorised STPAcuster group After sale Service INTERNAL FAULT If the software detects that there is a voltage output through the electrofusion cables out of the electrofusion cycle the display shows the following message SERIOUS TROUBLE TURN OFF UNIT The unit will be blocked and the buzzer will be permanently activated Switch off immediately the unit NOTE If case...

Page 18: ...the barcode data NOTE FOR SERIAL SCANNER ONLY The serial scanner should be correctly setup In case no data is captured by the device carry out the following barcode reading Software version v 1 23 Software version v 1 24 Laser scanner When reading the connected scanner emits a red laser line of a particular length To capture the barcode data place the scanner so that the laser line coincides longi...

Page 19: ...s are not accepted such as the expiry date has expired the encoded skill does not include the electrofusion jointing or there is an error on the encoding data itself or on the identifier the following message is displayed OPERATOR WRONG DATA The message is showed up during 3 seconds Ï Entering Operator No by barcode 2x5 interleaved OPERATOR Start screen OPERATOR A 1234 724 SG Capture by scanner Sh...

Page 20: ...ring job number using the barcode Code 128 up to 16 characters JOB Start screen JOB XXXXXXXXXXXXXXXX Capture by scanner To delete the reading and move to the start screen press STOP If the barcode or reading were incorrect JOB WRONG DATA Error message Two acoustic signals are emitted and it returns to the start L Entering job number without barcode via the keyboard Click one of the 4 arrows The di...

Page 21: ...XILIARY DATA WRONG DATA Error message Two acoustic signals are emitted and it returns to the start L Entering Auxiliary Data without barcode via the keyboard Click one of the 4 arrows The display will show the following screen AUXILIARY DATA Blinking cur sor Manually enter using the arrow buttons 16 alphanumeric characters Press the and arrows to move the cursor to a different field and the and ª ...

Page 22: ...is shown when the data are entered L Entering Traceability data without barcode via the keyboard Click one of the 4 arrows The display will show the cursor and the 26 digits with zeros The far right hand side of the top line of the display shows the digit involved TRACEABILITY 01 000000000000000000 Blinking cur sor Press the and arrows to move the cursor to a different field and the and ª arrows t...

Page 23: ... 9052 200 SDR11 The Component 1 text disappears Click the START VALIDATE key to pass to the following screen which will correspond to the Component 2 in the case of a coupler elbow reducer or tee fitting COMPONENT 2 Click one of the 4 arrows The display will show the cursor and the 40 digits with zeros The far right hand side of the top line of the display shows the digit involved COMPONENT 2 01 0...

Page 24: ...refraining from electrofusion if the exterior temperature is below 10 C or above 40 C 3 1 11 Entering electrofusion data in the unit Ù When data entry relating to operator job auxiliary data and traceability are not enabled or if they are enabled once validated the following screen will appear Verification of memory capacity When 50 or less fusion records remain only to reach the full memory s cap...

Page 25: ...e it involves a I Agru coupler of diame ter 20 40 Volt and 34 seconds nominal L Entering joint data without barcode via the keyboard Click one of the 4 arrows The display will show the following screen FUSION DATA 23ºC VOLTAGE Volt 40 0 40 0 Volt by default The electrofusion voltage should be be tween 8 and 48 V Enter voltage Press the and arrows to move the cursor to a different field and the and...

Page 26: ... 1 32 This message could be set to include the enter of the bar code of the aligning tool if used Refer to clause 3 2 4 Aligning tool bar code set as NO Aligning tool bar code set as YES CLAMP USED YES CLAMP USED ENTER BARCODE YES by default Change to NO by Enter the aligning tools bar code then clicking any of the 4 arrow keys the following message will appear Click the START VALIDATE key NOTE If...

Page 27: ...rofusion cycle If electrofusion data were entered using a barcode the unit should also check that the fitting resistance corresponds to that of the fitting connected and that it is within the tolerances assigned by the manufacturer This will be done when the unit starts the electrofusion cycle If the resistance is not correct the display will show the following messages where appropriate FAILURE O...

Page 28: ...tting electrofusion process the process will stop and the corresponding message will be shown on the display For further information see CHAPTER 4 TROUBLESHOOTING 3 1 13 Cooling time Û Once the electrofusion cycle is completed satisfactorily leave a minimum cooling time as provided by the fitting s manufacturer before proceeding to disassemble the equipment Repeat the procedure described for a new...

Page 29: ...Use the and ª keys to move to the selected option and validate with the START key And click ª again to see INFO SETUP Use the and ª keys to move to the selected option and validate with the START key And click ª again to see SETUP LAST REVISION Use the and ª keys to move to the selected option and validate with the START key And click ª again to see LAST REVISION SERVICE Use the and ª keys to move...

Page 30: ...K correct ERRn incorrect for the errors list see CHAPTER 4 TROUBLESHOOTING Click STOP to exit this option C EXPORT Validating the EXPORT option the fusion records can be transferred to a computer or to a memory stick depending on the model or user needs The language of the fusion records file will correspond to the one selected in the unit in the time of export EXPORT PRINT Click the START key to ...

Page 31: ... of the received file will appear File name The name you want We recommend using txt or csv extensions OK 5 The file will be transferred The BEAT Tr display will show the progress Click STOP to exit this option Disconnect the transmission cable PENDRIVE USB A OPTION Connect a pendrive format FAT or FAT32 to the USB A socket the connection can be made at any time it is not necessary with the unit o...

Page 32: ...red fusion records data will appear in a row with fields separated by a semicolon Description of the list of fields Fusion No Unit No Unit manufacturer Unit last revision service Type of fitting Fitting manufacturer Fitting diameter Fitting nominal resistance Fitting nominal voltage Nominal fusion time Operator No Job No Auxiliary data Scraped and cleaned Clamp used Ambient temperature Date Start ...

Page 33: ...appear do the following Field Delimited mark it Option Start import at row 1 and in File origin Windows ANSI Click Next and the next step will appear 6 In el Text Import Wizard Step 2 of 3 which will appear do the following Delimiters mark Semicolon the remainder of the options should be unmarked Text qualifier Click Next and the next step will appear 7 In the Text Import Wizard step 3 of 3 which ...

Page 34: ...lectrofusion Check that the two lower options are unmarked and click Finish 10 The message Microsoft Access was unable to annex all the data to the table and you will be asked Do you want to continue with this Click Yes 11 Another message containing information will open Click Accept 12 The table name_file _ImportErrors will have been created which can be deleted This is because the last line of t...

Page 35: ... FUSION TODAY S RECORDS ALL FUSIONS SELECT DATE RANGE Use the and ª keys to move to the selected option and the START key to validate Click the START VALIDATE key to print the fusion data If you select the last option o f SELECT DATE RANGE the display will show the following screen D MM YY dd mm yy DD MM YY corresponds to the earliest fusion record the first by default and dd mm yy to the latest P...

Page 36: ...tion ARE YOU SURE NO NO by default Use the or keys to change to YES Click START to validate Click STOP key to exit this option 3 2 3 INFO option To validate the following INFO menu option FUSION RECORDS INFO Use the and ª keys to move to the selected option and validate with the START key V v vv EN 1100 LAST SERV dd mm yy The display screen shows the following information V v vv is the software ve...

Page 37: ...e following option enables you to update the unit s date and time WARNING This option might have restricted access If enabled the following screen will appear initially OPERATOR Enter the supervisor PIN number Once the supervisor code has been introduced and the START VALIDATE button pressed the following screen that is directly shown that not having the restriction enabled dd mm yy hh mm dd mm yy...

Page 38: ...owed SHOW YES NO YES corresponds to operator s identification enabled whereas NO to disenabled Use the or keys to shift from YES to NO or vice versa Click the START VALIDATE key to accept the selection made Click STOP to exit this option without making a modification The next option allows to establishing the obligation or not in carrying out the identifica tion SHOW COMPULSORY Pressing START VALI...

Page 39: ...e the or keys to shift from YES to NO or vice versa Click the START VALIDATE key to accept the selection made Click STOP to exit this option without making a modification C JOB To modify the existing configuration of the option JOB proceed as follows WARNING This option might have restricted access If enabled the following screen will appear initially OPERATOR Enter the supervisor PIN number Once ...

Page 40: ... NO with the change of date only Use the or keys to shift from YES to NO or vice versa Click the START VALIDATE key to accept the selection made Click STOP to exit this option without making a modification C AUXILIARY DATA To modify the existing configuration of the option AUXILIARY DATA proceed as follows WARNING This option might have restricted access If enabled the following screen will appear...

Page 41: ...r vice versa Click the START VALIDATE key to accept the selection made Click STOP to exit this option without making a modification C SCRAPER BARCODE To modify the existing configuration of the option SCRAPER BARCODE proceed as follows WARNING This option might have restricted access If enabled the following screen will appear initially OPERATOR Enter the supervisor PIN number Once the supervisor ...

Page 42: ...P to exit this option without making a modification Click STOP to exit this option Turn the unit off and turn back on again at the mains to access the work menu 3 2 5 LAST REVISION option Validating the fourth menu option of LAST REVISION SETUP LAST REVISION Use the and ª keys to move to the selected option and validate with the START key dd mm yy dd mm yy dd mm yy ON OFF The display will show the...

Page 43: ...ac and min 45Hz max 65Hz The screen will show POWER SUPPLY ERROR 194 89V 44Hz The values the display shows are refreshed and correspond to the real input of the unit POWER SUPPLY ERROR 266 141V 66Hz The values the display shows are refreshed and correspond to the real input of the unit 2 Verification during electrofusion During the fusion cycle the minimum input voltage may be below 195 90 Vac wit...

Page 44: ...TENCE TOO LOW If this message persists and after checking that fitting and barcode resistance are correct send the unit the After Sales Service to check the calibration of the resistance measure 4 2 3 Interruption by operator ERR7 If the operator presses the STOP key once the electrofusion process has begun the display will show STOP PUSHED xxxxs Where xxxxs corresponds to the remaining cycle time...

Page 45: ...sage could also be motivated by a fault in the unit s CPU in which case the electrofusion unit should be sent to the Service Centre to be checked and repaired 4 2 6 Protection against internal temperature If the electrofusion unit is submitted to intensive prolonged operation especially with large diameter fittings with high fusion times for which the internal temperature may exceed the maximum al...

Page 46: ...t in this User Manual However no action should be taken by unqualified personnel beyond these troubleshooting measures in order not to run the risk of seriously damaging the unit 5 1 2 Storage If the unit is not to be used for a long period of time keep it in its original packing and protected from dust moisture extremes of temperatures direct sunlight and so on The electrofusion control box could...

Page 47: ...gramme version of the BEAT Tr and MINI BEAT Tr units is done in principle by the Technical Support Services of STPAcuster group Nevertheless the client may update the software version by means of the following options WITH A COMPUTER VIA THE SERIAL PORT FOR MODELS WITHOUT USB CONNECTOR ONLY The software of models without USB A connector can be upgraded exclusively via PC Note For models equipped w...

Page 48: ... you want to load which must be in the directory Beat NOTE where xxxx is the version of software between 000 and 999 if there is more than one file BTR_xxxx bin the highest version will be loaded C Must be FAT or FAT32 format and single partition Downloading process 1 Turn off the unit at least 5 seconds after having detected the file press the key and put it back up through the master switch The ...

Page 49: ...eries AR IP43 Class I IK10 20 Joules Duty factor 20 to 100 depending on the fitting Series AR 50 to 100 Electronic temperature monitoring of the unit Working temperature Manual Informative with established limits recommended acc to ISO 12176 2 from 10 to 40 C Barcode 20 C to 50 C could be modified since software version v 1 32 Display LCD 2 lines x 20 characters backlight Acoustic warning Piezoele...

Page 50: ...BEAT Tr 20 Kg including cables and accessories MINI BEAT Tr 15 Kg including cables and accessories Dimensions Height 370 mm Width 300 mm Length 220 mm Package exterior dimensions 380 x 310 x 230 mm Gross approximate weight 24 Kg or 19 kg according to model 6 2 2 Accessories List of accessories included in the unit QTY DESCRIPTION 1 Document holder 1 User Manual 1 Scanner 2 N 4 mm terminal adaptors...

Page 51: ...USER MANUAL Range BEAT Tr Edition January 2016 Revision No 3 TECHNICAL CHARACTERISTICS 51 NOTES ...

Reviews: